Quick guide for going live
When building a study in Viedoc, you are first given access to a training server, (for example, v4training.viedoc.net). This is so that you can use and evaluate Viedoc without the need for a contract or license. Studies that are to be taken into production are then migrated from the training server to the production server. For more information, see Migrating a study design from training to production.
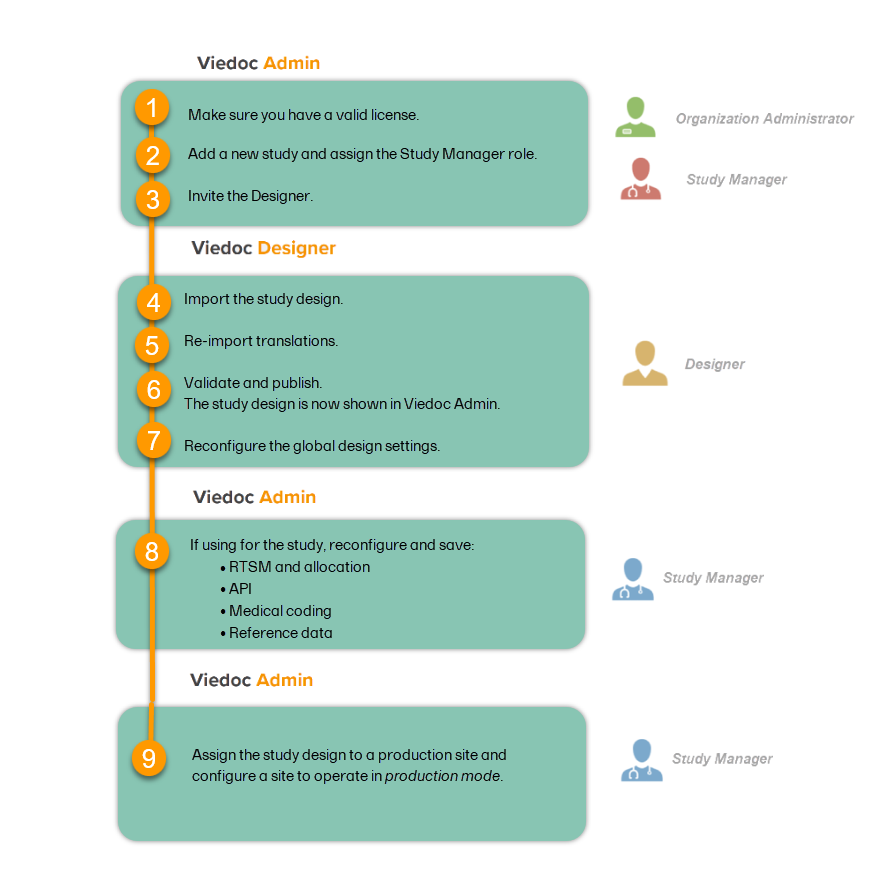
A study can be considered as live when there is a validated study design on a production site. The schematic below shows the steps that are needed, and which roles have permission to perform these steps.


Check your license
This step is performed by the Organization Administrator.
- Make sure you have a valid license: All production studies must have a valid license before they can be taken into production. The license is provided by a Viedoc representative. Every license is connected to a reference ID. The reference ID can be found on the signed study work order. For more information, see the section on licensing in Overview of Viedoc
- Make sure the license includes all of the features required for your study. These are listed in Viedoc Admin after the reference ID is entered.
Add a study to the production server
This step is performed by the Organization Administrator, after the study has been built and tested on the training server and the study design is exported.
| 1 |
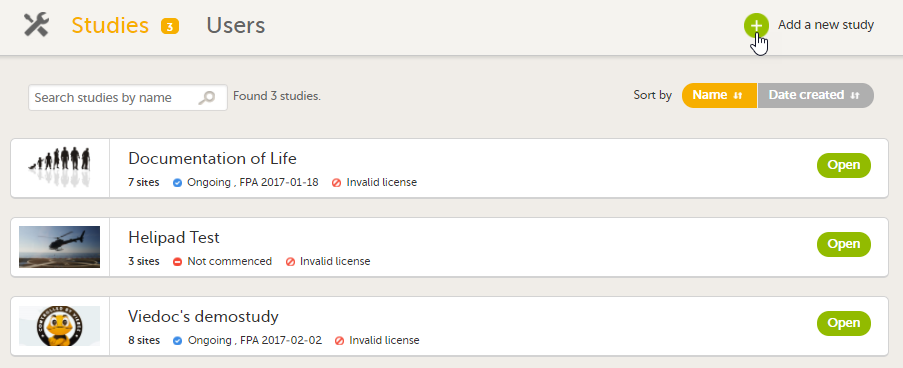
On the production server, add a new study in Viedoc Admin. For more information, see Adding a new study. 
|
| 2 | Assign the Study Manager role to yourself or anyone from the team. For more information, see Managing users (for Org Admin). |
Invite the Designer
This step is performed by the Study Manager.
Invite a user to the Designer role. For more information, see Managing users (for Org Admin).
Import the study design
This step is performed by the Designer.
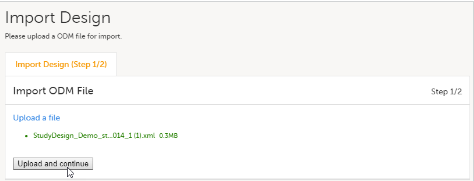
Import the study design ODM file (which was previously exported from the training server).

For further instructions, see Importing a new design version.
Re-import translations
This step is performed by the Designer.
If used for the study, import the Viedoc Me translations. For instructions, see Managing translations for subject-initiated events.
Validate and publish
This step is performed by the Designer.
Validate and publish the design. For more information, see Validating a study design.
Note! The study design becomes available to the Study Manager in Viedoc Admin when it has been published.
Reconfigure global design settings
These steps are performed by the Designer.
| 1 |
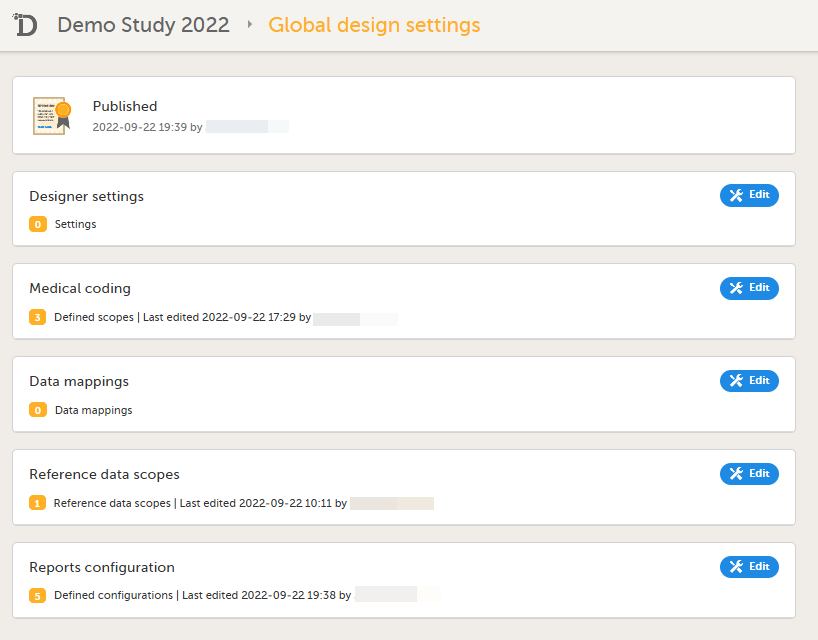
Reconfigure and publish the global design settings (as these are not in the ODM file) in the same way as on the test environment. For more information, see Overview of Viedoc Designer. 
|
| 2 |
If used for the study, reconfigure Viedoc Reports. For more information, see Quick Guide for setting up Viedoc Reports. If the features listed below are used for the study, the Study Designer will need to reconfigure and save these features in Viedoc Designer:
|
Reconfigure Admin settings
These steps are performed by the Study Manager.
If the features listed below are used for the study, the Study Manager will need to manually reconfigure and save these features in Viedoc Admin:
- Randomization and Trial Supply Management (RTSM) and global allocation list
- Application Programming Interface (API) configuration.
Note! To perform the reconfigurations in Viedoc Admin and in Viedoc Designer, the user must be assigned to the relevant user roles. For example, Unblinded Statistician for the RTSM and global allocation list, Reference Source Data Manager for the reference data, Dictionary Manager to manage the medical coding dictionaries, and API Manager for the API configuration.
Assign the study design
This step is performed by the Study Manager.
Assign the study design to at least one or several production sites in the study, and select an effective starting time for that design to be applied to the site.
Once a study is on the production server it is possible to configure the sites to operate in one of the following modes:
- training (demo) mode only: does not require a license, and the data is saved on the demo/training instance only. This is to be used for the test sites only.
- production mode only: used for the production site(s), that is, real sites where real data will be entered, not for testing purposes.
- both training (demo) and production modes (this is not recommended, see Training(Demo) vs Production mode).
Your study is now in production, and you can start work on the site.
| Important! This process cannot be used for revising an existing design version on production, as importing the design will always result in a totally new version. For more information about new versions and revisions see: handling eCRF updates after going live. |
