General study settings
This lesson describes the settings that can be made in Study settings.
Introduction
In Study settings, you can configure the general settings of the study such as details about the study, access to the study, and manage the helpdesk. You can also adjust the date and time formats used throughout the whole study, manage the medical coding dictionaries, import Operational Data Model (ODM) files, and access the Admin audit trail report.
The Study settings dialog
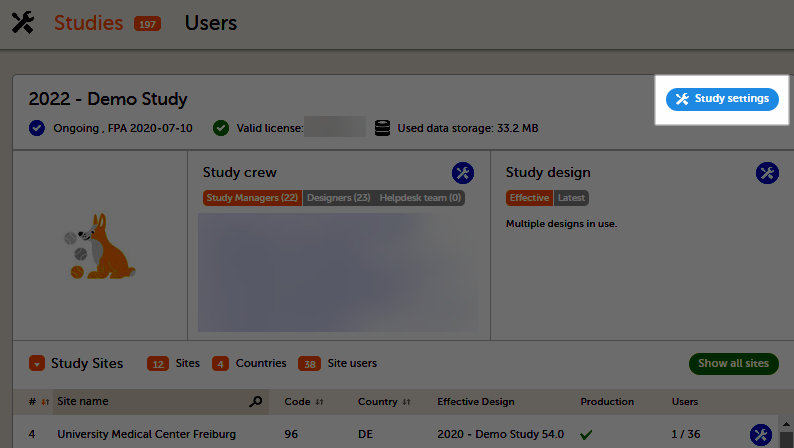
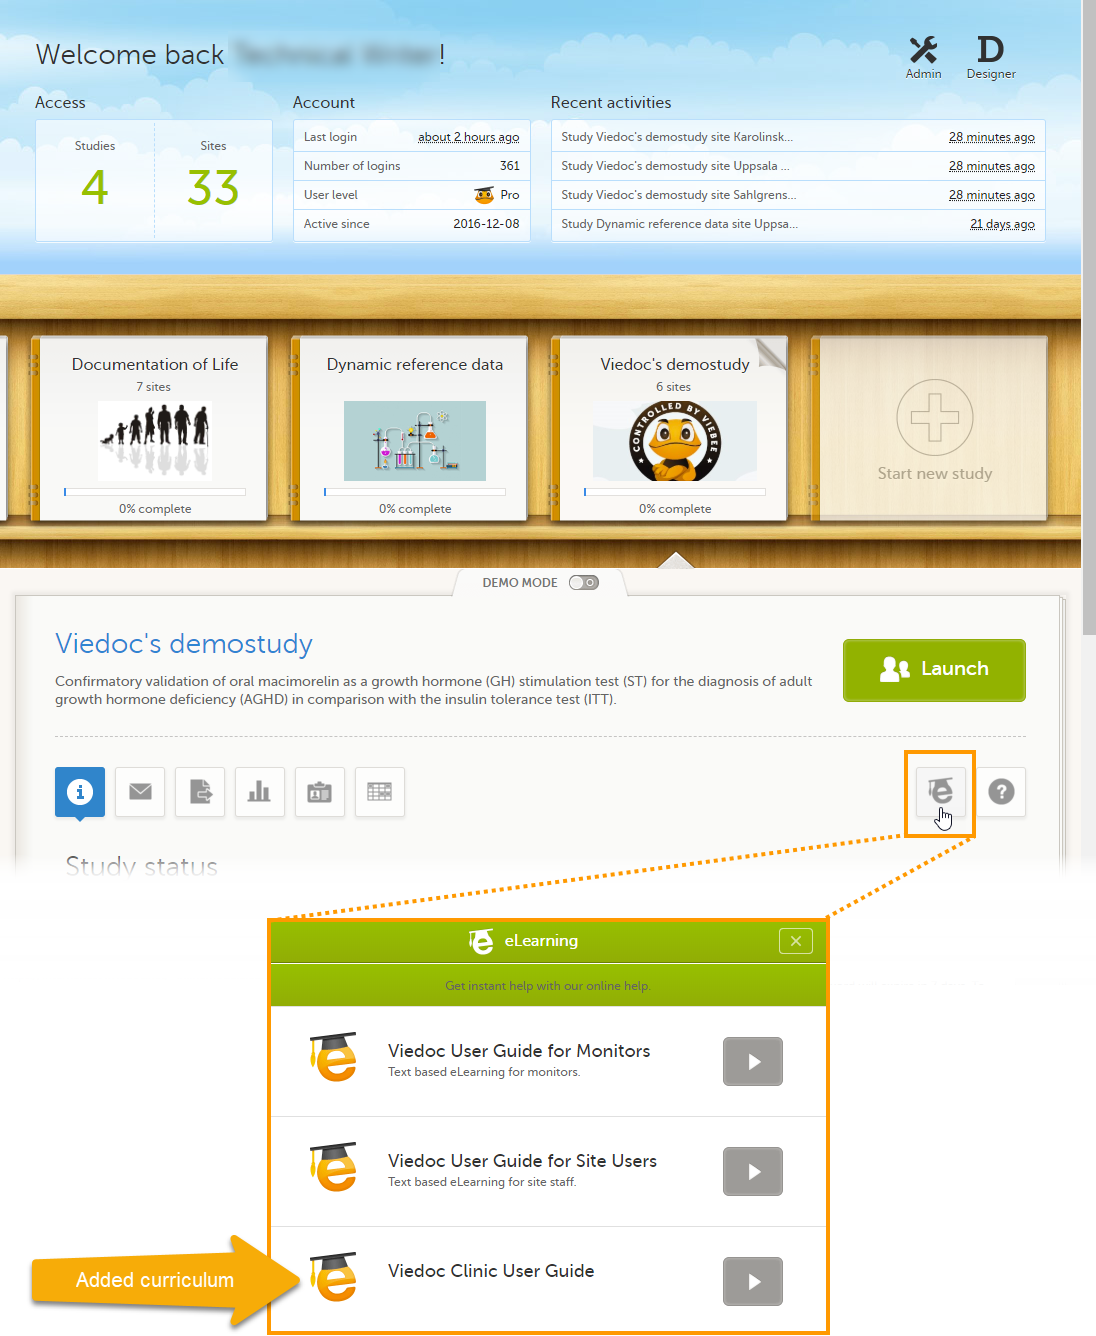
To open the settings, click Study settings on the study details page:
In the Study settings dialog, the following tabs are available:
The Settings tab
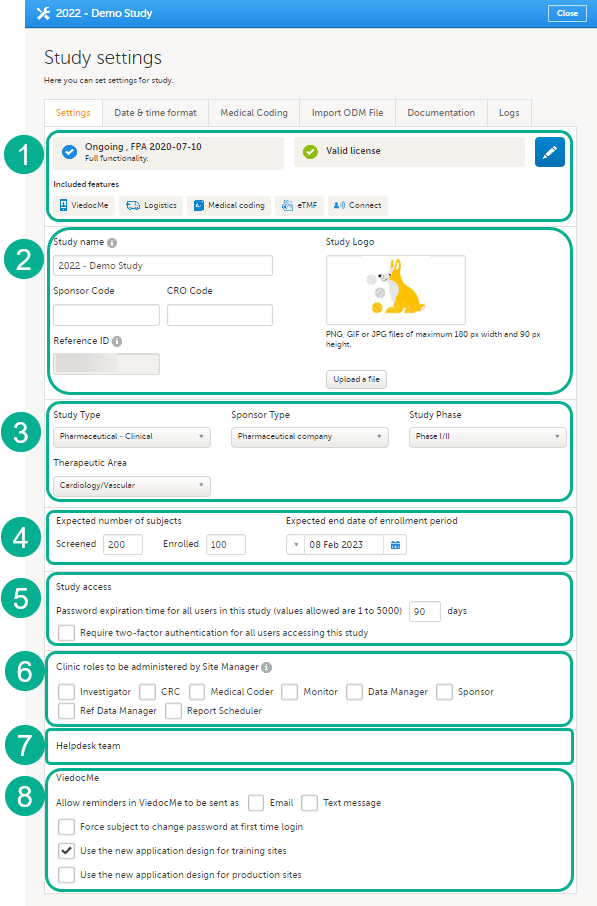
On the Settings tab, you can:
1. Click the pen icon to open the Study status page, see Locking a study for more information. Here you can view the study status, the study license status, and the features included in the license. You can also see the production and demo study Globally Unique Identifier (GUID), which is used for identification of your study when contacting Viedoc support. If you would like to add a feature, please contact your Viedoc representative.
2. Enter details of the study: study name, sponsor code, study logo, and the reference ID (for information about the reference ID, see the section Licensing in Overview of Viedoc).
3. Enter a description of the study.
4. Set the number of expected screened and enrolled subjects, and the expected end date of the enrollment period. These settings are used by the Metrics and Viedoc Reports applications.
5. Select whether a study will require two-factor authentication and when the password expiry should take place. Please see Study access settings for more information.
6. Select the clinic roles that are to be administered by the Site Manager instead of the Study Manager, see Managing users.
7. Manage the helpdesk settings, see Assigning a helpdesk.
8. Select the options for Viedoc Me:
- If reminders should be sent to the subjects, as email and/or text messages. For reminders to be sent, at least one of the options must be selected. For more information on how reminders are configured, see the section Setting Viedoc Me reminders in Study workflow in Viedoc Designer User Guide.
- If subjects themselves should be allowed to change their contact information and reminder settings in Viedoc Me. This option appears only if enabling reminders, by selecting the option(s) Email/Text message.
- If subjects should be forced to change their PIN code when they log in to Viedoc Me for the first time, and after the clinic staff reset their PIN code.
- If the new application design should be used for production and training sites.
| Study-specific considerations for text message reminders in China When studies are run with Viedoc Me in China and text message reminders are used, we need to have the message contents approved by the underlying text message gateway providers, in order to comply with the Cyber Security Law of the Peoples Republic of China, so that the text messages are allowed and come through to the trial subjects. After you have finalized the message contents, you will need to contact your Viedoc representative and provide some details of the study so that we can get the approval. Please plan for one week for your request to process. All system functionality works in the same way and if you're not looking at the URL, you won't notice the difference between the Chinese and European instances. |
When you click Show more options, the following options appear:
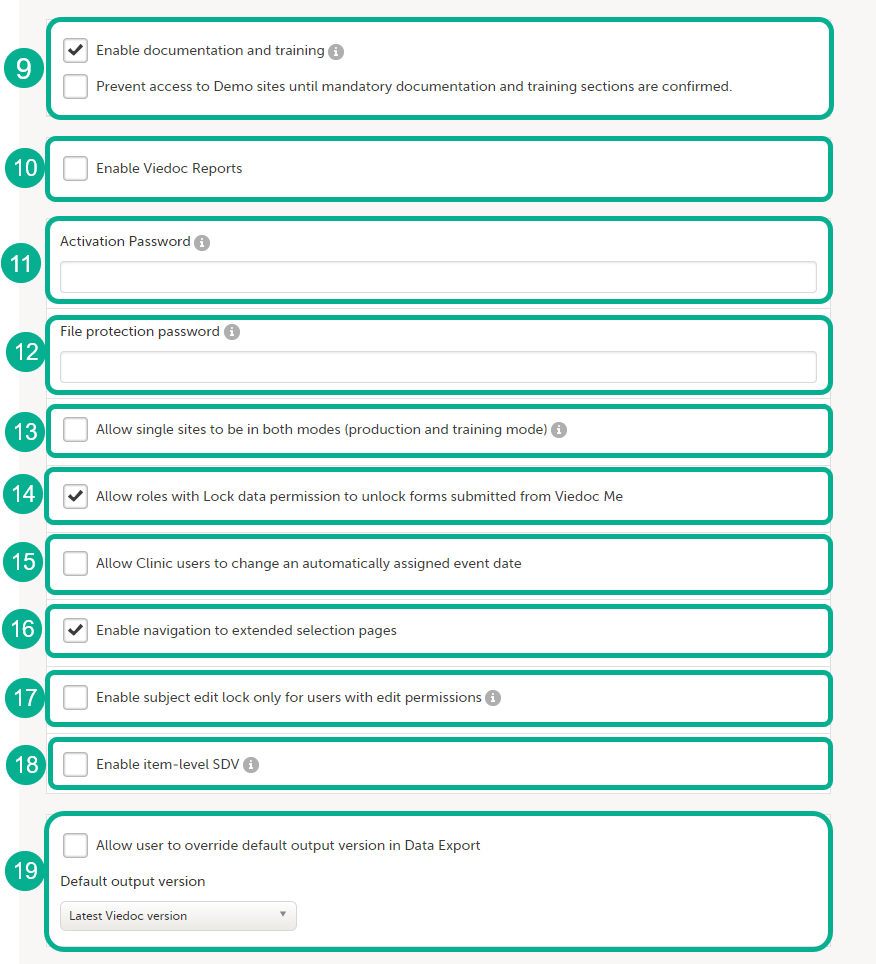
9. Enable documentation and training
- The option Enable documentation and training is selected by default for studies starting after the release of Viedoc 4.51 (May 2019).
 When this option is selected, then:
- All documentation is set up in Viedoc Admin.
- The user can upload study specific documentation, set up eLearning guides and make them available to different user roles, as well as set up mandatory documentation for user certification. This is described in detail in Setting up user documentation and training.
- The eLearning settings are not available in Viedoc Designer. Instead, all the eLearning curriculums and additional documentation is setup in Viedoc Admin.
- The option Prevent access to Demo sites until mandatory documentation and training sections are confirmed becomes available. If selected, clinic users that are assigned mandatory documentation will not be able to launch the study at all, not even in demo mode, until all mandatory documentation is read and signed. If deselected, clinic users can launch the study only in demo mode until the mandatory documentation is read and signed. For more details, see Setting up user documentation and training.
- The option Enable documentation and training is deselected by default for studies that started before the release of Viedoc 4.51.
 When this option is deselected, then:
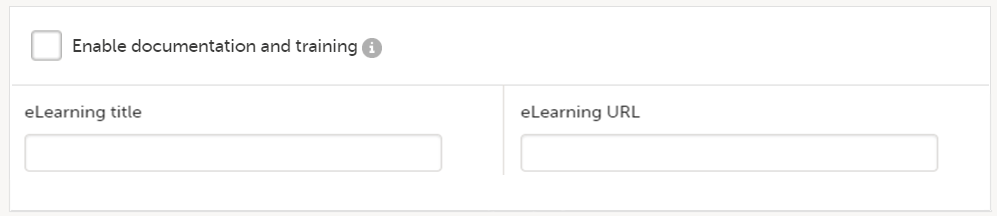
- All documentation is set up in Viedoc Designer. See eLearning settings for more information.
- The fields eLearning title and eLearning URL can be used for adding an additional curriculum to the eLearning curriculums that have been set up for the study in Viedoc Designer, see Adding an additional eLearning curriculum for more information.
10. Enable Viedoc Reports. When this option is selected, users with Reports permission are able to launch Viedoc Reports from the Metrics feature.
11. Activation password. If a password is set, all study users (clinic roles and system roles) are required to enter that password to access the study. This password is required only once, when the user accepts a role invitation and accesses the study for the first time.
12. File protection password. If Attach form PDF is selected for an email copy of alert messages, there is an option to enable password protection for the attached files. If a file protection password is set here, the attached form PDFs sent with the alert emails will be password protected and the user receiving the email needs the password in order to open the file. Only study users with edit rights for study settings, (the Organization Administrator and the Study Manager) can edit and save a password. Study users with view permission (the Site Manager) can view the file protection password. The file protection password option is also available for Japanese PMS studies.
Note! If the option to enable file protection password is not set (the field is not filled in), the attached files will not be password protected.
13. Allow single sites to be in both modes (production and training mode). If this option is selected, a site can operate as either a production environment, a demo (training) environment, or both (that is, you can select between the two). This is used to invite users to a training site before they go live. After the training, the site can be activated (that is, set to production).
14. Allow roles with Lock data permission to unlock forms submitted from Viedoc Me. When this option is selected, users with lock permission can unlock forms submitted by subjects through Viedoc Me, so that the forms are open for data edit by for example the Investigator. This option is automatically selected for all studies starting after the Viedoc release 4.48 in February 2019. For studies that started earlier, this option is by default set to inactive, and can be selected manually.
15. Allow Clinic users to change an automatically assigned event date. If this option is selected, it is possible for the clinic users to change automatically set event dates in the Event date form, if the date is based on the first data entry. The event date is not editable if it is based on a form item. For more information, see Study workflow in Viedoc Designer User Guide.
16. Enable navigation to extended selection pages. When this option is selected, users can navigate between all the selection pages that they have access to in Viedoc Clinic.
17. Enable subject edit lock only for users with edit permission. When this option is selected, multiple users without edit permissions (for example, monitors and data managers) can, in Viedoc Clinic, work on the same subject that is being edited by a user with edit permission (for example, an investigator or a study coordinator).
18. Enable item-level SDV. If this option is selected, users with SDV permission can apply SDV to individual items in a form. This option is deselected by default for studies that started before the release of Viedoc 4.77. The option is selected by default for studies that start after the release of Viedoc 4.77.
19. Allow user to override default option version in Data Export, see Data export compatibility with previous Viedoc versions below for more information.
PMS studies
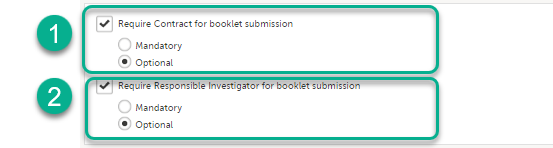
Note! In addition to the options described in the previous section, there are two settings available under Show more options for Japanese PMS Studies.
- Require Contract for booklet submission. This option is cleared by default. When this option is selected, there is the option to link a booklet to one of the available contracts for that site in Viedoc Clinic at the time of submitting the booklet. You can choose to make this option Mandatory or Optional - The default is Optional.
- Require Responsible Investigator for booklet submission. This option is cleared by default. When selected, there is the option to link the booklet to a Responsible Investigator at the time of submitting the booklet. You can choose to make this option Mandatory or Optional - The default is Optional.
Adding an additional eLearning curriculum
On the Settings tab, if Enable documentation and training is deselected, the eLearning curriculums that clinic users have access to from Viedoc Clinic are configured in Viedoc Designer. For details, see eLearning settings and Configuring roles in Viedoc Designer User Guide.
If Enable documentation and training is selected, it is possible to add an additional curriculum from Viedoc Admin that clinic users can access when launching the eLearning from Viedoc Clinic.
To add an additional curriculum:
| 1 |
In Viedoc Admin, click Study settings. |
| 2 | On the Settings tab, scroll down to the bottom of the dialog and click Show more options. |
| 3 | Enter the name of the curriculum you would like to add in the eLearning title field. Enter the URL to that curriculum in the eLearning URL field. |
| 4 | Click Save changes. The dialog closes. |
If a clinic user launches the eLearning from the landing page in Viedoc Clinic, a dialog appears in which the clinic user can select which eLearning curriculum he/she would like to view. The newly added curriculum is included in the dialog.
Study access settings
On the Settings tab, in the Study access field, you can configure the password expiration time and activate two-factor authentication for all users in the study.
Password expiration time
If a user has access to more than one study, the password settings for all studies are checked upon login. If the password expiration settings for any of these studies dictate that the password is expired, the user is redirected to the Change password dialog and is forced to change his/her password. An internal message displayed on the Messages page in Viedoc Clinic will notify the user about the password expiration time ten days in advance.
The password expiration time can be set to any value between 1 day and 5000 days.
Two-factor authentication
The use of two-factor authentication provides an extra security measure at login. After entering the user name and password, the user is required to enter an authentication code that he/she received via text message or email to be able to login.
Data export compatibility with previous Viedoc versions
When exporting data, Viedoc offers the possibility to create a data export file that is compatible with files exported from previous versions of Viedoc. The default Viedoc version that is used when exporting data can be set in Viedoc Admin.
Setting the Viedoc version to be used for data export
To set the Viedoc version to be used for data export:
| 1 | In Viedoc Admin, select Study settings to open the study settings dialog. |
| 2 |
On the Settings tab, select Show more options. 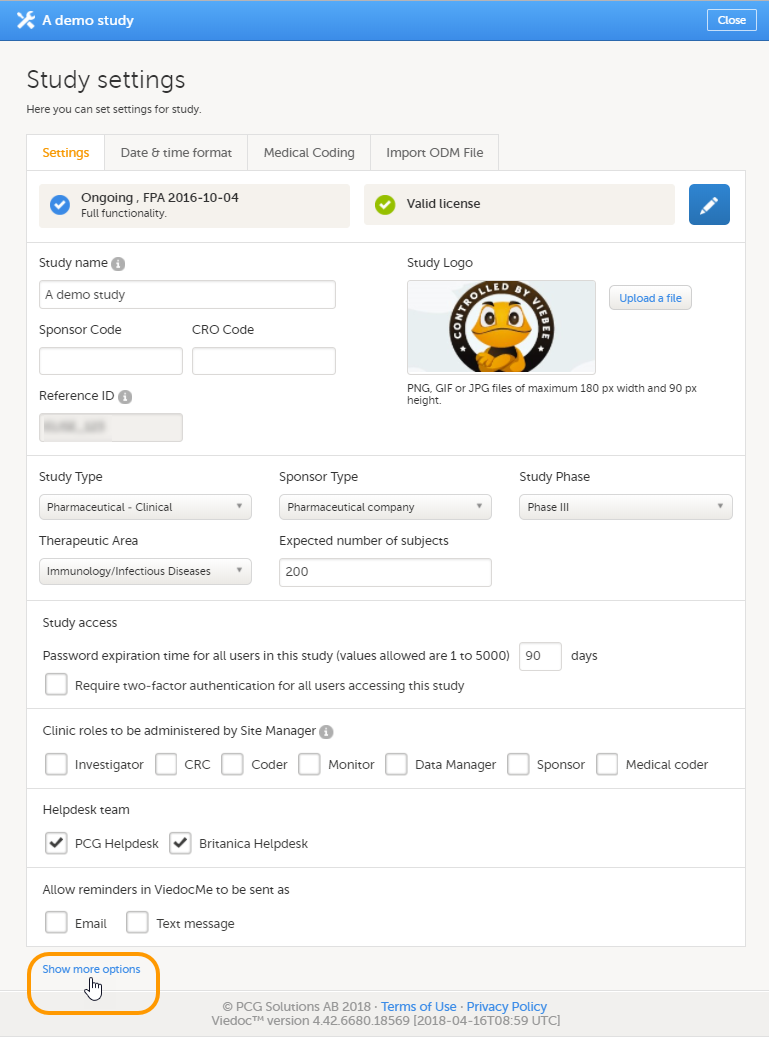
|
| 3 |
Select the default export output version from the Default output version dropdown list. 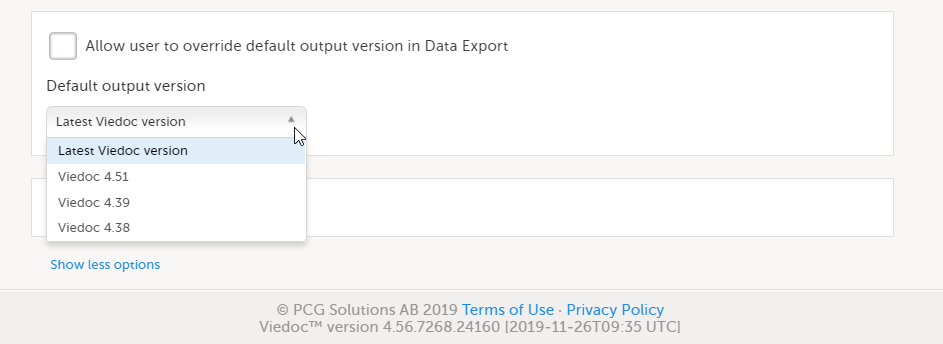
|
| 4 | If you would like to allow clinic users to be able to override the default output version and select the output version themselves, select Allow user to override default output version in Data Export. When this option is selected, clinic users can select the export output version themselves. If this option is left deselected, clinic users can only export data in the output version selected here. |
| 5 | Click Close to save the changes. |
Available Viedoc versions
The Viedoc versions available in the Output version dropdown menu are only those versions in which changes to the data structure were introduced.
[[single-source url="2031"]]
The Date & time format tab
On the Date & time format tab, you can edit the format of date and time used in all fields displaying a date or a time in Viedoc.
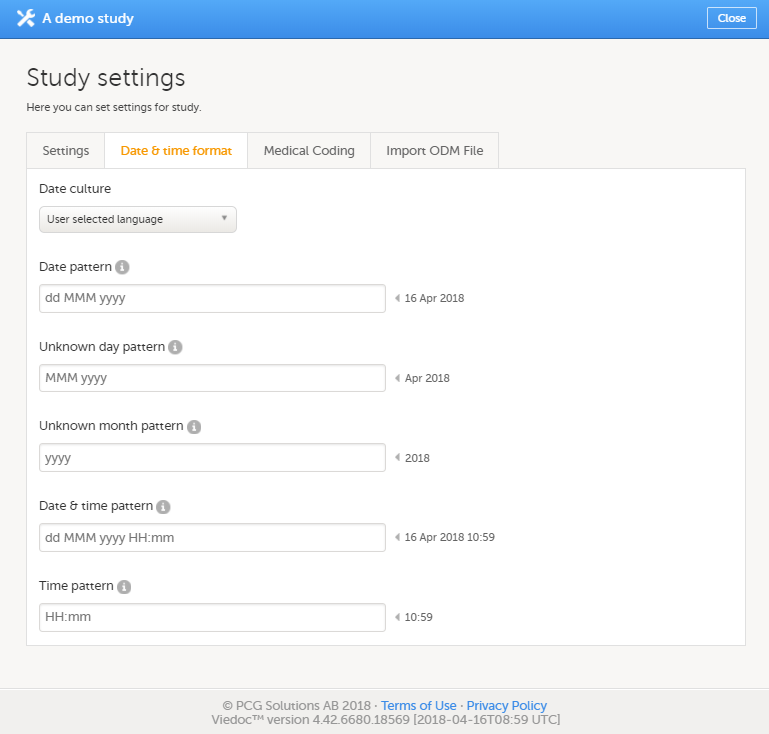
You can edit the date and time format in two different ways:
- By selecting a language from the Date culture dropdown list on the Date and time format tab. Dates and times will then be displayed in the format that is used in the selected language.
- By directly entering a pattern in one or more fields on the Date and time format tab.
You can choose one of the following formats:
| Date/time format | Description | Example |
|---|---|---|
| dd | Two-digit day of the month | 01 |
| d | One-digit day of the month | 1 |
| MMMM | Name of the month fully spelled | February |
| MMM | Abbreviated name of the month (three letters) | Feb |
| MM | Two-digit number of the month | 02 |
| yyyy | Four-digit year | 2010 |
| yy | Two-digit year | 10 |
| HH | Two-digit 24-hour time | 08:15 |
| H | One-digit 24-hour time | 8:15 |
| hh | Two-digit 12-hour time (use in conjunction with tt) | 08:15 am |
| h | One-digit 12-hour time (use in conjunction with tt) | 8:15 am |
| mm | Two-digit minutes | 15 |
| ss | Two-digit seconds | 30 |
| tt | am or pm | am |
You can configure the following date and time fields:
| Date field | Description |
|---|---|
| Date pattern* | Format for dates, in cases where day, month and year to be entered are known |
| Unknown day pattern | Format for dates, in cases where only the month and year to be entered are known |
| Unknown month pattern | Format for dates, in cases where only the year to be entered is known |
| Date & time pattern* | Format for dates, in cases where both date and time are to be entered |
| Time pattern* | Format for times |
*For studies that use the Viedoc eTMF application, the patterns set in Viedoc Admin will be inherited by the eTMF application.
After you have edited the date and time format, click Save changes to save the settings and close the dialog.
The Medical Coding tab
On the Medical Coding tab, you can attach medical coding dictionary instances to medical coding scopes. For more information about managing the medical coding dictionaries, see Managing medical coding dictionaries.
The Import ODM file tab
On the Import ODM file tab, you can upload and import ODM files. For more information on how to upload an ODM file, see Importing data from ODM file.
The Documentation tab
On the Documentation tab, you can manage the documentation and training sections. For detailed information about the documentation and training, see Setting up user documentation and training.
Note! This tab is visible only if the option Enable documentation and training is selected in Study settings.
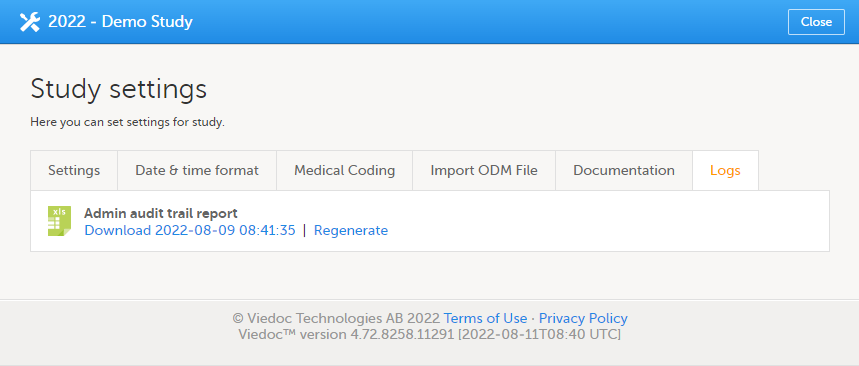
The Logs tab
On the Logs tab, you can generate and download an Admin audit trail report in Excel format.
The Admin audit trail report contains information about all settings and changes of study settings that have been made by authorized users in Viedoc Admin.
If the report has already been generated, you can download the latest generated report or regenerate it.
For more information about the report, see Admin audit trail report.