Entering/Editing data
Overview
Note! When making edits to this lesson, make sure to check if the corresponding edits are needed also in PMS>Clinic Side>Entering and editing data in a PMS study.
Details page
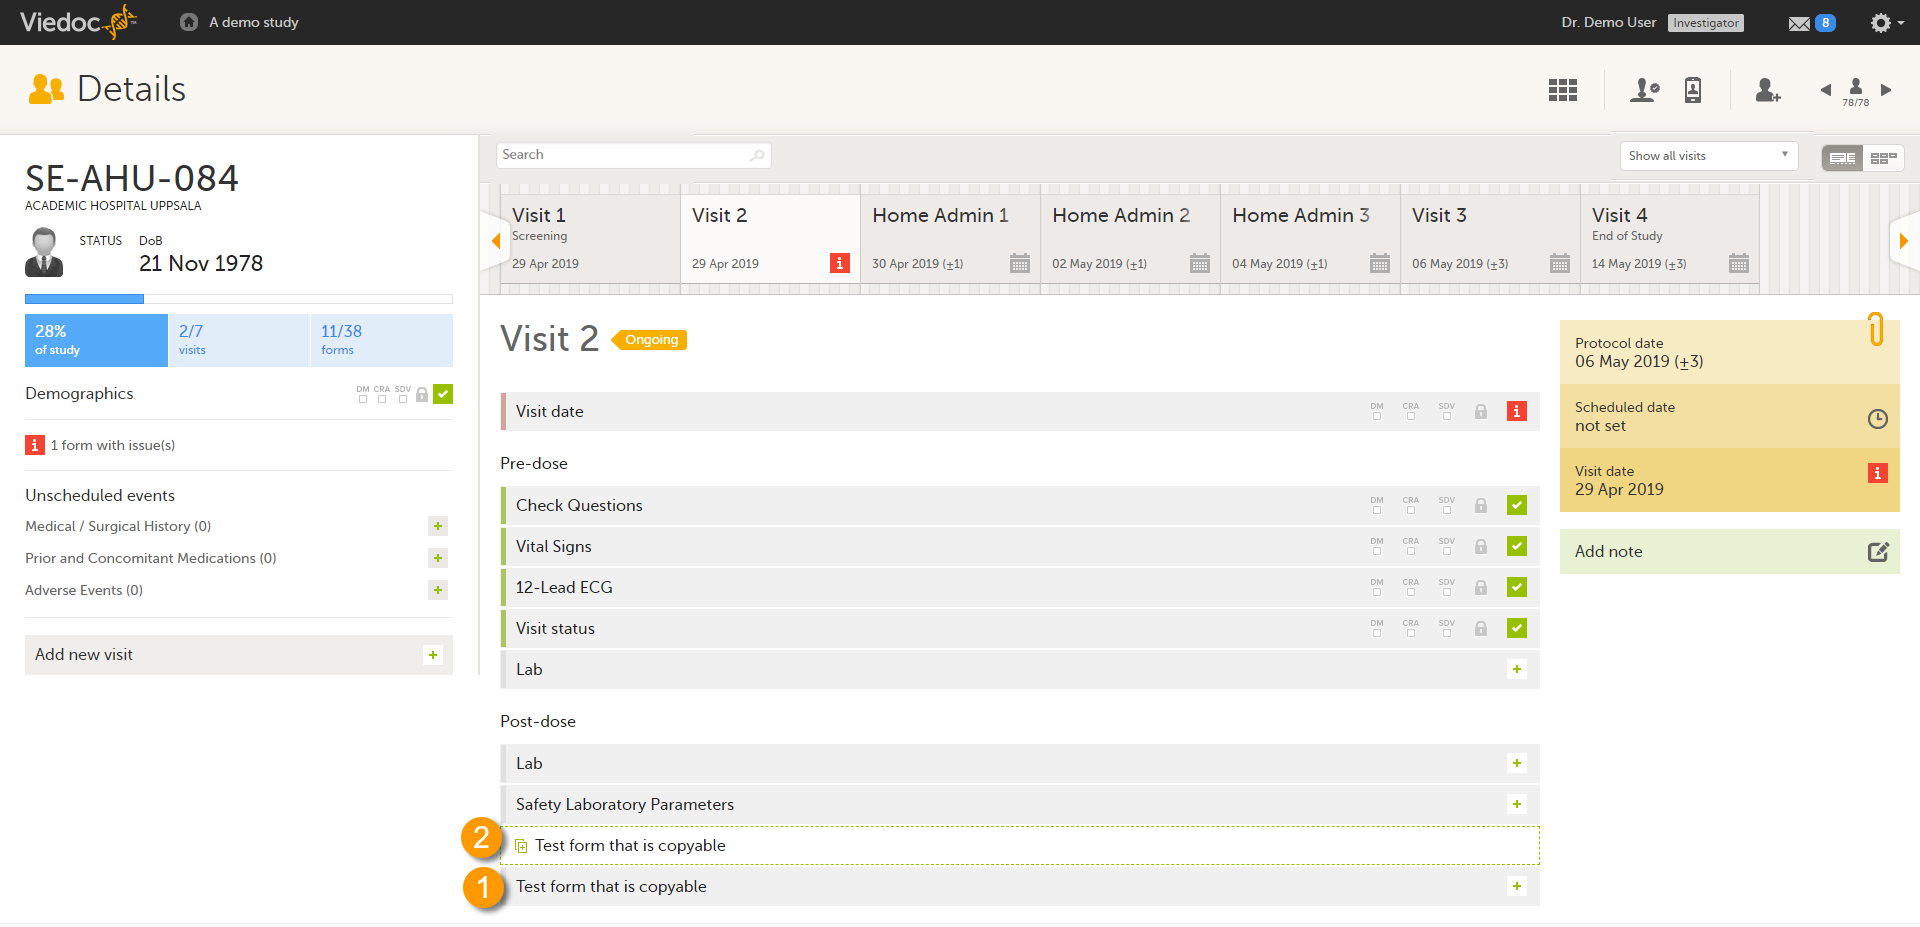
When you select a subject card in the Selection page, or add a new subject, the Details page opens.
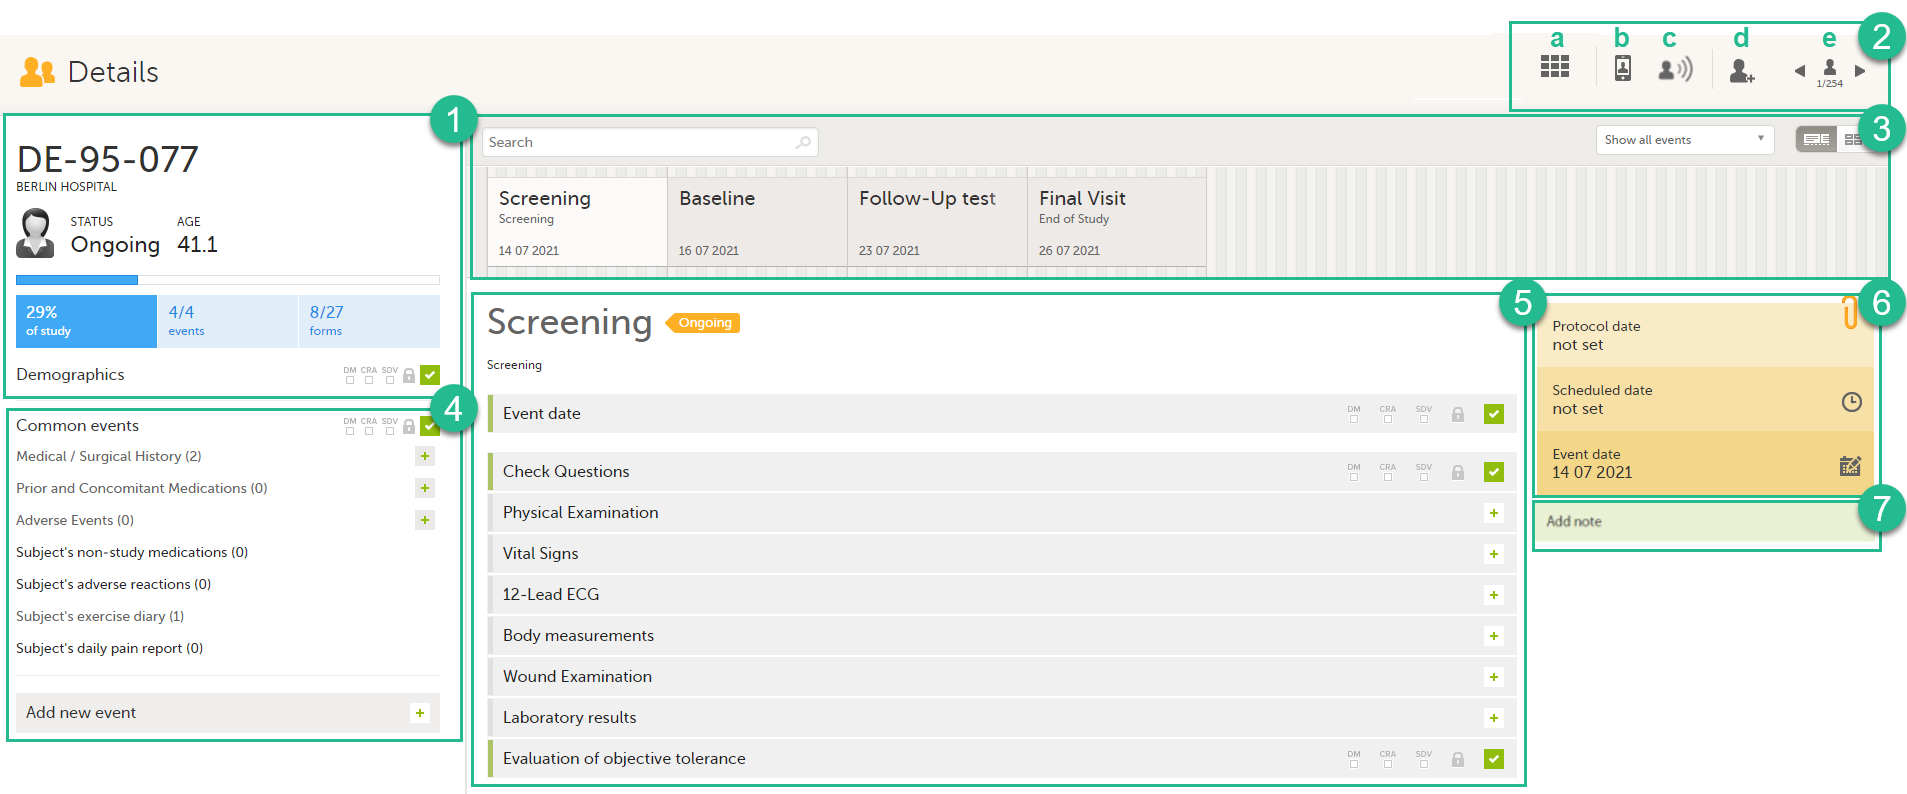
Here you will find the following information:
1. Subject details - including subject ID, site name and a status summary.
Note! The subject details view reflects the subject status and the review flags considering the role visibility, while the Selection page does not take into account the role visibility. Therefore, the subject status on the Selection page reflects the general status of the subject in the study, regardless of the user who has tasks to be performed. This could result, for example, in a subject status in the subject details view where a subject could have a green check mark or being locked, while in the Selection page it is not (due to some other user role having unfinished work/forms to complete on the respective subject).
The following flags show the status of each form:
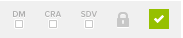
| Flag | Description |
|---|---|
| DM | Shows if the data was reviewed by the Data Manager (DM) or other role with review permission. Green check-mark if performed, otherwise grey. |
| CRA | Clinical review indicator, reviewed by Clinical Research Associate (CRA) or other role with review permission. Green check-mark if performed, otherwise grey. |
| SDV | Source Data Verification (SDV) indicator. Green check-mark if performed, otherwise grey. |
| Lock | Black if the form was locked by the Monitor, otherwise grey. |
| Status | Shows the status of the data entered:
|
Note! The flags are not displayed for the empty forms.
2. Toolbar with the following functions:
a. Return to the Selection page
b. Set up Viedoc Me
c. Initiate a Viedoc Connect call
d. Add a new subject
e. Toggle between subjects
Depending on the role and permissions you have, the following might also be available:
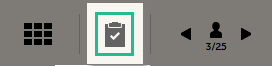
- Signing console (for details, see Signing data):

- Data review console, for user roles with data review permissions (for details, see Clinical review, SDV and Lock and Data review and Lock):
See also the video tutorial Enter data.
3. Event slider - a list of all the scheduled and unscheduled events for the subject.
From the top-left corner you can search for events. All events containing characters of the search string are filtered and shown in the slider.
From the top-right corner you can toggle the view and change the way the events are displayed: only by name or with detailed cards. Tip! Toggle to the "only by name" view to fit all events, if there are many matches in your search result.
From the dropdown list to the right you can select to:
- Show all events
- Show all initiated events
- Show all unplanned events
- Show / hide subject-initiated events
- Show / hide deleted events
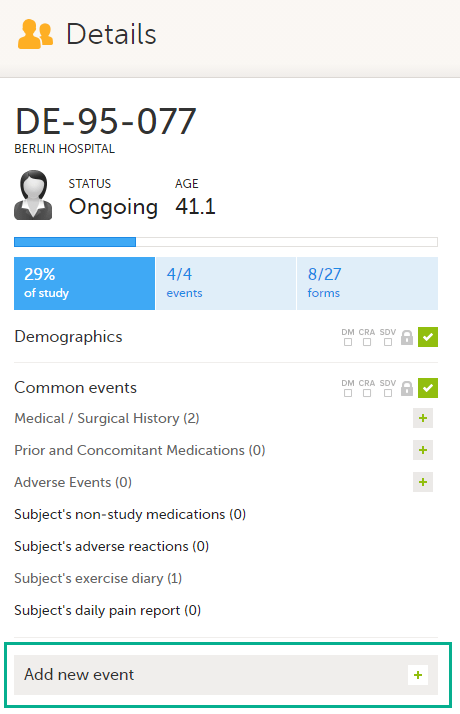
4. Common events - here you can add events that cannot be scheduled in advance, such as adverse events, by selecting on the respective event name.
You can also add unscheduled events by selecting the Add new event link. The unplanned events will show up in the event slider inserted among the existing events according to the event date.
5. The list of the forms to be filled in for the event selected in the event slider (2). Select the form bar to open it and enter the data. Depending on the study setup, it may be necessary to initiate the event through the Event date form, to be able to enter data. For more information, see Initiating an event.
6. The protocol date, the scheduled date (if set), and the event date (if set).
7. Private notes. For details, see Adding private notes.
An example of a form
When you select on a form on the Details page, the form opens. The below image shows an example of a form:
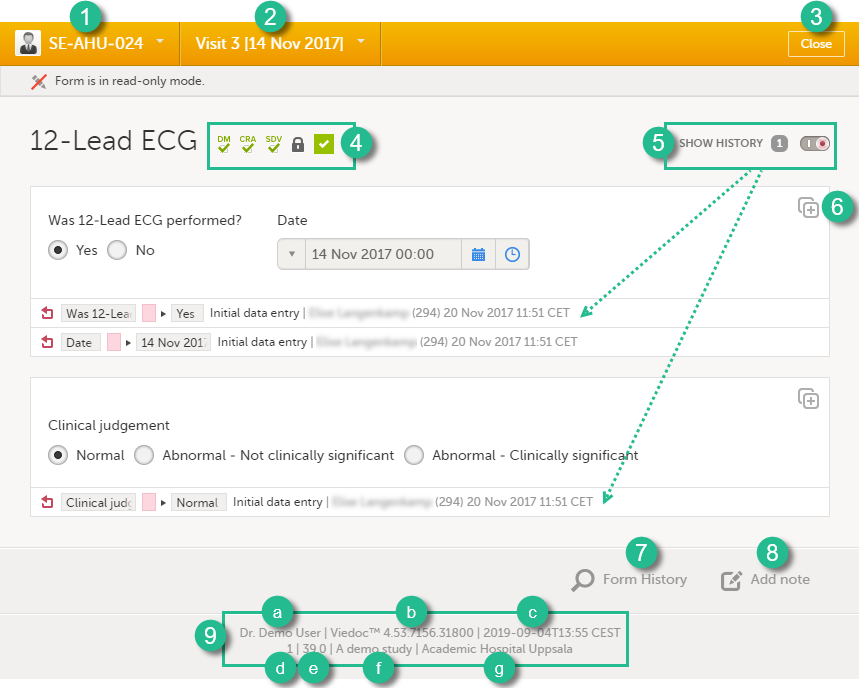
1. Subject ID. You can use this dropdown list to navigate to other subjects within the same form, see Navigating between subjects/events within the same form.
2. Event name. You can use this dropdown list to navigate to other events within the same form, see Navigating between subjects/events within the same form.
3. Close. Select to close the form and return to the Details page.
4. Flags showing the status of the form, see the description of these flags above.
5. Show history. Activate the switch to display the history of each form item.
6. Action button. Select to select a field (item) and select the type of action you wish to perform, for example to confirm data as missing or to add a private note. For more information, see Confirm data as missing and Adding private notes.
7. Form history, see Form history PDF.
8. Add note. Select to add a private note to the form, see Adding private notes.
9. Footer of the form, containing the following information:
a. User name
b. Viedoc version number
c. Date and time of last form edit
d. The protocol version that the study is based on
e. Study design version number of the version that is active on the moment the event is initiated
f. Name of the study
g. Name of the site
Initiating an event
There are two types of events that can be initiated for a subject:
- Scheduled events - events that were scheduled in advance. These can be events initiated in Viedoc Clinic or subject-initiated events. The subject-initiated events can be initiated only by the subject via Viedoc Me - the filled-in data is visible in Viedoc Clinic afterwards.
- Unscheduled events - events that cannot be scheduled in advance.
To start entering data on an event, the event must first be initiated.
The exception is when the event date is configured in the study design to be automatically set and based on the data entered within the event.
Note! When the event date is automatically set, the following apply to the Event date form based on the settings in the study design:
- The Event date form is visible and can be edited if this option is enabled for your study. Queries can be raised on the Event date form.
- The Event date form is not visible. This means that the Event date form is not shown on the Details page, in the Review console, in the Signing console, or in the Issues list, and that it is not possible to raise queries on the event date. The Event date form is neither included in metrics but still available in the data export.
Scheduled event
When initiatiating an event, you can either plan the event for a future date or you can initiate the event immediately.
You might need to plan the event based on the study workflow. For example, some studies may need a series of Viedoc Me assessments before a visit. The Viedoc Me events will not be made visible until you have planned the next visit.
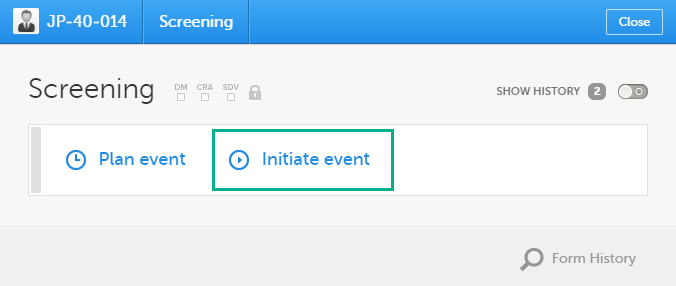
To initiate a scheduled event:
| 1 |
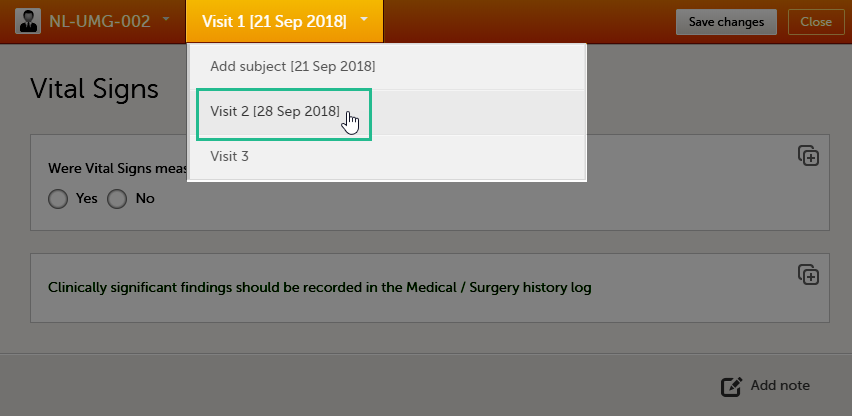
Open the Event date form, in one of the following ways: a - Next to the event name, select Set an event date. 

|
| 2 |
In the event date pop-up, select Initiate event and select the date: Note! For the events that are already scheduled, the protocol date is also displayed. Entering an event date that is outside the protocol date will raise a warning message. |
| 3 | Select Save changes. The event date pop-up closes and the event is initiated. The event status changes to Ongoing. |
Unscheduled events
To add and initiate an unscheduled event manually:
| 1 |
On the Details page, select Add new event in the left-side pane. The Add new event pop-up opens. |
| 2 | Choose the Event name from the dropdown list. The events available are the ones that were configured by the study designer as unscheduled events. |
| 3 | Select Initiate event and select the date: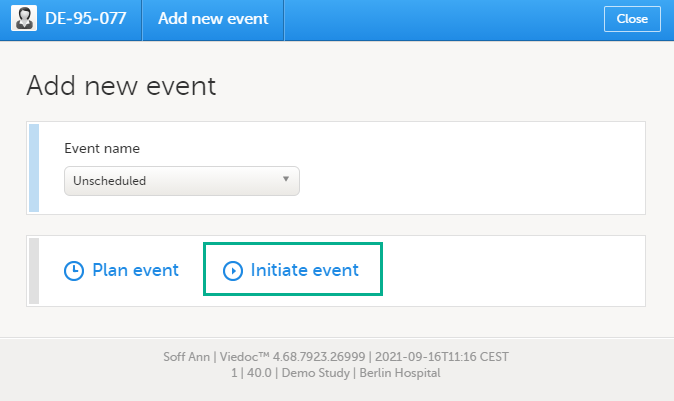 |
| 4 | Select Add event. The event date pop-up closes and the event is added and initiated. The unplanned events will show up in the event slider inserted among the existing events according to the event date. The event status changes to Ongoing. |
Entering data
Working in multiple browser tabs
Important! Working in multiple browser tabs when entering data may cause data conflicts and other serious problems. Therefore it is important to only work in one browser tab when entering or editing data.
Entering data in a form
When the event date is set, automatically or manually, it is possible to start filling in the forms.
To enter data in a form:
| 1 |
Open a form by selecting the form bar: 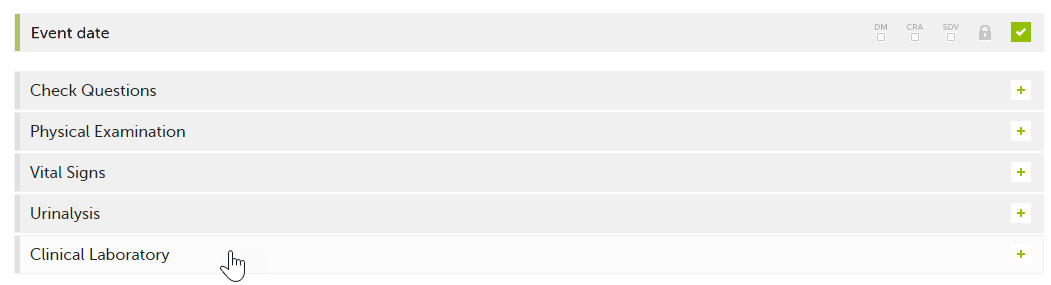
|
| 2 |
Fill in the fields - most fields are self-explanatory when it comes to how they should be filled in: 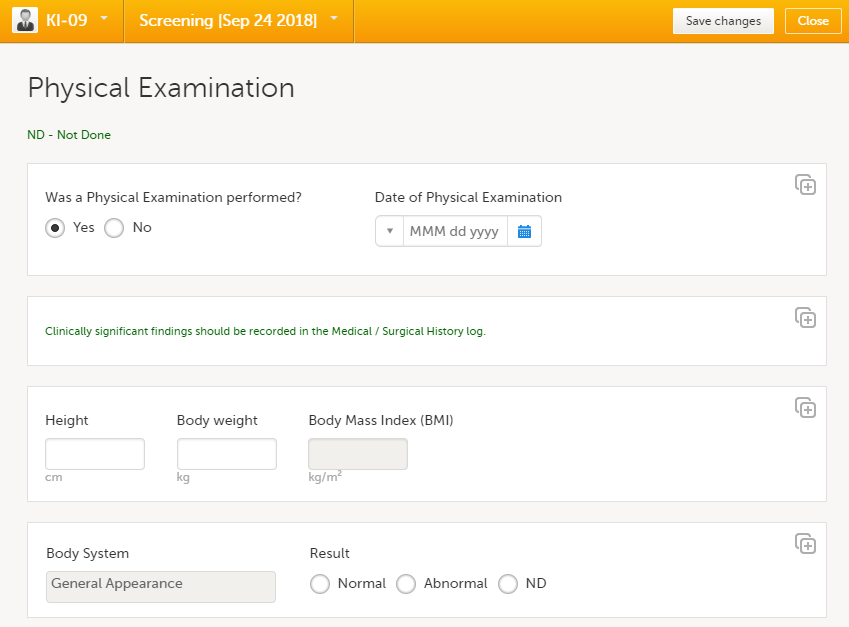
|
| 3 | Select Save changes. |
When all the forms in one event are filled in, the event is considered completed and a green check mark appears on the event tab in the event slider.
Below, we explain how to fill in some of the most common fields in a form:
Dates
You can fill in the date field in two ways:
- Select the dropdown menu and select one of the following options:
- Current date
- Yesterday
- Day not known
- Month not known
- Clear (remove date)

- Select the calendar icon to open the date picker and select a date. Select the arrows to change month.

Tip! You can select the month/year header to view all months of the year, and then select the year header to view a range of years.
Times
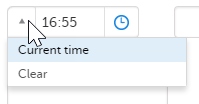
You can fill in the time field in two ways:
- Select the dropdown menu to select the current time:
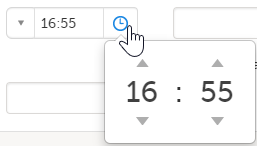
- Select the clock icon to open the time picker. Select the arrows to select the hour and minute (with a five minutes time interval), or double-click the hour and minute fields to manually enter any hour and minute:
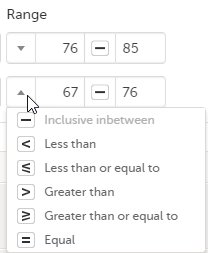
Range
You can define a range of values by selecting a comparator symbol, and then enter the numeric value(s). You can choose between the following comparators:
|
- Inclusive in between |
 |
File upload
To upload a file to a form:
| 1 | Select the arrow next to the File upload item or select the thumbnail if this is available.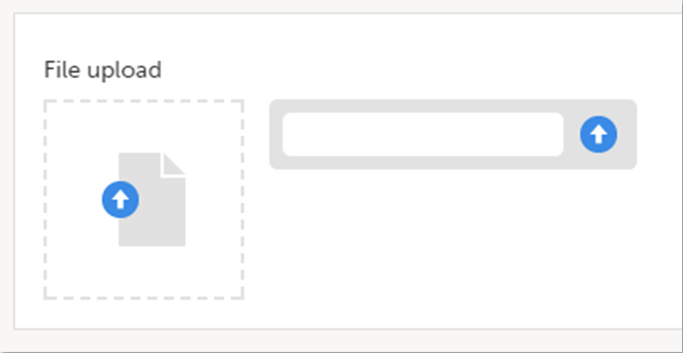 |
| 2 | Search for the file you want to upload and select Open. During the upload process:
|
| 3 |
The uploaded file(s) will be stored once the respective form is saved by selecting Save changes. Files are not uploaded to Viedoc until completing the final step (the de-identification runs in the browser). |
You can download an existing file by selecting the file name or by selecting the thumbnail (if it exists). If a drawing pad item was submitted from Viedoc Me it will be available as a downloadable file.
You can remove an uploaded file by selecting the trash can icon on the right side of the file name.
Note!
- The file upload icon will display a thumbnail of the image if a jpeg, gif or png file is uploaded. If other file types are uploaded, the icon will only show the file extension.
- The maximum allowed file size is 2 GB.
- The upload of password-protected zip files is not supported, as Viedoc cannot scan these files for viruses.
- For security reasons, it is not possible to upload executable files. See the complete list of unsupported file types in the end of this lesson, in Blacklisted file formats.
DICOM file upload and de-identification
DICOM (Digital Imaging and Communications in Medicine) files contain both imaging data and embedded metadata. Certain metadata fields may contain Protected Health Information (PHI), either directly (for example, patient identifiers) or indirectly (for example, dates or site-related information).
If your study design includes a DICOM file upload item in a form, you can upload DICOM files for de-identification during upload to the Viedoc system. You can upload ZIP archives with DICOM files, and automatically remove Protected Health Information as defined by the Health Insurance Portability and Accountability Act HIPAA and DICOM PS3.15 tags according to the DICOM Standards Committee.
The Viedoc de-identification actions are based on the PS3.15 - Table E.1-1a. De-identification Action Codes
Notes!
- The DICOM upload item is only available in Viedoc Clinic.
- Viedoc Me does not support the DICOM upload item. Only ZIP files containing exclusively DICOM files are accepted. The maximum allowed file size is 2 GB.
Before uploading your files, please consider the following information:
- Protected Health Information can exist in less visible parts of the file. For example, DICOM files can contain nested data structures called sequences. While a sequence itself is not sensitive, the data inside it can include identifying information. Sequence structures are displayed in the Review tab to give you full visibility for managing and reviewing nested data.
Please make sure you review:- Sequences
- Private/vendor tags
- Free-text fields
- Folder structure
- To ensure that no unprocessed data is uploaded, the entire de-identification process is performed client-side, meaning that the hardware specifications of the computer used can have a noticeable impact on the processing performance.
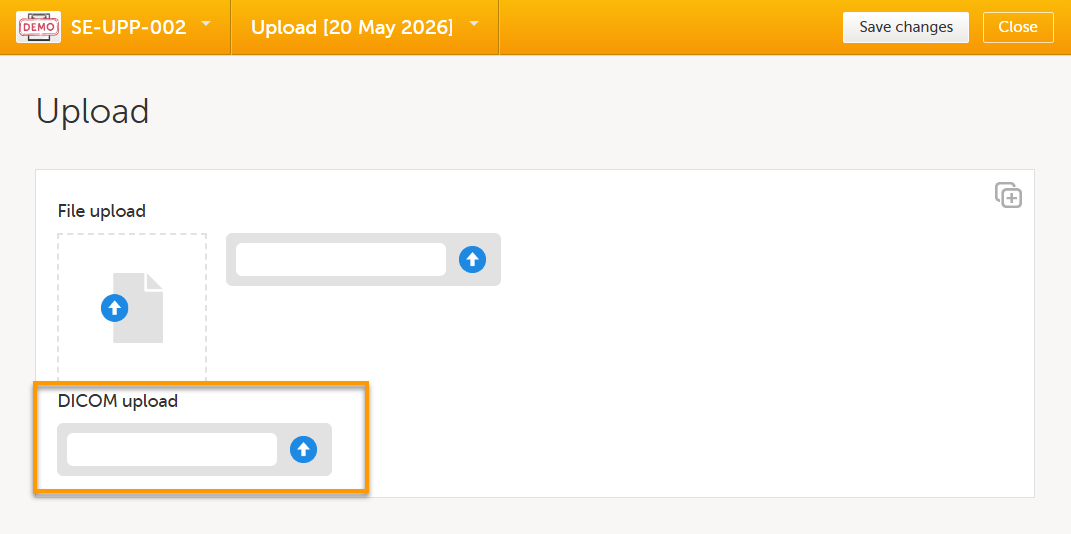
To upload a DICOM file to a form:
| 1. |
Open the form and select the upload button next to the DICOM upload item: Navigate to the file you want to upload. |
| 2 |
The DICOM de-identifier opens on the Configure tab and displays a summary of the archive contents. |
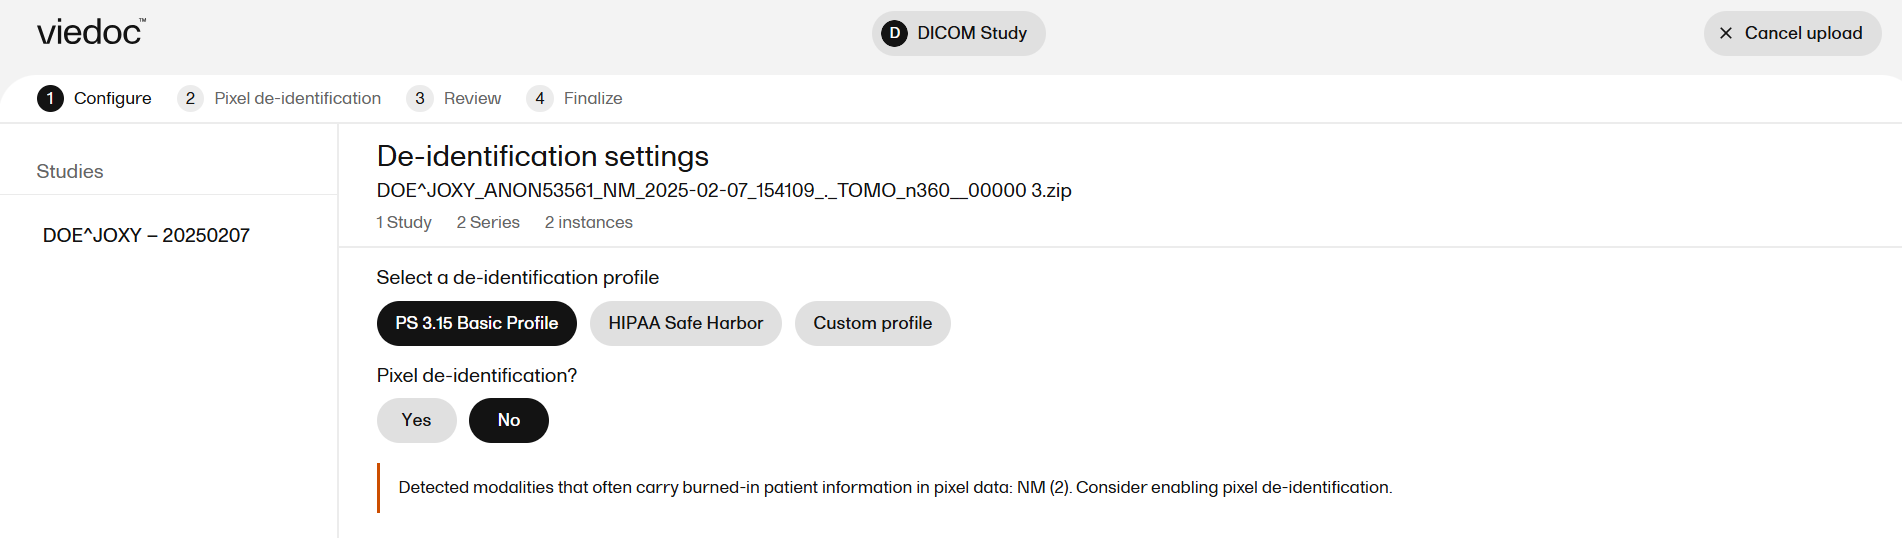
| 3 |
In the De-identification settings, select a de-identification profile. You can choose either the HIPAA Safe Harbor profile, (removes tags according to the HIPAA Safe Harbor de-identification standard) and the DICOM PS3.15 profile (removes tags according to the DICOM PS3.15 confidentiality attribute profiles).
|
| 4 | Select whether to apply pixel de-identification. If you select Yes, this is applied in the next step. Select Continue. |
| 5 |
The Pixel de-identification tab opens. Each series in the archive is shown in the left panel. Select a series to preview it in the image viewer. Use the series panel on the left to switch between series and apply pixel redactions to each series independently. Use the slider at the bottom right to navigate between frames. To remove all selected drawn areas, select Clear selections. Repeat for each image or frame where redaction is needed. Select Continue. |
| 6 |
The Review tab opens. This step displays all the DICOM tags in the archive as well as the Name, VR (Value Representation, the data type and formatting rules for the tag value, for example DA (date), PN (person name), the Value and the Action.
Select Show affected only to filter the list, or use the Search tags field to locate a specific tag by name, and/or all other fields in the table. 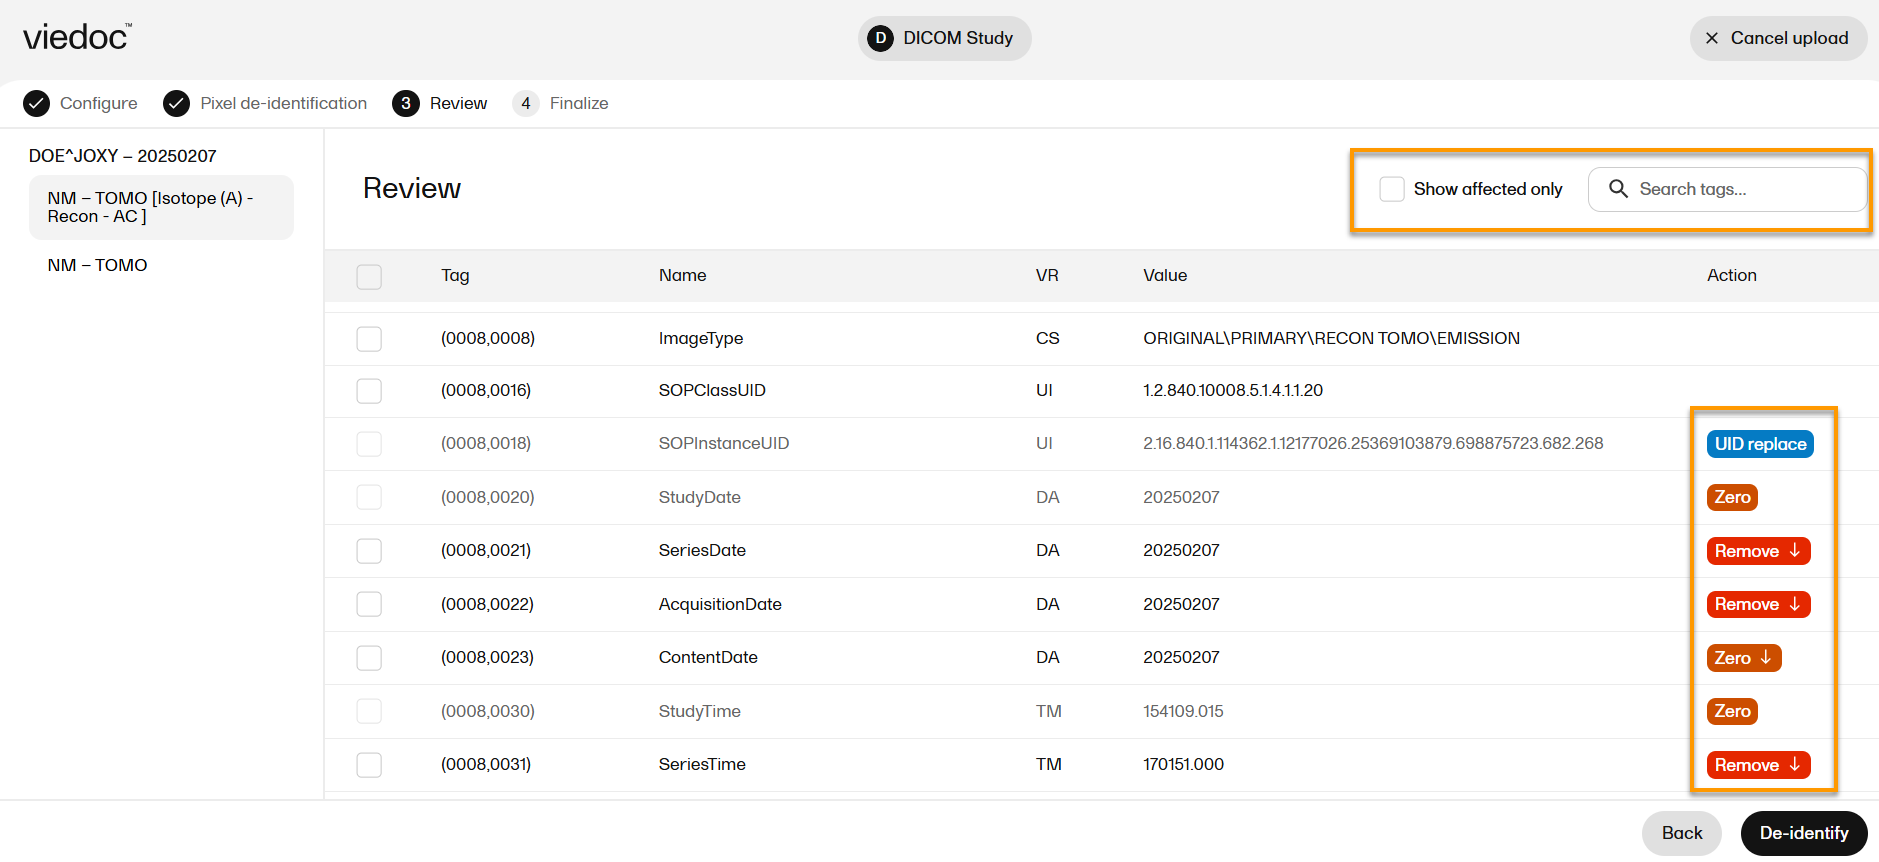
You can select multiple tags by selecting the checkbox next to the Tag column. A toolbar appears at the bottom of the list showing the number of tags selected. To override the action for a specific tag, select the action and choose another action from the dropdown. Note!
Select Clear overrides to revert selected tags to the profile default, or Clear selection to deselect. Select De-identify when the review is complete. |
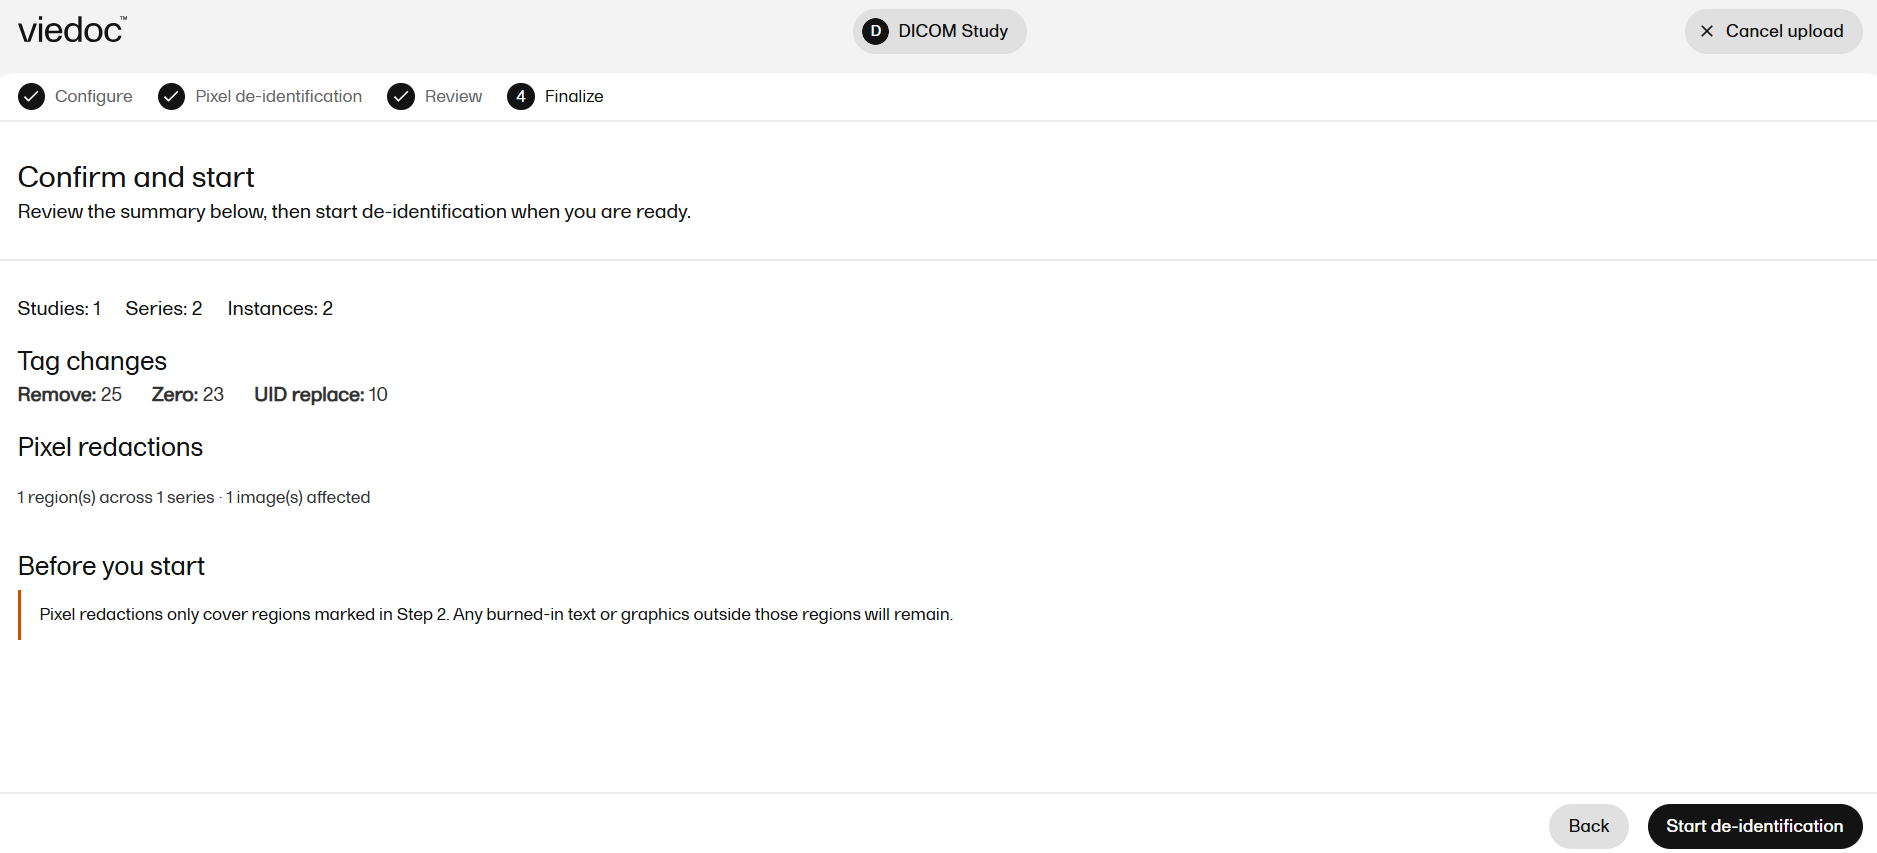
| 7 |
The Confirm and start screen opens on the Finalize tab. This shows a summary of the changes to be applied:
Review the summary carefully. If the counts are not as expected, select Back to return to the Review tab. When you are satisfied, select Start de-identification.
A De-identification audit is also available for download. Select Download audit to save a JSON file record of all of the actions performed. Note! When the system language is set to a non-English language, a warning message on the Finalize step of the DICOM de-identification upload workflow is displayed in English only. This will be resolved in a future release. |
| 8 |
Select Finish. The de-identified ZIP file is set as the file to be saved on the form. |
| 9 |
Select Save changes on the form to save the upload. The file upload information becomes available in the audit trail. To view the audit trail, select Show history on the top right side of the form. Note! Once the form is saved, the de-identification wizard cannot be accessed again. To view the uploaded DICOM files, download the ZIP file from the form: 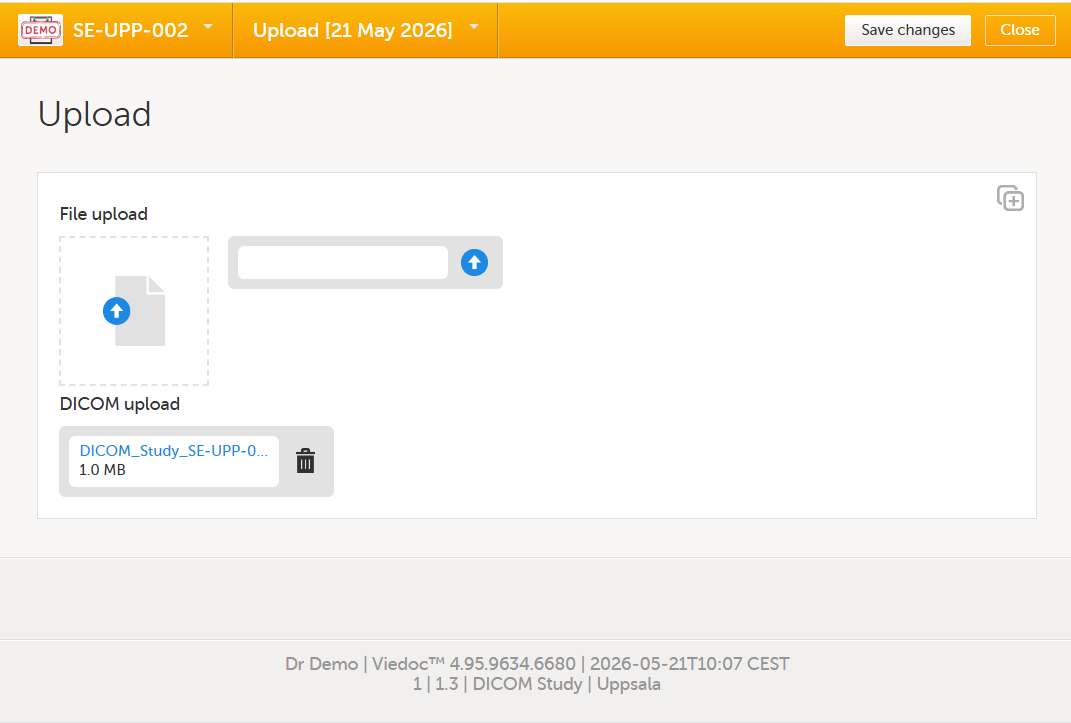
Note! The downloaded ZIP file contains the de-identified DICOM file(s) and the de-identification audit JSON. The files within the ZIP retain their original names and folder structure. The ZIP is renamed on download using the study name, subject key, and UTC timestamp. |
Linking between forms
When editing a form, you can add links between different types of forms with the Form link item. This can be useful for example, to quickly see when a medication was taken by a subject and for what reason.
Notes!
- To access the Form link item Clinic users must have access to whichever form type it is configured to link to, for example the Medical History, Adverse events or Prior and Concomitant Medications forms. Viedoc Me does not support forms with Form link items.
- Form link items cannot be mapped to an item in a repeating item group.
Forms can be linked with several instances of a specified form type. For example, while editing the Prior and Concomitant Medications form, links can be made to several registered Medical History events.
To link two forms:
|
1 |
Open a subject card. In this card you can see two Medical History forms under Common events: 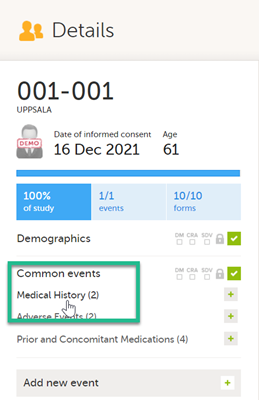
|
| 2 |
In this example, we will link the Prior and Concomitant Medications form to the existing Medical History form instances and enter the medication that the subject has taken for the Medical History event. 
|
|
3 |
To link the Prior and Concomitant Medications form to the Medical History form instances: Select Add new in the Prior and Concomitant Medications form. 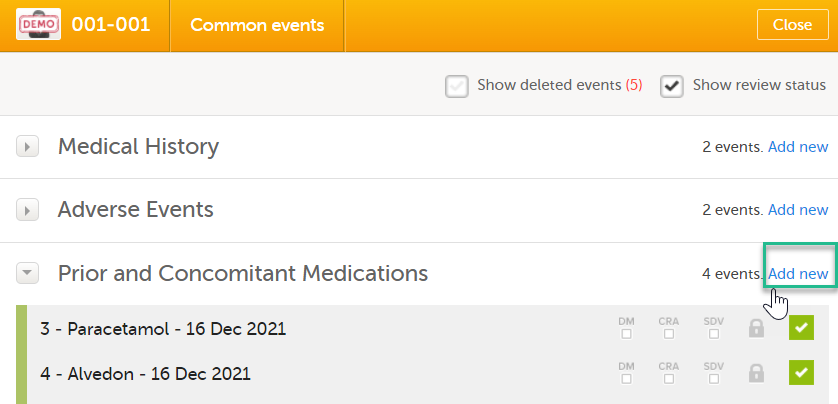
|
| 4 |
In the Prior and Concomitant Medications forms, select Medical history to show all existing form instances of the same type. The available link items are shown in a dropdown list. 1. Enter the name of the drug/medication/therapy. 2. Select the relevant Medical history. 3. Select Save changes - the Prior and Concomitant Medications form is now linked to the Medical history form instance. Notes!
|
| 4 |
After saving the form, select any link item to open and read that form. In the example shown below, the Adverse events form. Closing the form returns you to the original form, in this example the Prior and Concomitant Medications form. 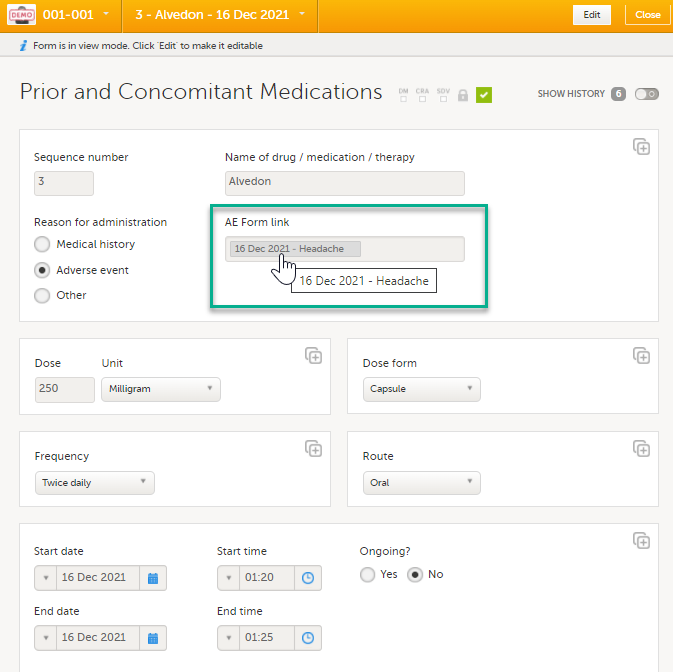
Note! You can also search in the form link item field. This can be useful to find a specific form instance if there are many adverse events for example. |
Updates to linked forms
If you update a linked form by resetting, deleting, or changing data, the following occurs:
- The form containing the linked form instance is marked with an issue flag (the red [ i ] icon).
- An error message is displayed at the top of the form containing the link item:

Locations of updated linked forms
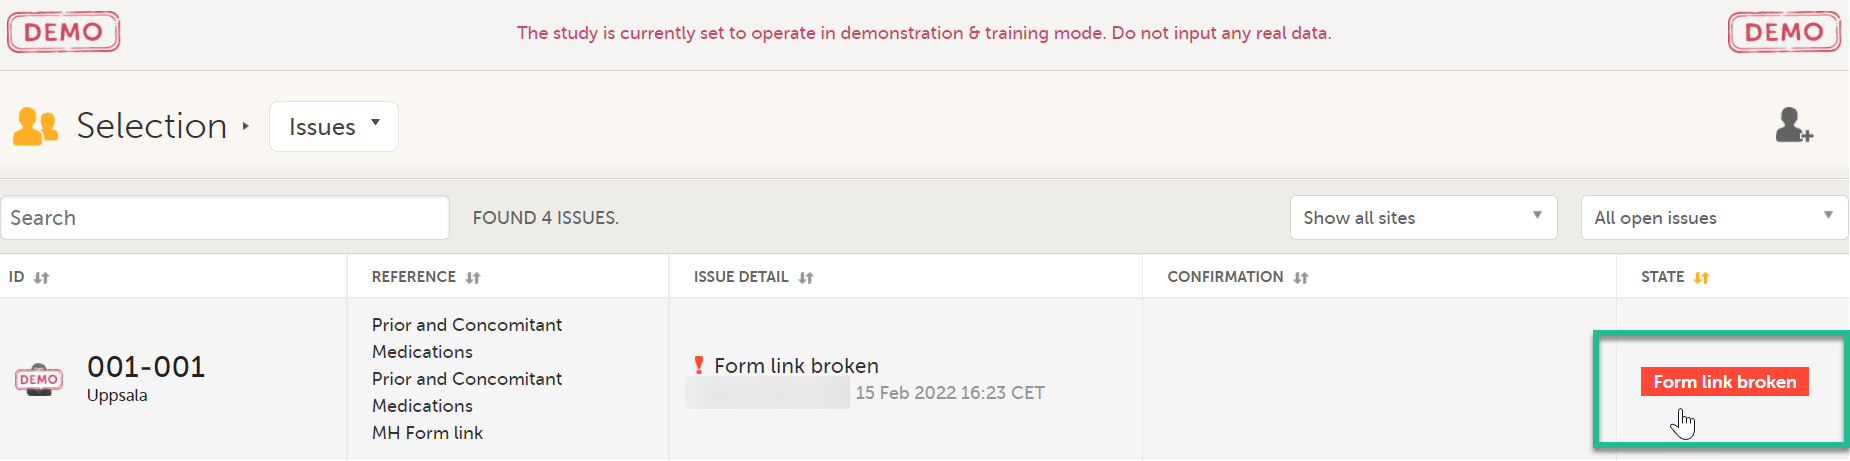
In the Issues view of the Selection page, forms are easily identified and are labelled Form link broken:
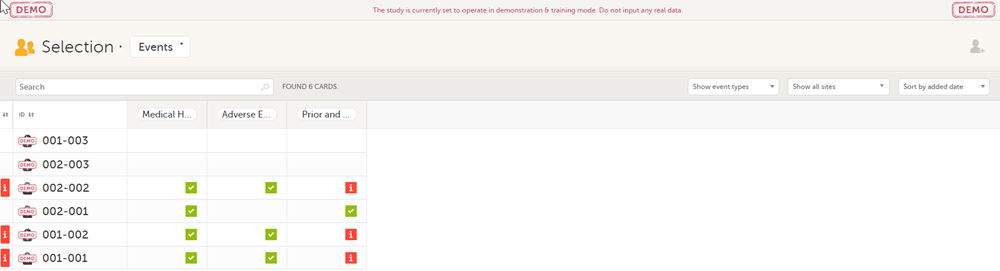
In the Events view of the Selection page, forms are easily identified and marked with an issue flag (the red [ i ] icon). Select the red [ i ] icon to open the subject card.
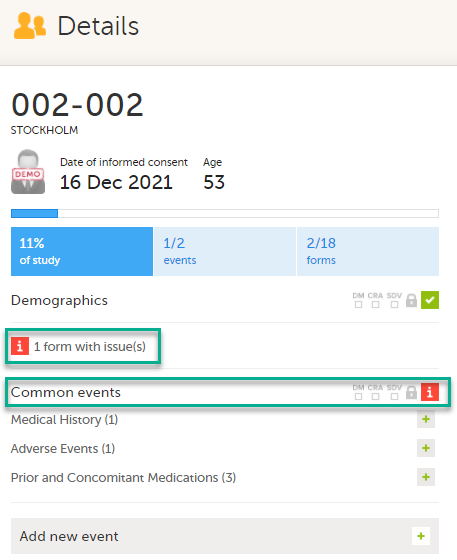
On the subject card, the issue is marked with an issue flag:
Updating a linked form
| 1 |
Select the red [ i ] icon to open the issue, (in this example under Common events).
|
| 2 |
Select the red [ i ] icon (in this example under Prior and Concomitant Medications) to open the form with the issue. 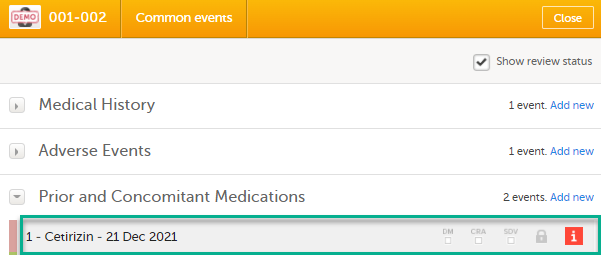
|
| 3 |
Select Edit to update the form: 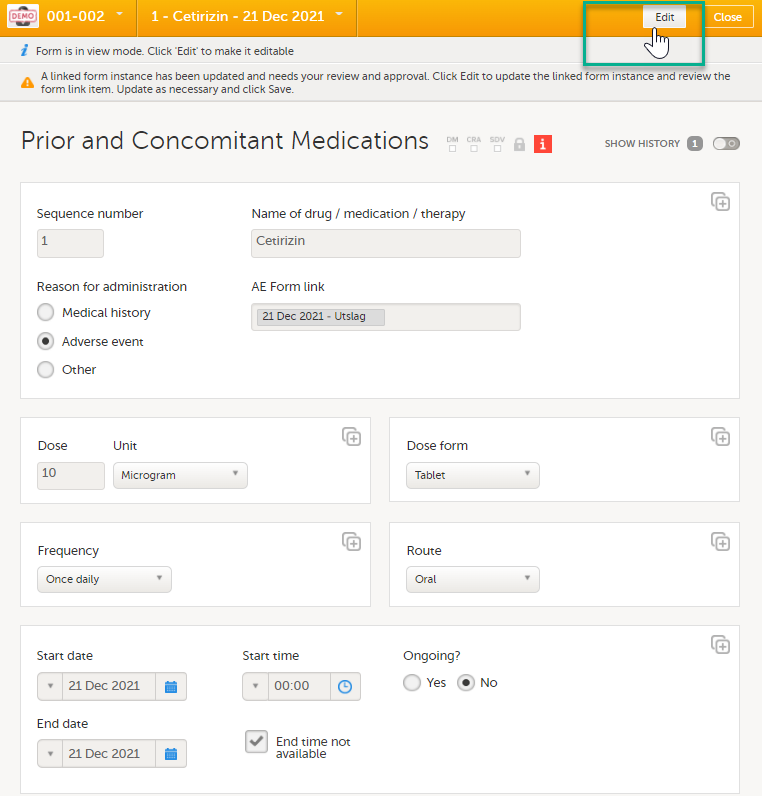
|
| 4 |
A message is displayed as part of the audit trail when the linked items are updated: 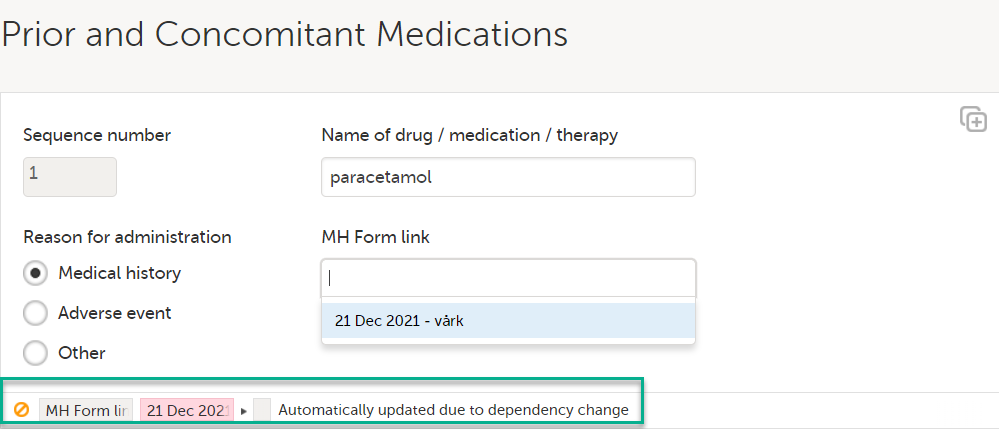
|
Navigating between subjects/events within the same form
Once you have a form open, it is possible to navigate through different subjects, or different events, if the form is included in other initiated events as well. This function is available through the dropdown lists in the form header, as illustrated below:
- Navigate through subjects:
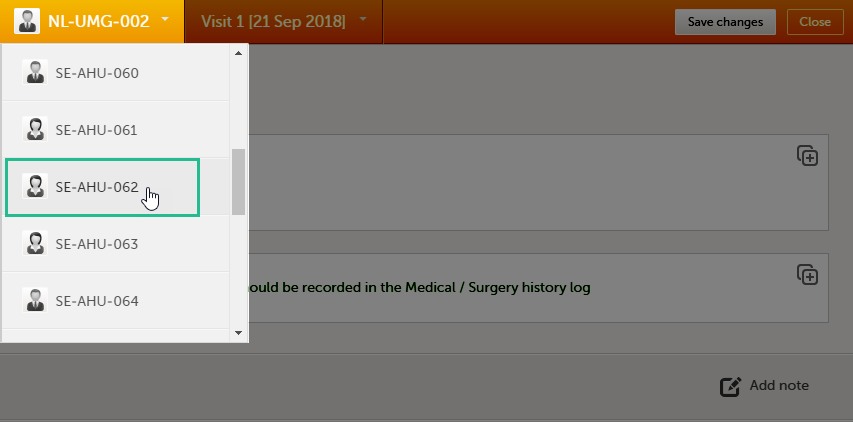
- Navigate through events:
Editing data
To edit data that already have been saved:
| 1 | Open the form that contains the data you want to change. |
| 2 | Select Edit in the top right corner of the form.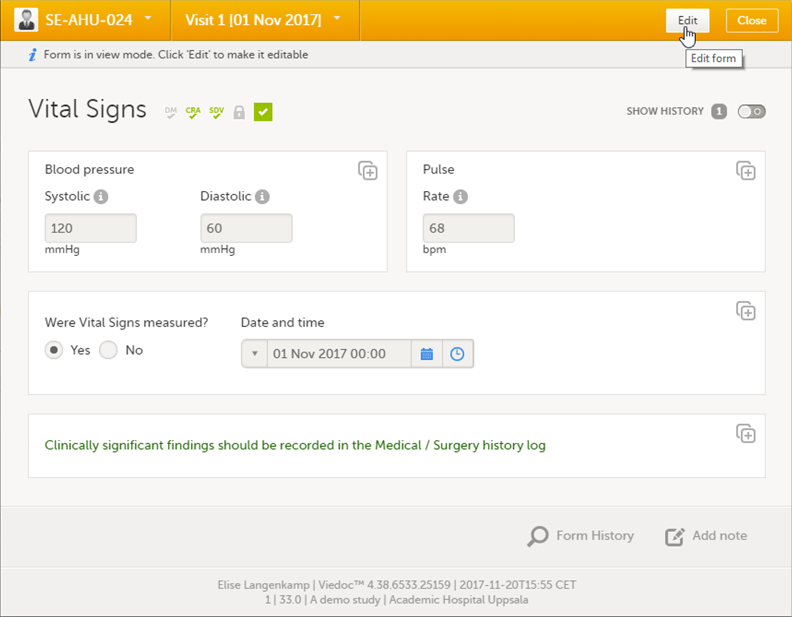 |
| 3 | Edit the data and select Give reason. A pop-up opens. 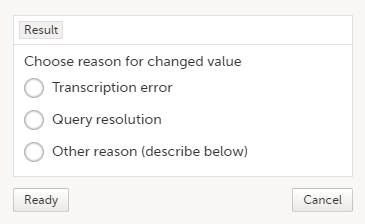 |
| 4 | Select one of the pre-formulated reasons for change, or select Other reason and provide a description. Select Ready and Save changes. |
Notes!
- A form that has been locked by the Monitor or Data Manager cannot be edited. If you still want to edit a locked form, contact your Monitor.
- Subject-submitted (Viedoc Me) forms are locked by default. If you, together with the subject, consider that changes need to be made to the answers in a subject-submitted form, contact your Monitor. Depending on the settings for your study, your Monitor might have the possibility to unlock the subject-submitted form.
- For scheduled and unscheduled events, when the event date form ($EVENT) is excluded when you use automatic event dates, it still counts. In the signing console the counter (number of forms) for a event includes the $EVENT form. It cannot be selected to be signed but can be signed if you select sign all (for subject or event). If you sign forms on an event individually you will not be able to sign the $EVENT form. This in turn makes it so that the sign symbol that appears on the event when everything is signed does not appear, even though it looks like everything is signed.
Repeating forms
It is possible to create several instances of the same form within one activity. This can only be done if the form is set as repeating in the study design.
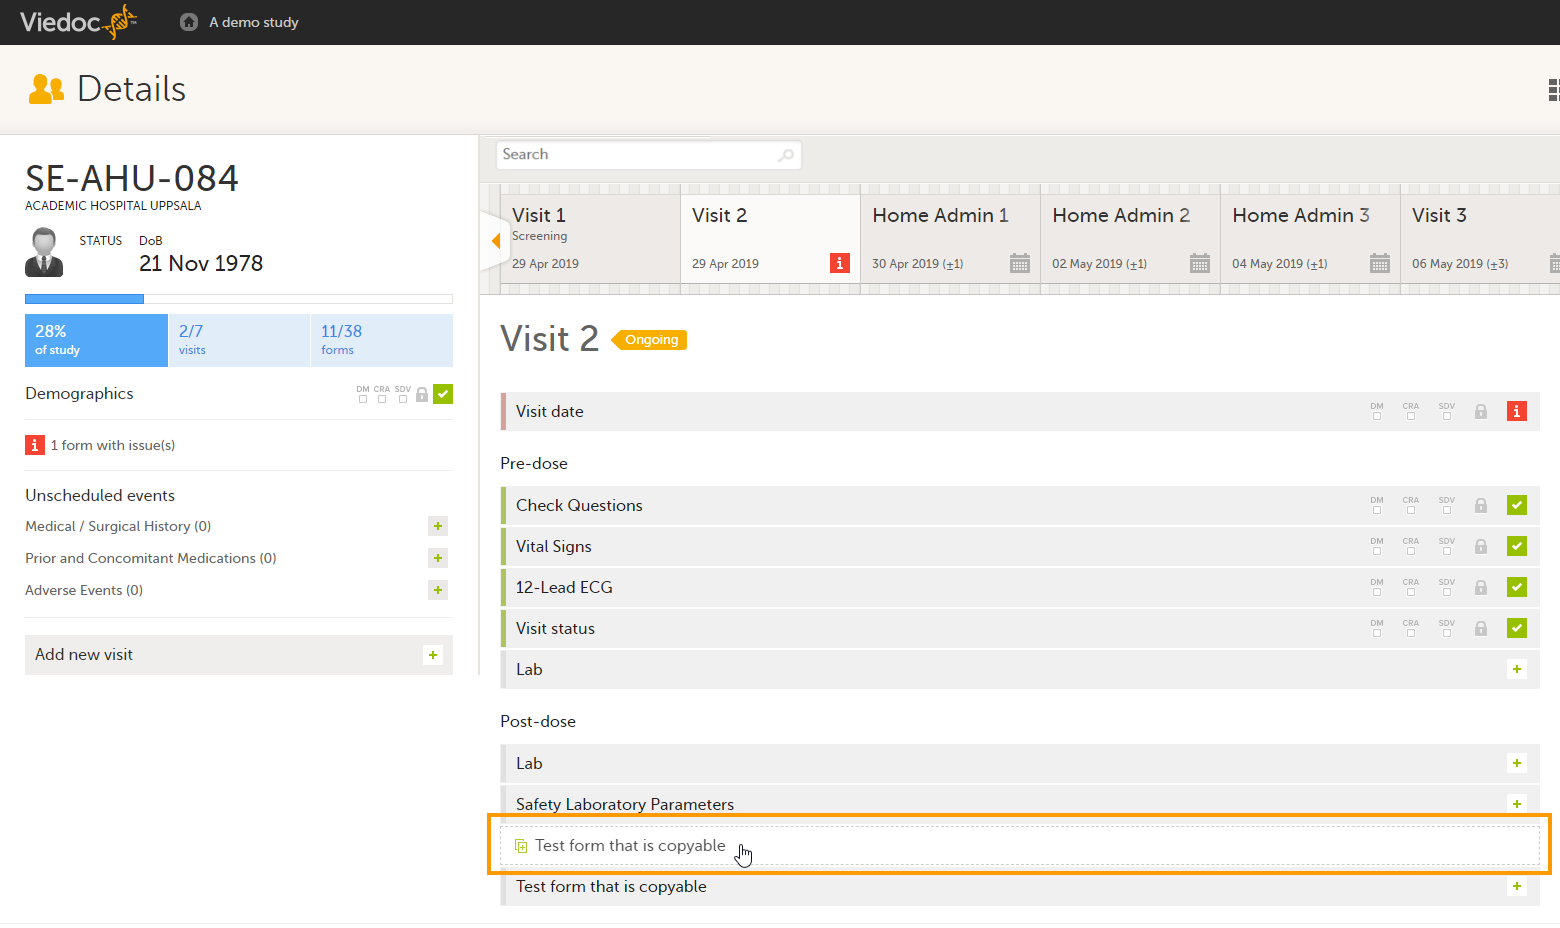
If a form is set as repeating, a ghost form will appear once you have filled in and saved the first instance of the form (see the lab form example in the image).
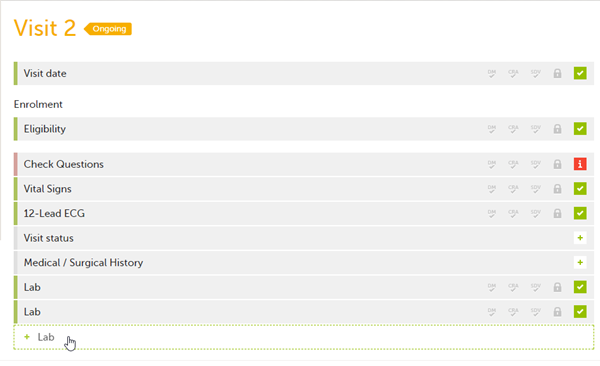
Note! The ghost form of a repeating form is displayed below the main form and marked with a + icon. If you see a ghost form above the main form, it is a copyable form. See the image below, and see Copyable forms.
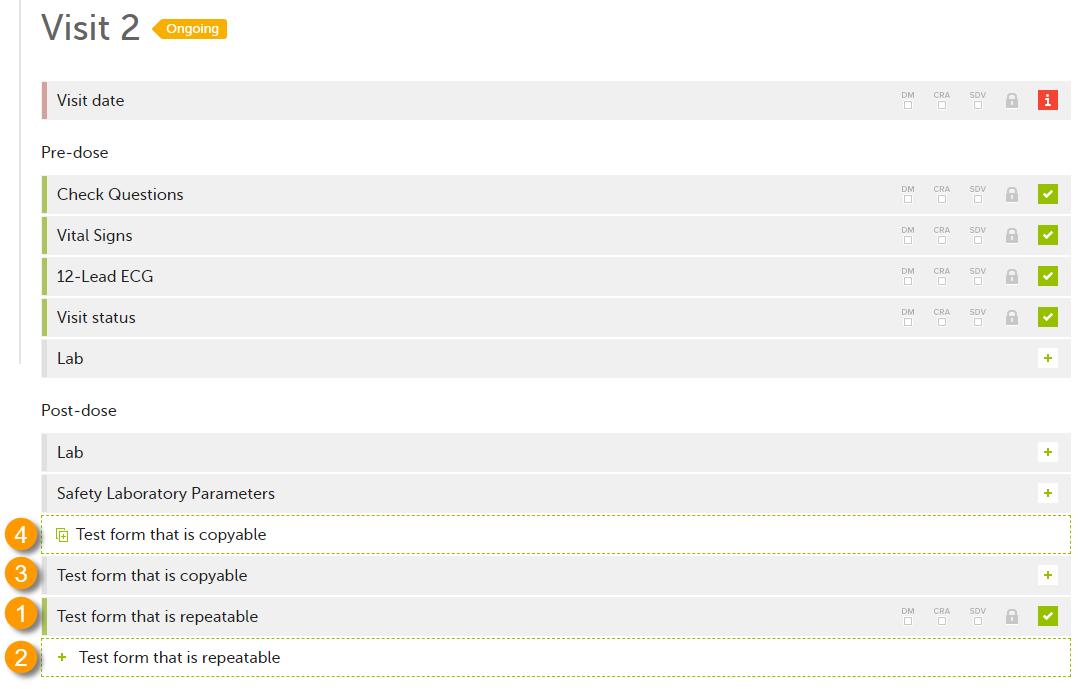 1. Main form instance of repeating form
2. Ghost form of a repeating form, displayed below the main form instance and marked with a + icon
3. Main form instance of a copyable form
4. Ghost form of a copyable form, displayed above the main form instance and marked with a copy icon
To fill in an instance of a repeating form:
| 1 | Select the ghost form. A new instance of the form opens. |
| 2 | Fill in the form instance and select Save changes. If you have not reached the maximum allowed number of instances of a repeating form, a ghost form appears every time you save a new instance of the form. If the maximum number of instances of the repeating form is reached, no ghost form will appear upon saving a new instance of the form. |
To delete an instance of a repeating form:
| 1 | Open the respective instance of the form and select Edit. |
| 2 | Select Delete form. |
| 3 | Select or enter a reason for deleting the form and select Delete. The instance of the form is removed. |
Note!
- It is not possible to reset a repeating form. If you wish to clear the data, it is only possible to completely delete that specific instance of a repeating form and create a new one again.
- In order for the event to be considered as completed, at least one instance of a repeating form must be filled in.
Repeating item groups
Using repeating item groups allows you to dynamically add multiple rows of data within the same form. This is useful when the number of repeated observations varies, such as multiple measurements or multiple analytes in a single form.
Repeating item groups are defined in the study design. The minimum and maximum number of item groups that can be added is also defined in the study design.
Notes!
- Repeating item groups differ from common event forms, which repeat at the form level. Repeating item groups repeat only a group of items within a single form.
- Repeating item groups can not be used inside a form included in a subject initiated event, or a form set as a randomization or as an allocation form.
- Forms in Viedoc Me do not support repeating item groups.
Adding a repeating item group
To add an instance of a repeating item group to a form:
| 1. |
Open a form that contains a repeating item group: 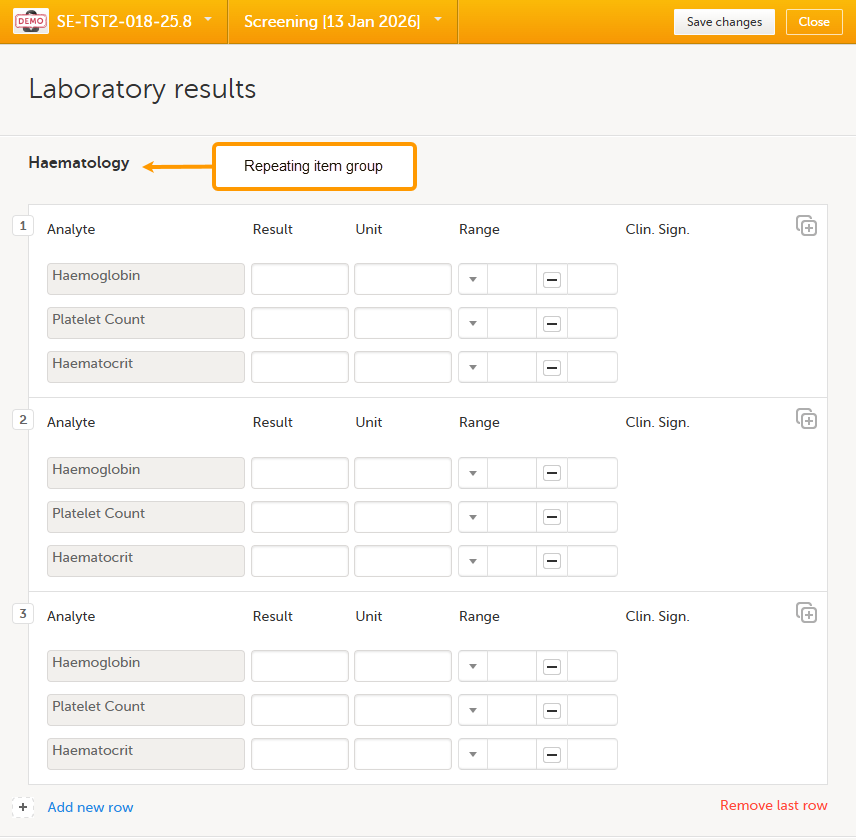
|
| 2. |
Select Add new row: 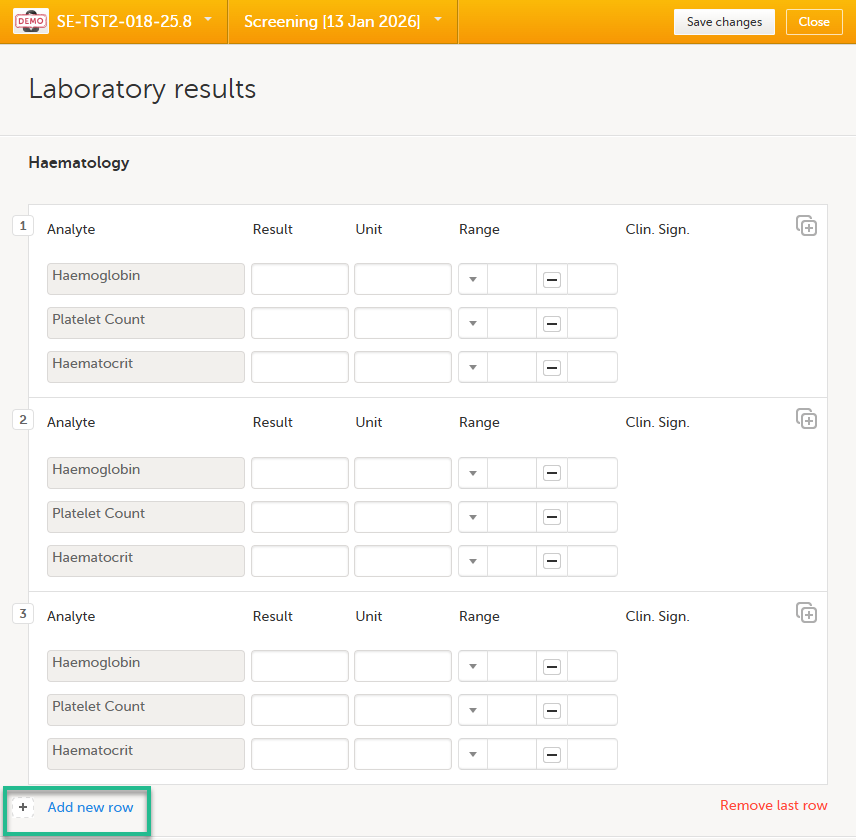
A new instance of the repeated item group opens. |
| 3. |
Enter your data and select Save changes. If the maximum number of occurrences has been reached, no additional rows can be added. Notes!
For more information about the scope and reference data, see How the reference data feature works within forms. |
Removing the last row of a repeating item group
To remove the last row of a repeating item group:
| 1. |
Open the form and select Remove last row: 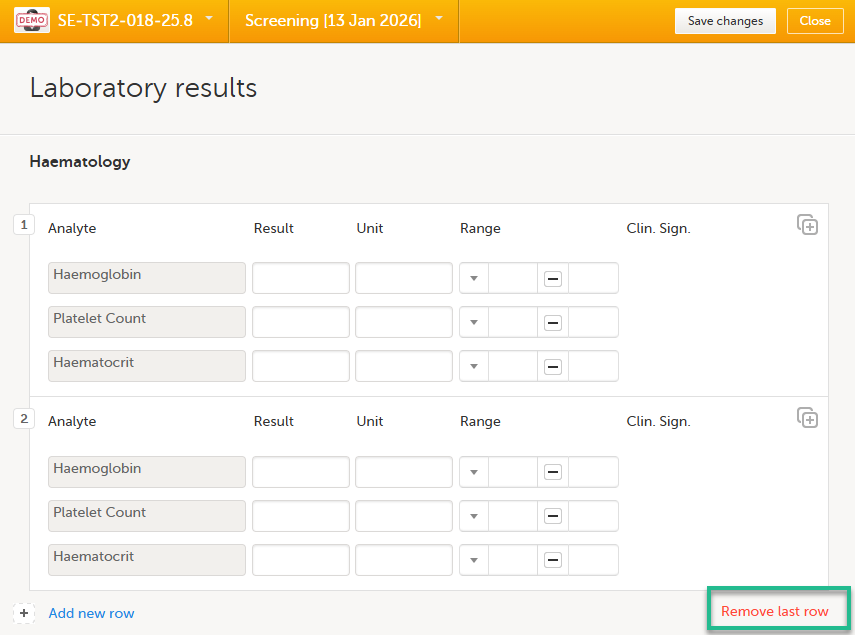
|
| 2. |
Select Save changes. You are prompted for a reason for change: Give reason. 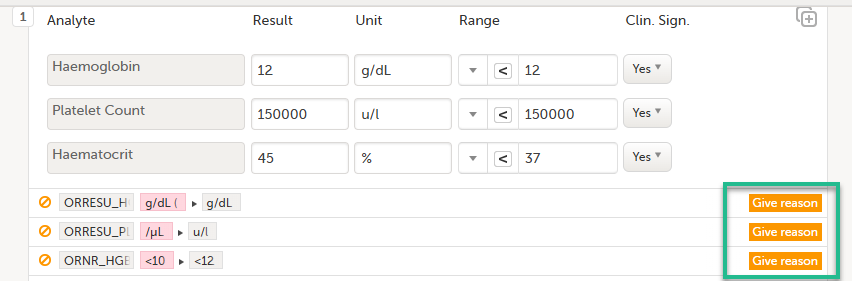
|
| 3. |
The Choose reason for changed value pop-up is displayed: 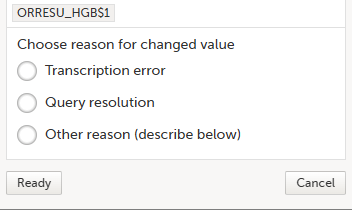
Select an option in the pop-up, for example Query resolution. The same reason is applied to all items in the same instance of that repeating item group: 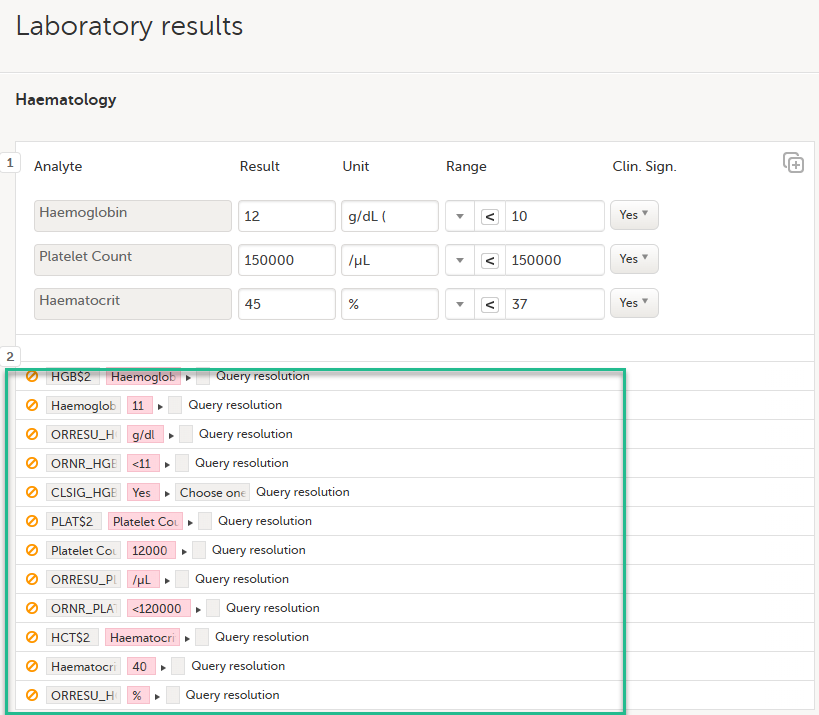
|
Notes!
- If a form is both copyable and contains repeating item groups, all existing instances of the repeating item group from the previous form are copied into the new event when the form is initiated by copying data.
- Adding or removing an instance of a repeating item group is recorded in the audit trail.
- The audit trail is visible in the form history and included in the form history PDF.
Copyable forms
It is possible to initiate a form based on copied data from a previous event. This can only be done if the form is set as copyable in the study design.
If a form is set as copyable, a ghost form will appear above the main form.
1. Main form - select the main form to enter data manually. Data from the same form in a previous event will not be copied into this form in the current event.
2. Ghost form - select the ghost form to initiate the form by copying data from a previous event. See below for instructions.
Note! The ghost form of a copyable form is displayed above the main form, and marked with a copy icon. If you see a ghost form below the main form, it is a repeating form. See the image below, and see Repeating forms.
1. Main form instance of repeating form.
2. Ghost form of a repeating form, displayed below the main form instance and marked with a + icon.
3. Main form instance of a copyable form.
4. Ghost form of a copyable form, displayed above the main form instance and marked with a copy icon.
If the copyable form is also set as repeating (see Repeating forms), and in the previous event, three instances of that form have been initiated, then in the current event all three instances appear as ghost form. By selecting one of these ghost forms, you can select the instance from which the data are copied.
To initiate a form based on data copied from a previous event:
| 1 |
Select the ghost form.
|
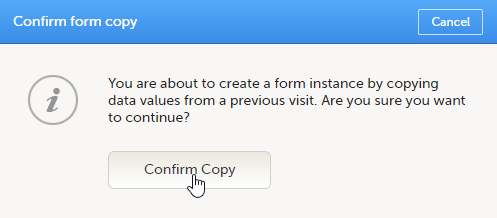
| 2 |
Select Confirm to continue. 
|
| 3 |
The ghost form disappears and the form is displayed as initiated. |
To delete a copied form:
| 1 | Open the form and select Edit. |
| 2 | Select Delete form. |
| 3 | Select or enter a reason for deleting the form and select Delete. The copied form is removed and the ghost form re-appears. |
Note!
- A form instance based on copied data always contains the data of the previous event, even if data have been changed during that event. If a copyable form is included in Event 1, 2 and 3, and the data is copied from Event 1 to Event 2, edited during Event 2, and then copied to Event 3, the changes made during Event 2 are included in the data copied into Event 3.
- A form instance based on copied data always contains the latest saved data from the previous event at the moment of copying. Any changes performed to the form instance from which the data are copied (the source) after the copy action are not reflected in the form instance containing the copied data (the destination).
Confirming data as missing
To mark the data as missing, if you are not able to provide information in a field:
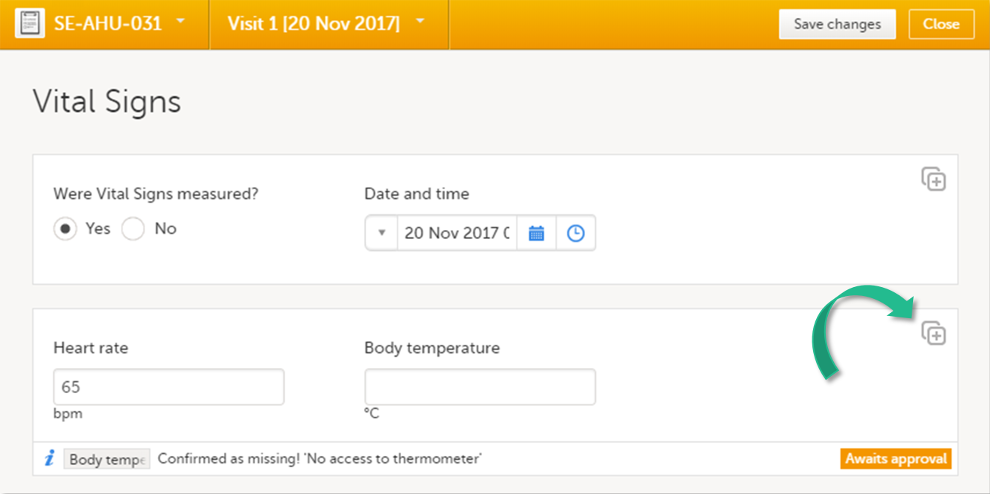
| 1 |
Select the action icon in the top right corner of each field group: A pop-up opens. |
| 2 | Select the field for which the data is missing in the dropdown menu. |
| 3 | Select Confirm field is missing and provide a reason. Note! The Confirm field is missing action is only shown for the fields that are set as "Required" in the study design. |
| 4 | Select Ready. Below the field, the text Confirmed as missing is displayed, together with the reason provided above. |
Adding private notes
You can add private notes for:
Note! It is only possible to add private notes if this feature is enabled for your role.
Private notes for events
You can add private notes to every event. Private notes are only visible to the user that created the notes, and can only be edited by that user. Adding or editing a private note does not break the signature. It is possible to add as many notes as you like. Notes are ordered according to date in descending order.
To add a private note for an event:
| 1 | Select Add note on the right pane of the Details page. |
| 2 | Enter the note text and select Ready. |
| 3 | Select Save changes. The notes pop-up closes. |
To add another note:
| 1 | Select Open notes. |
| 2 | Select Add another note. |
| 3 | Enter the note text and select Ready. |
| 4 | Select Save changes. The notes pop-up is closed and the new note is displayed in the right pane of the Details page. |
To edit an existing note:
| 1 | Select Open notes. |
| 2 | Select the pen icon behind the note you want to edit. |
| 3 | Edit the note text and select Ready. |
| 4 | Select Close. The notes pop-up is closed. |
To delete a private note:
| 1 | Select Open notes. |
| 2 | Select the trash can icon behind the note you want to delete. |
| 3 | Select Save changes. The notes pop-up closes. |
To see a history of changes to private notes, activate the Show history switch. Private notes are not recorded in the audit trail, neither included in the data export.
Private notes for forms
You can add private notes to every form. Private notes are only visible to the user that created the notes, and can only be edited by that user. Adding or editing a private note does not break the signature.
To add a private note for a form:
| 1 | Select Add note on the bottom of the form. |
| 2 | Enter the note text and select Save note. The note pop-up closes and the note is displayed on the form. |
Private notes for fields
You can add private notes to single fields in a form. Private notes are only visible to the user that created the notes, and can only be edited by that user. Adding or editing a private note does not break the signature.
To add a private note for an event:
| 1 |
Select the action icon in the top right corner of the field group. 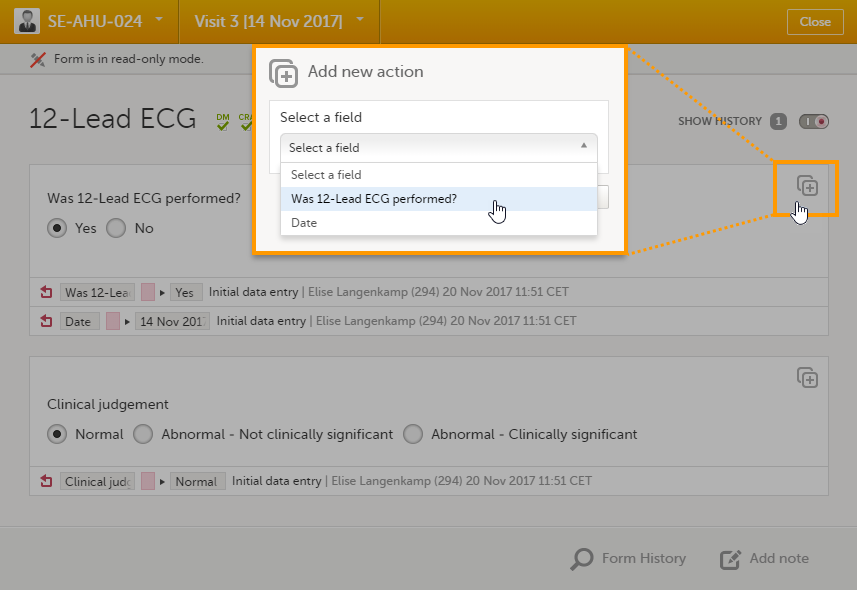
|
| 2 |
Enter the note text and select Ready. 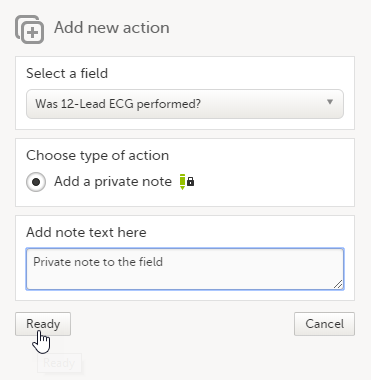
|
| 3 |
Select Save changes. 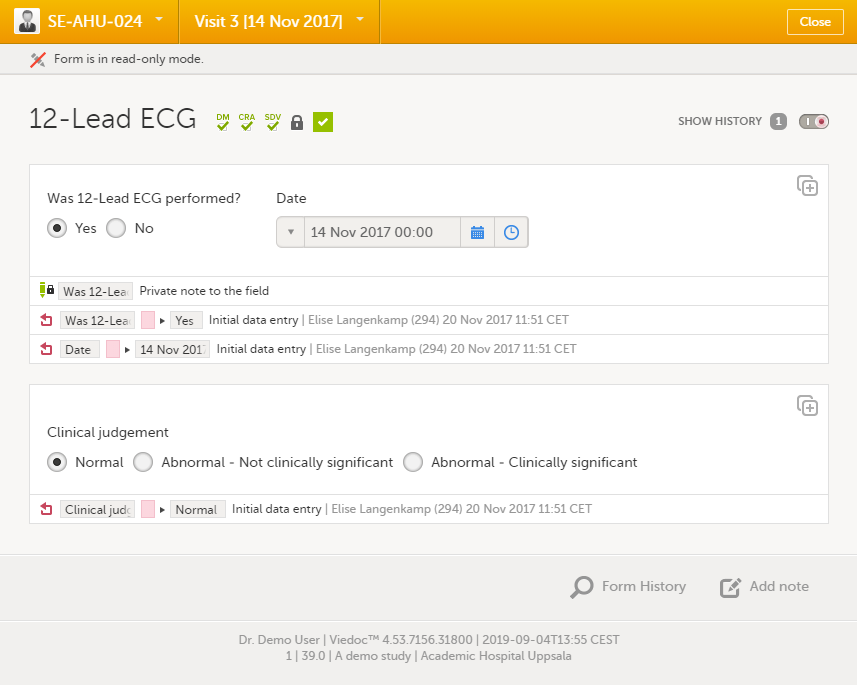
|
Resolving a query
For complete instructions on how to resolve a query, see Resolving queries.
See also:
- The video tutorial Issues: Resolve a query
- Overview of the queries process and workflow in Viedoc - Queries overview
Audit trail and form history
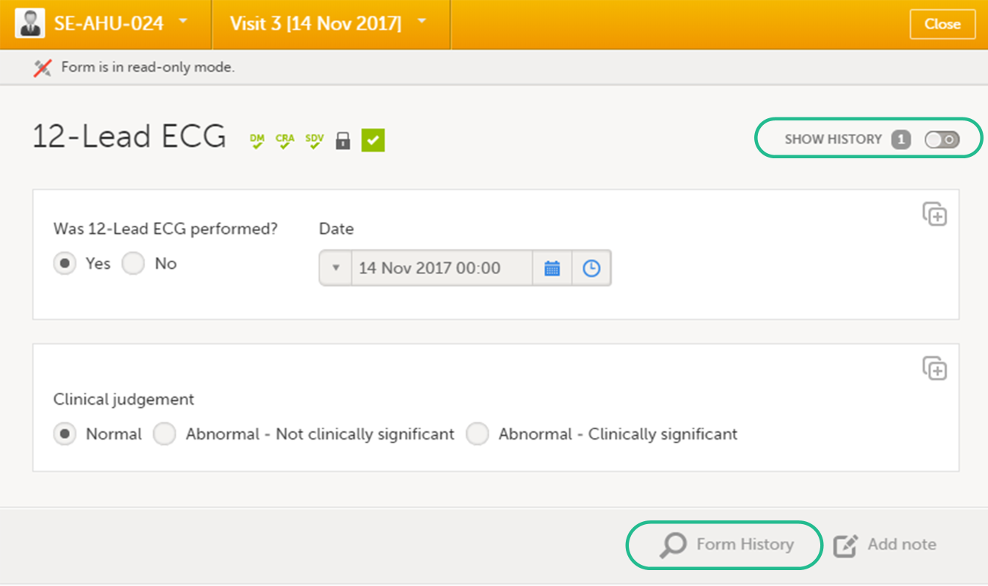
You can view the history of a form, including information on who entered the initial data and who made any changes. To view the history, activate the Show history switch on the top right side of the form:
Note!
- If an item without a value is confirmed as missing, the audit trail export displays the query response as the edit reason.
- If an item that already has a value is confirmed as missing, the audit trail will display Confirmed as missing! as the reason for clearing the value.
Limited number of audit trail records
To make the form history and the form history PDFs more manageable in terms of size, there is a limit to the number of displayed audit trail records. The history only displays the initial data entry and the latest 25 audit trail records. If there are more records, a message is displayed:
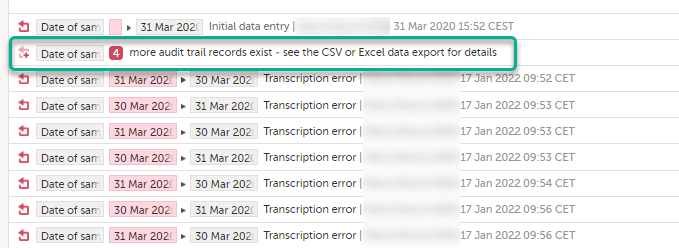
To see the complete form history, export to CSV or Excel. For more details on how to download and export the Admin Audit trail please select this link.
Note! It is not very likely that clinic staff would make more than 25 edits to a field. However, when working with JavaScript functions, that is a possibility.
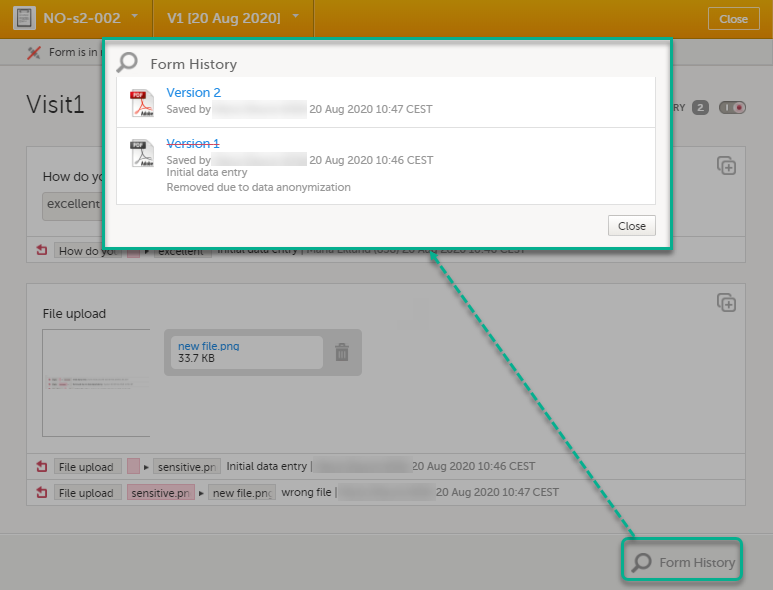
Form history PDF
You can download PDFs of all the saved versions of the form by selecting Form History located on the bottom right side of the form.
If any of the fields in the form are hidden for your role, you are not able to see the form PDFs.
By selecting Form History, a list with all the form versions is displayed, and you can choose which version you want to download. There is one version of the form for each change performed on the eCRF.
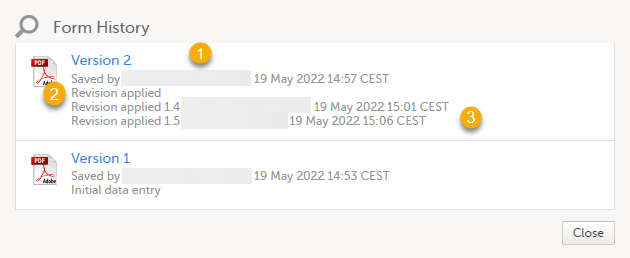
1. The user name of the user who saved the edited form.
2. "Revision applied" is displayed when a user has updated the form according to a new design revision. This can be done in one of two ways:
- Manually edit a specific form
- Manually perform a batch update of all forms with a pending upgrade
3. "Revision applied X.Y <Study Manager user name> <date time>" is displayed when the system has automatically updated the form according to a new design revision. This happens if the update in the revision does not affect the data integrity.
The PDF shows a screenshot of the form with the editing history included:

The page header and footer provide the following information, as illustrated in the previous image:
1. Subject ID
2. Form name
3. Event info (in the format set in the study design)
4. Site name
5. Study name
6. User name - the user who last edited the form
7. Version number - the version of the eCRF
8. Viedoc version number
9. Date and time when the form was last edited
10. Page number out of total number of pages of the PDF document
Masking of sensitive data
If sensitive data has been entered into a form, it is possible to mask such data so that it is not visible in the form history (except for roles with the specific permission). Sensitive data can, for example, reveal information about a subject's name or gender.
To mask sensitive data in the form history, your role must have the permission to anonymize data. The permission is set up in Viedoc Designer.
When sensitive data has been entered into a form, you first need to edit the data into something not sensitive, see Editing data. Then a record in the form history is created.
Masking text
To mask sensitive text data in the form history:
| 1 | Select Show history in the top right corner of the form to open the form history. |
| 2 |
For the history record with the sensitive data, select the Changed value icon. 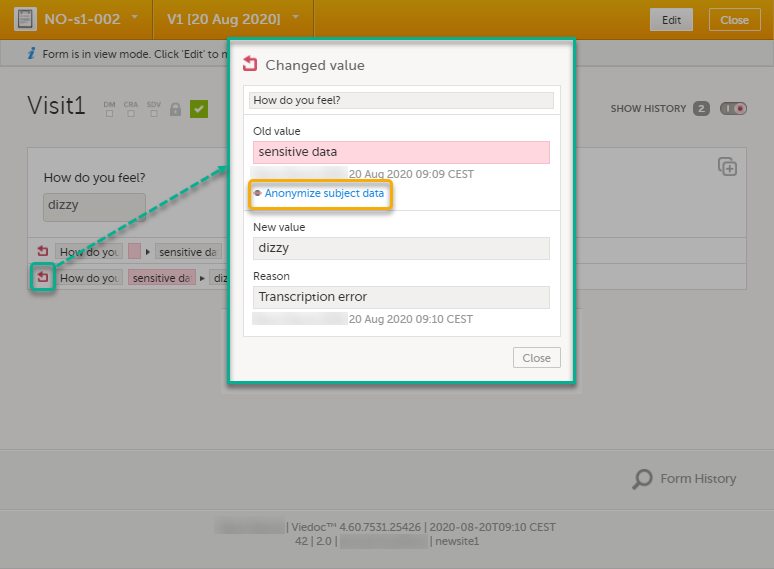
|
| 3 | Select Anonymize subject data. |
| 4 |
In the pop-up that is displayed, select Anonymize data value and select Continue. 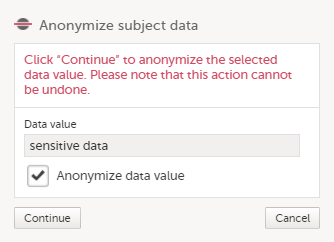
|
| 5 | Enter your password and select Submit. |
| 6 |
The pop-up now displays a text confirming that the data is anonymized. Select Ready. Note! All masking actions are logged so that it is possible to see when they were made and by whom. 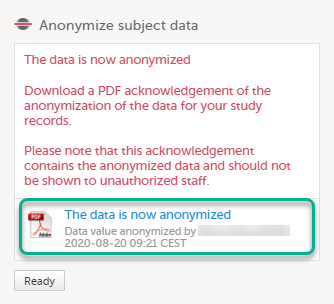
Note! When the data has been masked, a PDF acknowledgement is created. The PDF contains information about what has been masked, when and by whom it was done. To download the PDF, select the link in the pop-up. It is recommended to archive the PDF together with your study documentation. |
| 7 |
The form history now displays asterisks in place of the sensitive data. 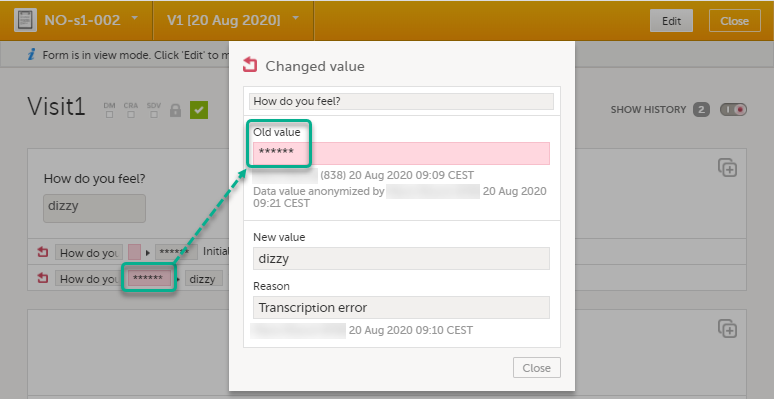
Note! The masked data will be masked also in an export. Note! Anonymization of data in linked forms does not affect the form link items, these have to be anonymized separately. |
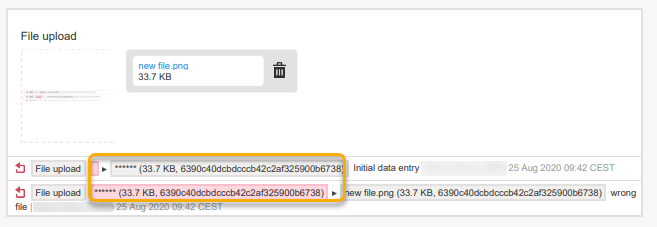
Masking a filename
To mask a sensitive filename in the form history:
| 1 | Select Show history in the top right corner of the form to open the form history. |
| 2 |
For the history record with the sensitive filename, select the Changed value icon. 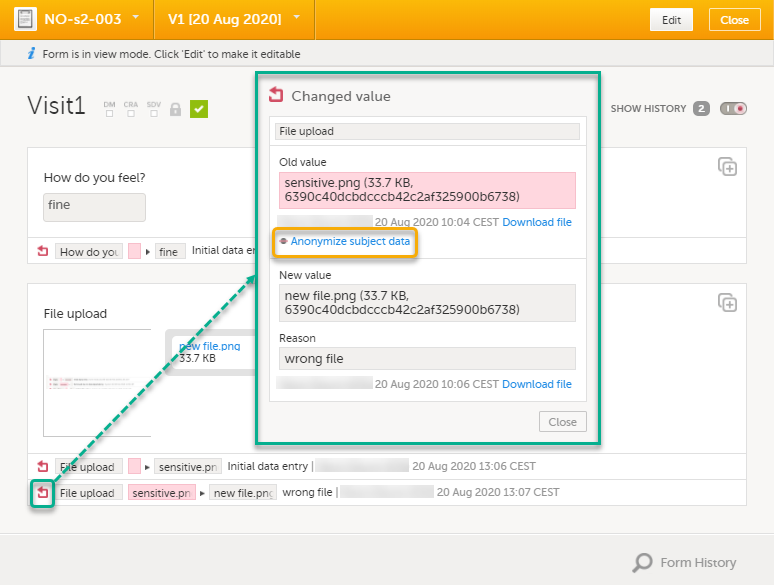
|
| 3 | Select Anonymize subject data. |
| 4 |
In the pop-up that is displayed, select Anonymize file name and select Continue. 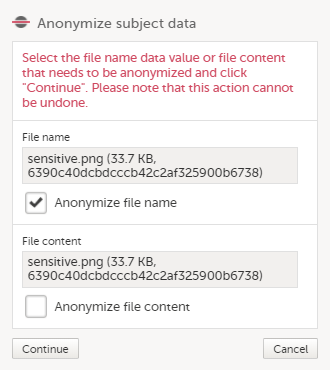
|
| 5 | Enter your password and select Confirm. |
| 6 |
The pop-up now displays a text confirming that the filename is anonymized. Select Ready. 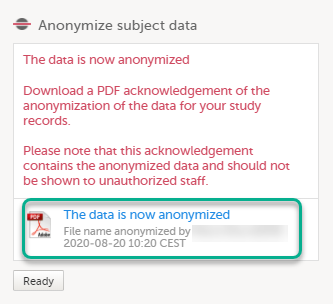
Note! When the filename has been masked, a PDF acknowledgement is created. The PDF contains information about what has been masked, when and by whom it was done. To download the PDF, select the link in the pop-up. It is recommended to archive the PDF together with your study documentation. |
| 7 |
The masked filename is now no longer visible in the form history. 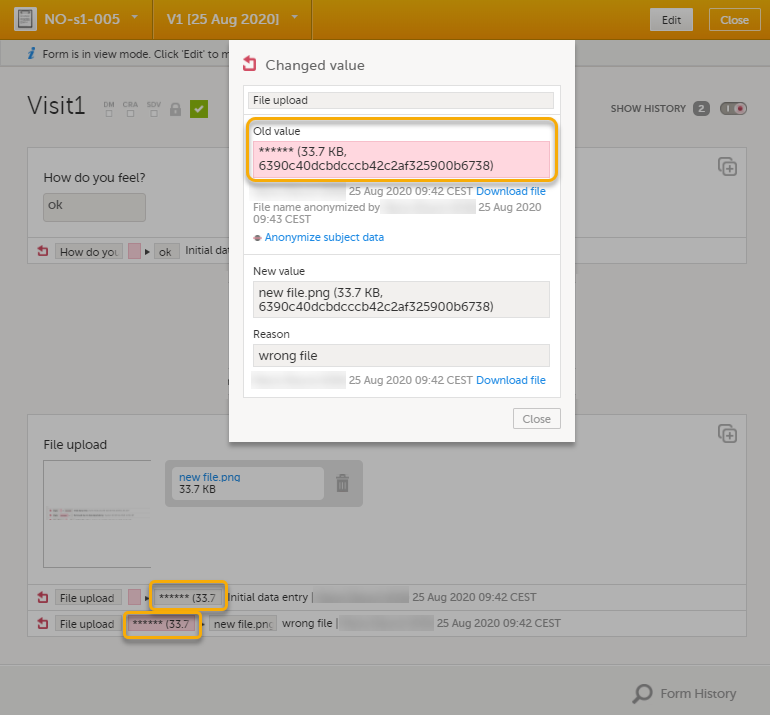
|
Masking file content
| 1 | Select Show history in the top right corner of the form to open the form history. |
| 2 |
For the history record with the sensitive file content, select the Changed value icon.
|
| 3 | Select Anonymize subject data. |
| 4 |
In the pop-up that is displayed, select Anonymize file content and select Continue. 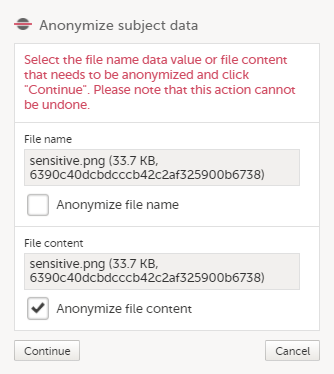
|
| 5 | Enter your password and select Confirm. |
| 6 |
The pop-up now displays a text confirming that the data is anonymized. Select Ready. 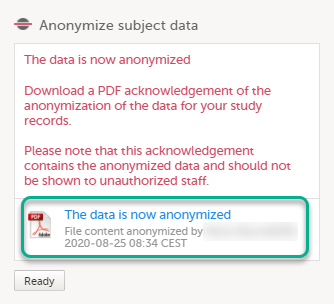
Note! When the file content has been masked, a PDF acknowledgement is created. The PDF contains information about what has been masked, when and by whom it was done. To download the PDF, select the link in the pop-up. It is recommended to archive the PDF together with your study documentation. |
| 7 |
The masked file is now no longer accessible in the form history. 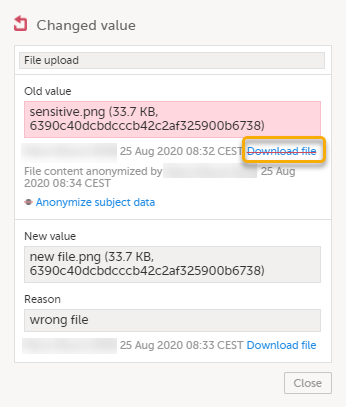
|
Consequences of masking data
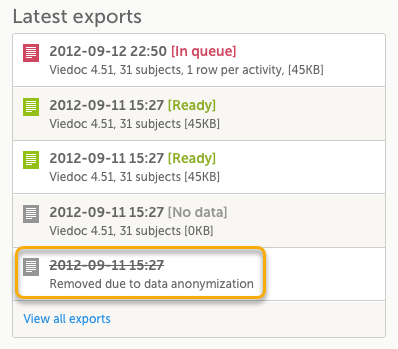
Data exports
Historical data exports that were created before the data masking can no longer be downloaded because such exports could include the data that was later masked.
Form PDFs
When data has been masked, it is reflected in all form PDFs.
For a form version with masked data, and for all previous form versions, all form PDFs become unavailable because they could include the data that was masked.
Viewing masked data
For roles with the permission to view anonymized data, it is possible to view masked data in the form history. The permission is set up in Viedoc Designer.
To view masked data:
| 1 | Select Show history in the top right corner of the form to open the form history. |
| 2 |
For the history record with the masked data, select the Changed value icon. 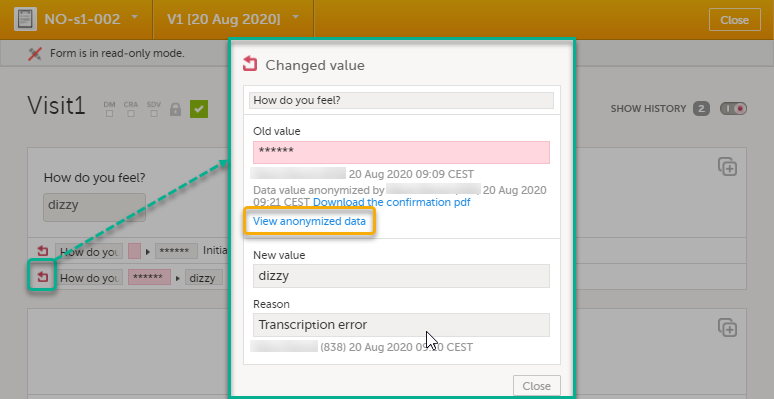
Note! You can download a confirmation PDF using the link in this pop-up. |
| 3 | Select View anonymized data. |
| 4 |
For masked text and filenames, the sensitive data is immediately displayed in the field Old value. For masked file content, the disabled download link for the file is enabled. 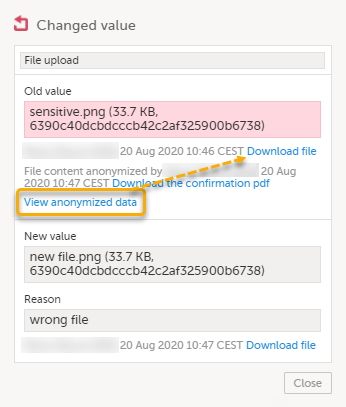
Note! From this pop-up, you can download a confirmation PDF. The PDF contains masked data and should not be shown to unauthorized staff. |
Blacklisted file formats
The following executable file types are considered as high risk because essentially all computers with the listed operating system installed can carry out the commands contained in the executable file.
In other words, files with the extensions listed below can be executed with some basic part of Windows, Mac OS, Linux, and so on.
Due to this, the following file formats will not be accepted by Viedoc form file loader:
| Extension | Format | Operating system(s) |
|---|---|---|
|
ACTION |
Automator Action |
Mac OS |
|
APK |
Application |
Android |
|
APP |
Executable |
Mac OS |
|
BAT |
Batch File |
Windows |
|
BIN |
Binary Executable |
Windows, Mac OS, Linux |
|
CMD |
Command Script |
Windows |
|
COM |
Command File |
Windows |
|
COMMAND |
Terminal Command |
Mac OS |
|
CPL |
Control Panel Extension |
Windows |
|
CSH |
C Shell Script |
Mac OS, Linux |
|
EXE |
Executable |
Windows |
|
GADGET |
Windows Gadget |
Windows |
|
INF1 |
Setup Information File |
Windows |
|
INS |
Internet Communication Settings |
Windows |
|
INX |
InstallShield Compiled Script |
Windows |
|
IPA |
Application |
iOS |
|
ISU |
InstallShield Uninstaller Script |
Windows |
|
JOB |
Windows Task Scheduler Job File |
Windows |
|
JSE |
JScript Encoded File |
Windows |
|
KSH |
Unix Korn Shell Script |
Linux |
|
LNK |
File Shortcut |
Windows |
|
MSC |
Microsoft Common Console Document |
Windows |
|
MSI |
Windows Installer Package |
Windows |
|
MSP |
Windows Installer Patch |
Windows |
|
MST |
Windows Installer Setup Transform File |
Windows |
|
OSX |
Executable |
Mac OS |
|
OUT |
Executable |
Linux |
|
PAF |
Portable Application Installer File |
Windows |
|
PIF |
Program Information File |
Windows |
|
PRG |
Executable |
GEM |
|
PS1 |
Windows PowerShell Cmdlet |
Windows |
|
REG |
Registry Data File |
Windows |
|
RGS |
Registry Script |
Windows |
|
RUN |
Executable |
Linux |
|
SCR |
Screensaver Executable |
Windows |
|
SCT |
Windows Scriptlet |
Windows |
|
SHB |
Windows Document Shortcut |
Windows |
|
SHS |
Shell Scrap Object |
Windows |
|
U3P |
U3 Smart Application |
Windows |
|
VB |
VBScript File |
Windows |
|
VBE |
VBScript Encoded Script |
Windows |
|
VBS |
VBScript File |
Windows |
|
VBSCRIPT |
Visual Basic Script |
Windows |
|
WORKFLOW |
Automator Workflow |
Mac OS |
|
WS |
Windows Script |
Windows |
|
WSF |
Windows Script |
Windows |
|
WSH |
Windows Script Preference |
Windows |