Viedoc eTMF is a digital repository for capturing, managing, sharing, and storing essential documents for your clinical trial.
Viedoc TMF is based on the TMF Reference Model by CDISC. The TMF Reference Model is an industry consensus catalog of all TMF records. Using the TMF Reference Model ensures compatibility and interoperability with other clinical trial parties, such as CROs.
The TMF Reference Model includes documents in all different phases of a clinical trial:
The TMF Reference Model categorizes documents in zones, sections, and artifacts in a hierarchical structure.
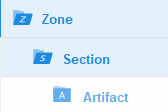
The set of zones, sections, and artifacts included is defined in a template file that is maintained by the eTMF Manager.
The TMF can include both the Investigator Site File (ISF) and the sponsor TMF.
For portability reasons, the TMF Reference Model is defined in an Excel file.
Viedoc eTMF also uses Excel files as templates for the eTMF structure.
In Viedoc Admin, the Study Manager assigns an eTMF Manager. For more information, see Managing users.
The eTMF Manager can then map Viedoc user roles to eTMF user roles and permissions. For more information, see Managing your Viedoc eTMF application.
The following image shows the document version statuses and the actions that change the status of a document version. The initial status of a document when it is uploaded to Viedoc TMF is Unpublished.

If you edit the metadata for a document version that is Unpublished or Awaiting review, the document version status is not changed.
It is not possible to edit the metadata of a Finalized document. To make changes, a new version needs to be created.
Note! Different actions require different permissions, which means that they are performed by users with different roles.
The eTMF Manager has permissions to manage the eTMF application in Viedoc Admin and to manage templates in Viedoc eTMF.
The user access to Viedoc TMF is determined by the assigned roles and permissions. The roles and permissions can work in combination or independently.
These user roles are defined in the template, which is maintained by the eTMF Manager.
The end user role determines what kind of access a user has to artifact data (no access/read/write/review) on the different levels:
Note that this text section is available also in the lesson Introduction to Viedoc eTMF.
These permissions are defined in Viedoc and are assigned to the users by the eTMF Manager.
The eTMF permissions are:
Note! For more information about permissions and accesses, see eTMF access use cases.
If you have the user role eTMF Manager or the permission Read-only TMF Admin, you have access to the TMF Admin view. In this view, the eTMF Manager can manage the eTMF templates, structure, and other eTMF settings.
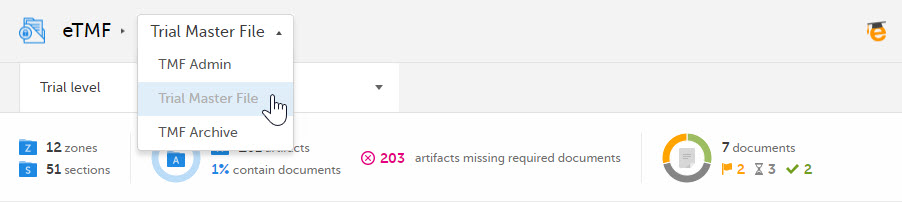
If you have the user role eTMF Manager, a Viedoc Clinic role that is mapped to an eTMF role, and have the permission to Download audit trail report, you have access to three views of Viedoc eTMF: TMF Admin, Trial Master File, and TMF Archive.
To toggle between the views, use the dropdown menu:
See Introduction to Viedoc eTMF.
See Complete audit trail report.
In Viedoc eTMF, there is a link to the eLearning curriculum Viedoc User Guide for eTMF Managers.

It is important to be fully prepared for an inspection of relevant documentation about the EDC system used in a clinical trial. If the correct documentation is available for review by the regulatory authorities and certain validations have been performed, inspectors can then assess the systems used when collecting subject data in clinical trials.
There are also specific expectations that sponsors must comply with, depending on the regulatory body, European Medicines Agency (EMA) Food and Drug Administration (FDA) and the Japanese Pharmaceuticals and Medical Devices Agency (PMDA) even though these are similar in that they all expect the sponsor to have a complete understanding of the system. They also expect that the sponsor (or Contract Research Organization (CRO), if delegated) fully understands the functionality of the EDC system being used and can demonstrate this understanding and explain how the system has been validated.
To assist in preparing for inspections, Viedoc has developed the Viedoc Inspection Readiness Packet (VIRP) which provides you with the information you need in order to fulfil regulatory expectations and requirements.
The VIRP is available for every release of Viedoc. The VIRP introduction describes the contents of VIRP in more detail, and also talks about additional documentation you should provide. The VIRP introduction is included in VIRP.
eLearning: Viedoc also provides an eLearning lesson - Inspection Readiness when Working in Viedoc, which describes in detail the information needed step-by-step, as well as having additional information about potential pitfalls, what happens when new functionality is introduced in a release, about backward compatibility and more.
The Viedoc Release Binder. We also store a snapshot of the information in our development environment for each release. This information is included in the Release Binder for that release which is stored in SharePoint and can be shared with inspectors either in a webinar or onsite.
When it comes to preparing for regulatory inspections, there are different areas of responsibility for the Sponsor/CRO and Viedoc.
The Sponsor/CRO should be able to rely on Viedoc standard qualification documentation as there are no sponsor or study-specific software modifications made to the standard product. The configuration of Viedoc for use in a study is done using only functionality that has been validated before being released to the study.
Each new Viedoc version is fully validated before release - which takes place every 6-8 weeks. These releases are installed on all production servers at the same time, meaning all customers and all studies are updated at the same time. Furthermore, we ensure that ongoing studies are not affected by fulfilling the following two requirements:
The new release must be 100% backward compatible.
Any new functionality in the release shall be disabled for ongoing studies by default.
Some areas and activities, however, remain the responsibility of the sponsor/CRO and should be documented:
It is a Sponsor/CRO responsibility to validate the study configuration and confirm that the study has been set up in accordance with the study protocol. This validation should be documented.
The different versions of systems used during the study and a synopsis of the differences between the versions should be stored as part of the study record in the sponsor (e)TMF.
A risk-based assessment documenting the decision to rely on VIRP should be carried out.
A checklist of the required functions (such as randomization module, patient ePRO module, coding module) for your trial on our epic1 level, and where necessary, individual features1.
When the inspector visits, they must have access to Viedoc. Regulatory inspectors have the legal right to view all data in the study – even patient data and hidden (anonymized) items in the audit trail. The study manager should invite the inspector to the Viedoc user role Regulatory Inspector when they arrive.
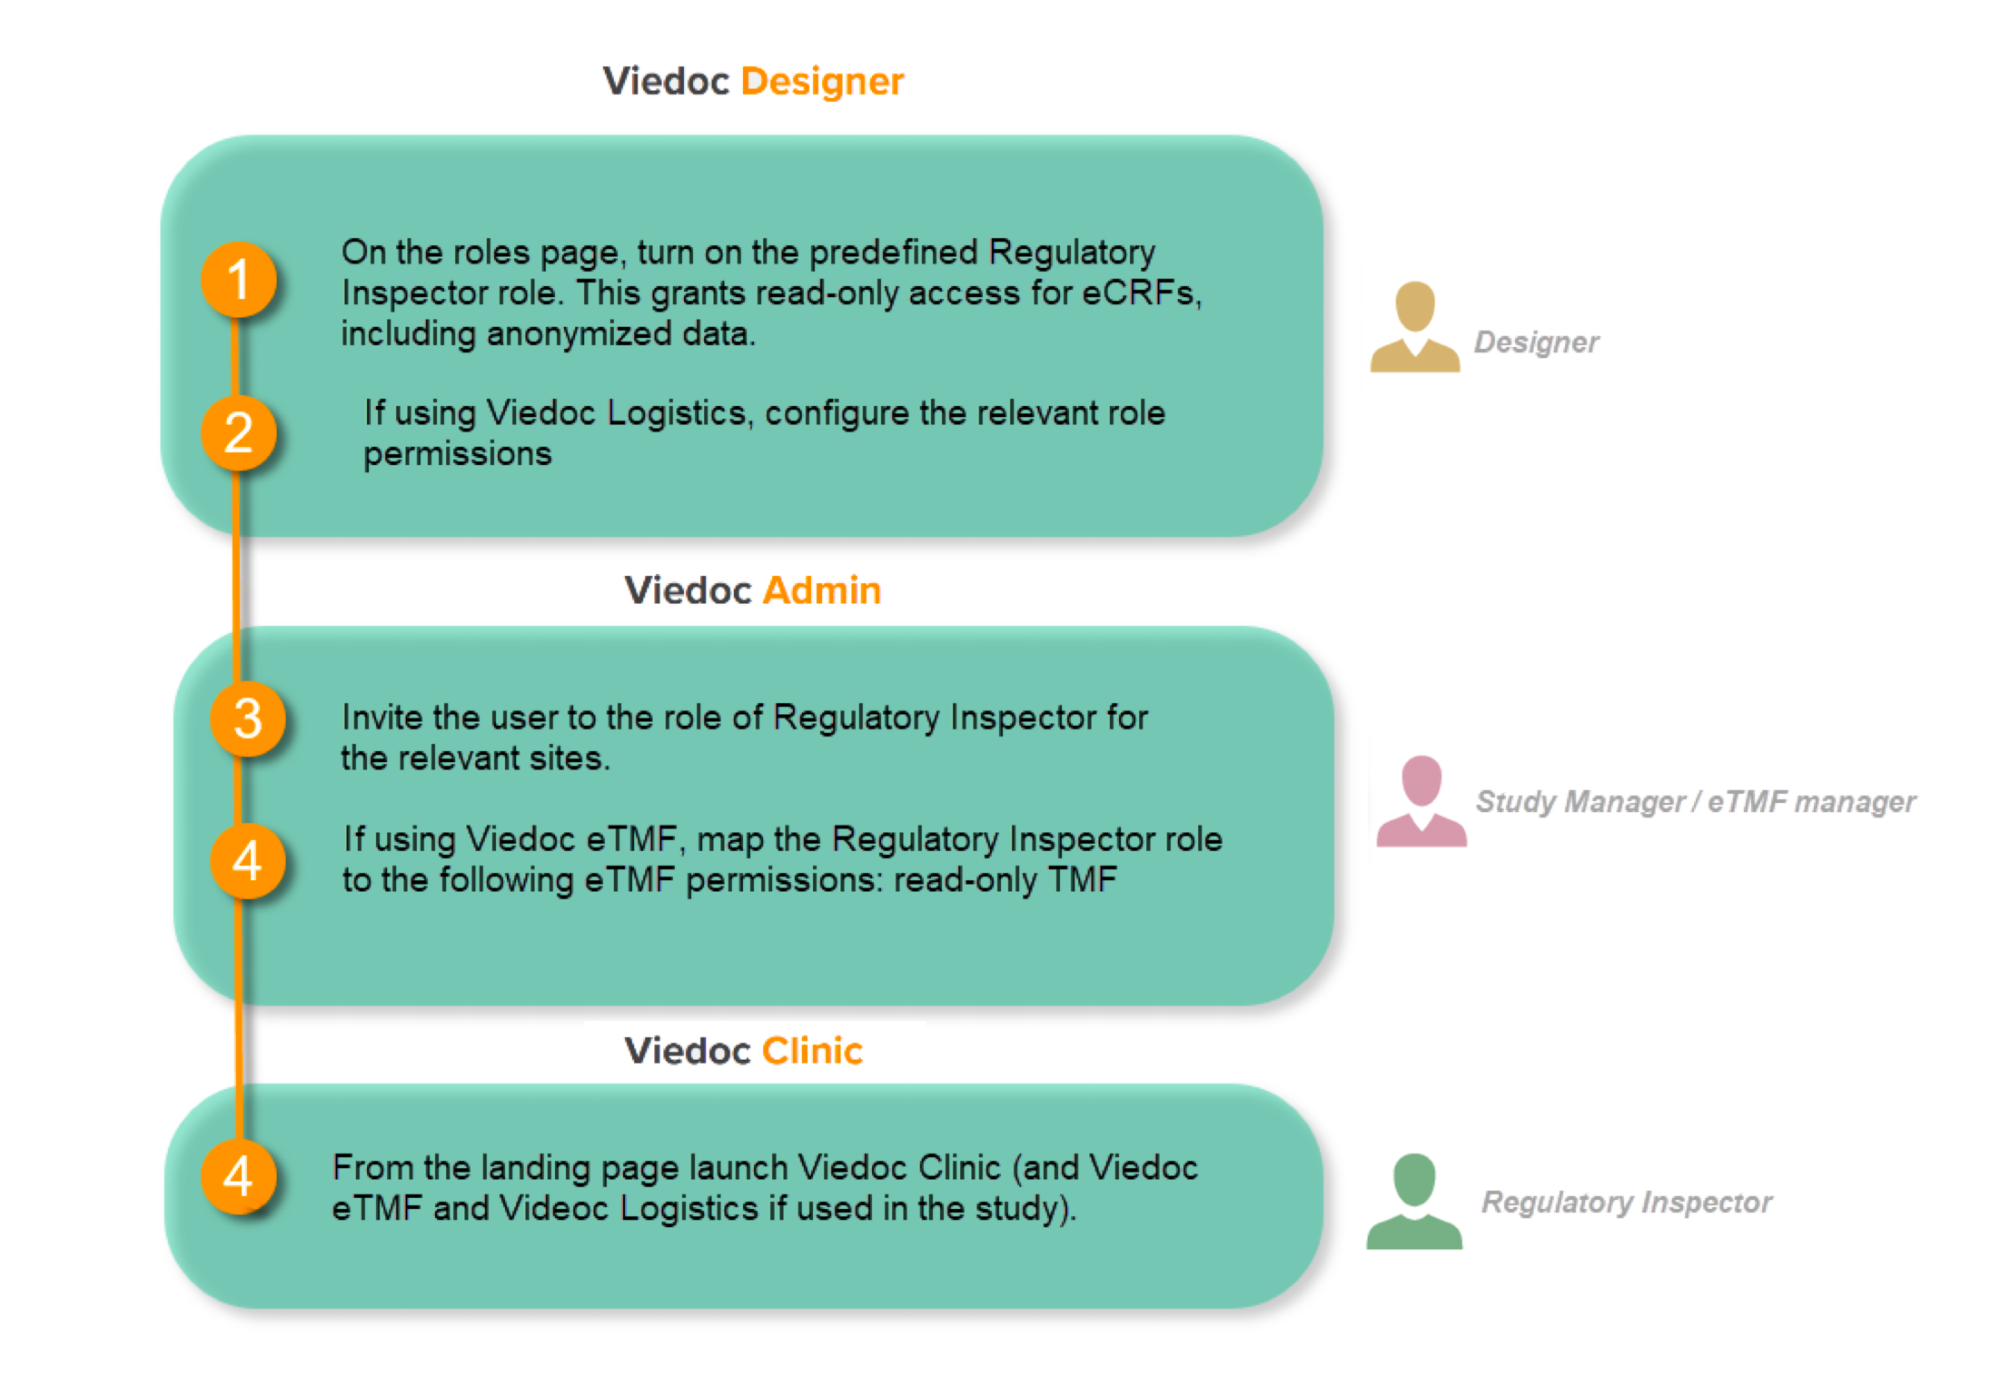
Follow these steps to ensure that the inspector has all the correct access permissions in Viedoc:
This step is performed by the Designer.
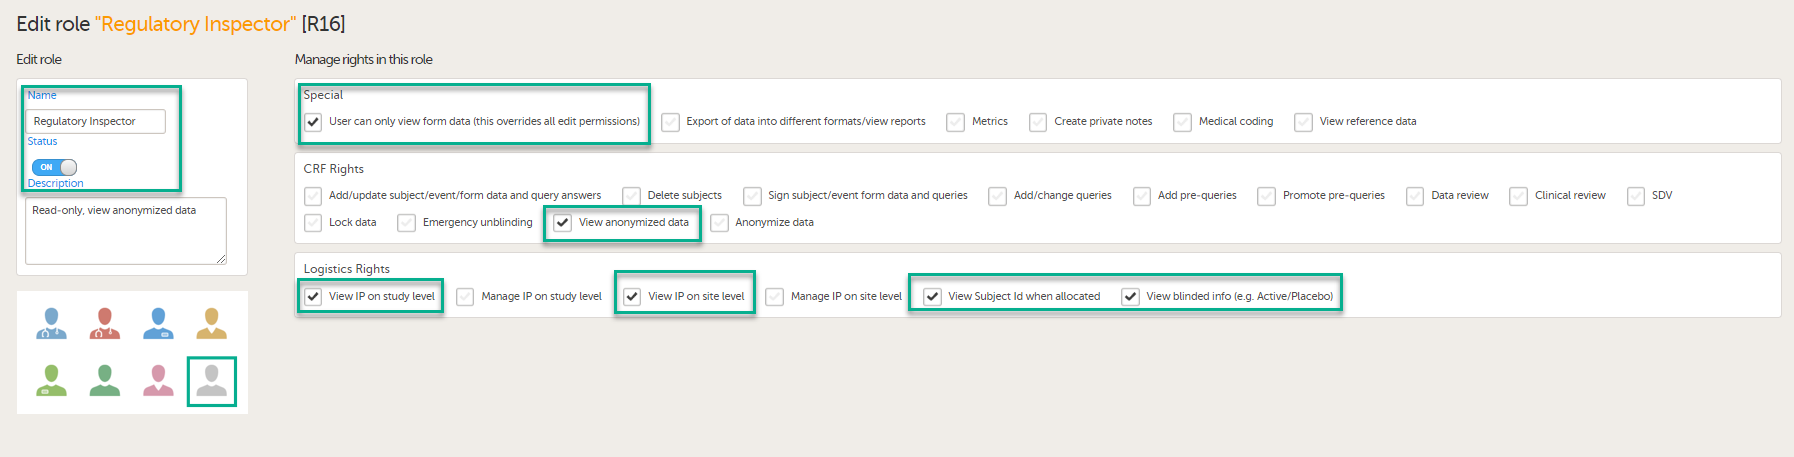
In Viedoc Designer, on the Roles page, configure the Regulatory Inspector user role and make sure it is turned on.
To allow the Regulatory Inspector access to study data, their role must be configured with Read-only for form data and View anonymized data and blinded data permissions on the Roles page.
If the study uses Viedoc Logistics, the following role permissions in Logistics Rights for the Regulatory Inspector role must be configured on the Roles page:
View IP (Investigational Product) on study level,
View IP on site level
View subject ID when allocated
View blinded info (e.g. Active/Placebo).
See the image below and Configuring roles.

Note! Should the inspector also require access to Viedoc Admin or Viedoc Designer, and the study is managed by a Viedoc representative, you are always welcome to contact your Viedoc representative if you need assistance.
These steps are performed by the Study manager.
In Viedoc Admin, the study manager invites the Regulatory Inspector to the study for all sites. See Managing users.
The inspector should also be invited to the study with the role of Unblinded Statistician, in order to have access to the randomization lists and be able to download them in Viedoc Admin.
Note! This role is only used for randomized studies, when it is necessary to have control over who has access to and can manage the randomization lists.
The inspector should also be able to access the eLearning. There is a requirement for customers to be able to present to regulatory inspectors, on request, the version of the eLearning used to train staff during the course of the study.
The Documentation tab under Study settings provides a list of all documentation and training sections.

The Regulatory Inspector role should be granted access to the relevant eLearning documentation on the Study settings page.
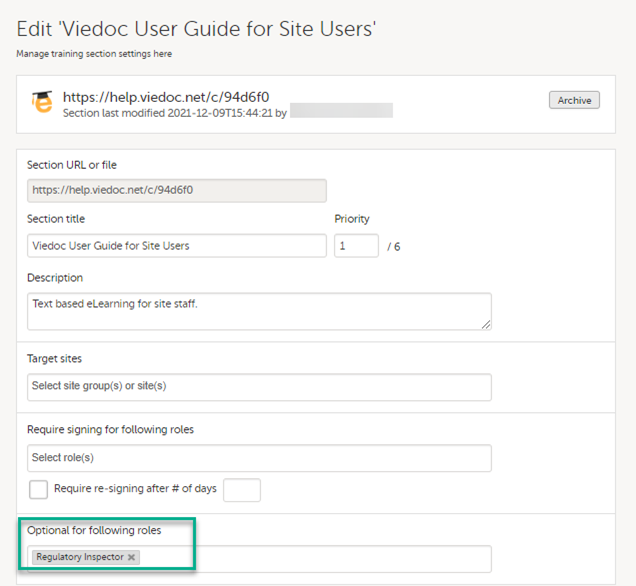
See the Viedoc Admin User Guide Setting up user documentation and training
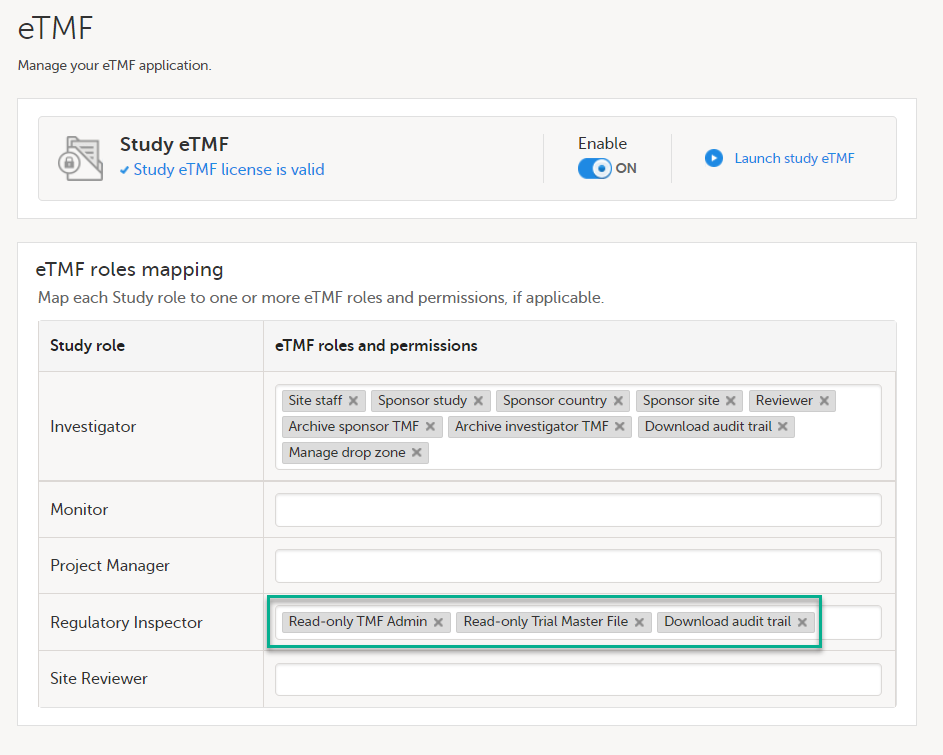
If the study uses Viedoc eTMF, the study manager/eTMF manager should map the Regulatory Inspector study role to an eTMF role with at least the following permissions: Read-only TMF Admin, Read-only Trial Master File and Download audit trail.

See Viedoc User Guide for eTMF Managers - Managing Viedoc eTMF - Mapping user roles.
These steps are performed by the Regulatory Inspector.
The regulatory inspector accepts the invitation and activates their account - see Viedoc User Guide for Site Users: Managing your Viedoc account
The inspector can now launch Viedoc Clinic and the Viedoc eTMF from the landing page.
1 At Viedoc, we publish our User Requirements Specification in an easy-to-understand format made up of epics, features, and user stories.
Epics describe an overall module within Viedoc, such as audit trail, ePRO, and medical coding.
Features describe a given functionality in more detail, such as Viedoc Connect, form link items, and email alerts.
User stories are the detailed, broken-down requirements used by the system developers when designing, implementing, and validating Viedoc.
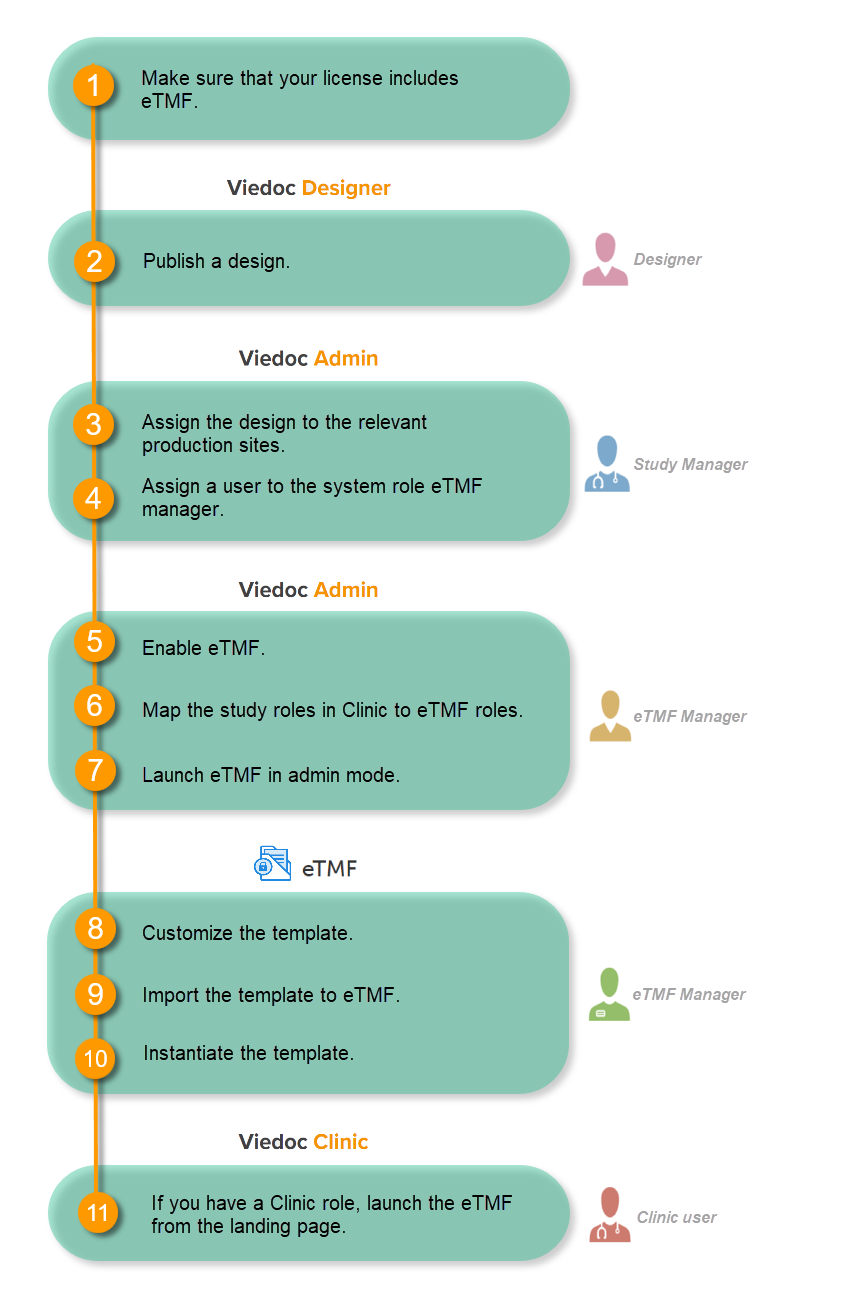
Make sure you have a valid license for using Viedoc eTMF.
This step is performed by the Designer.
Note! To publish the CRF design, you only need to have the roles configured and enabled, and a form added to the start event in your workflow (the form can be without any items at this stage). The actual CRF design can be added in subsequent versions.
See Publishing a study design.
This step is performed by the Study Manager.
This step is performed by the Study Manager.
See Managing users.
This step is performed by the eTMF Manager.
| 1 |
In the study details page, select the tools symbol in the eTMF area: 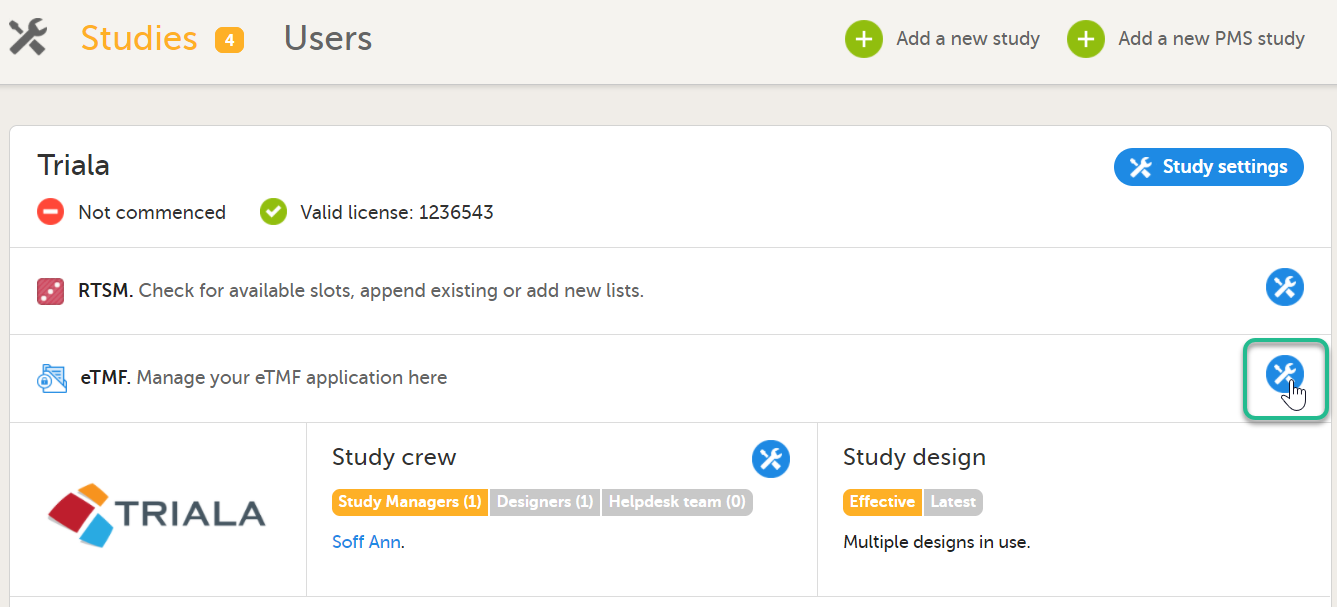 |
| 2 |
Toggle the Enable switch to ON in the eTMF settings pop-up: 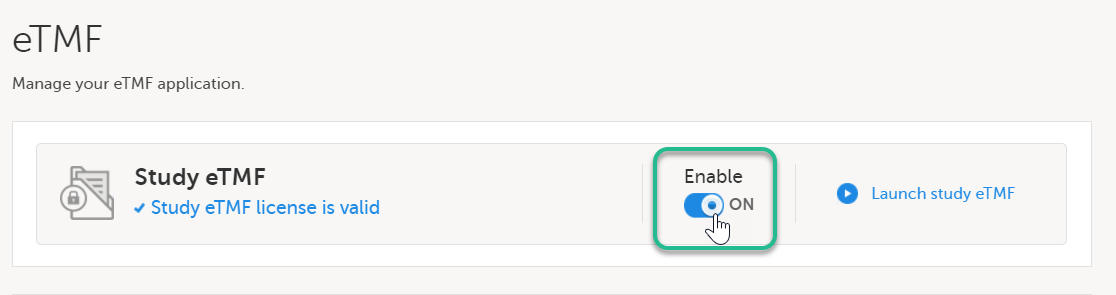
|
This step is performed by the eTMF Manager.
| 1 |
In the eTMF roles mapping area, select the eTMF roles and permissions that you want to map to the Viedoc study roles: 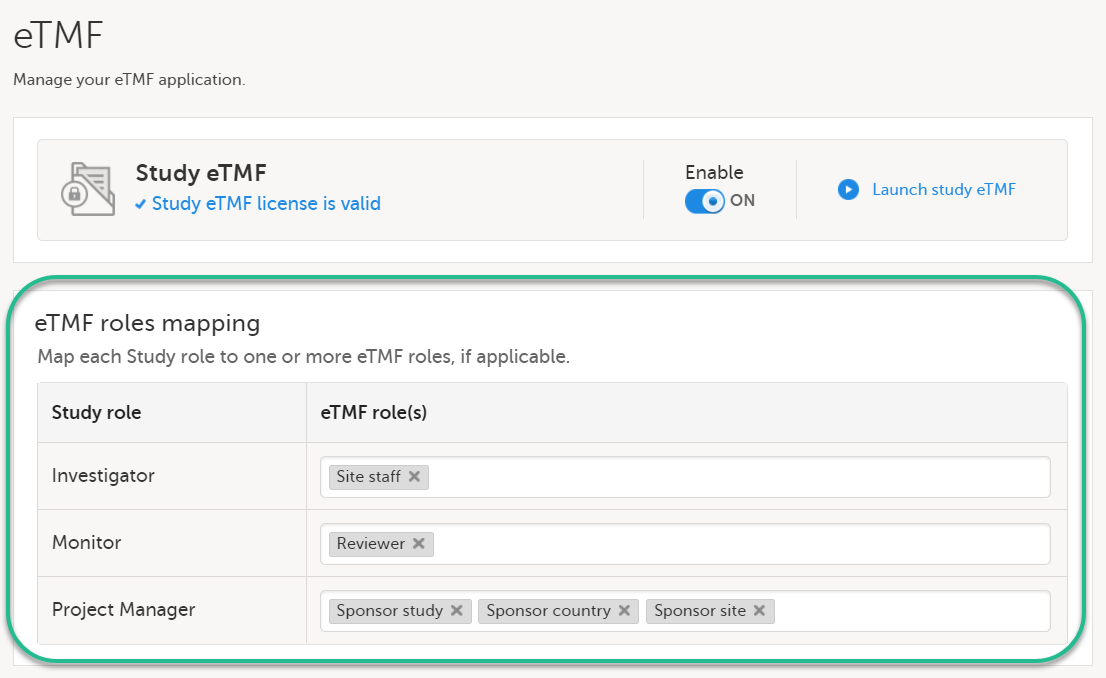
|
| 2 | Select Save changes. |
This step is performed by the eTMF Manager.
| 1 |
On the study details page, select the tools symbol in the eTMF area: |
| 2 | Select Launch study eTMF: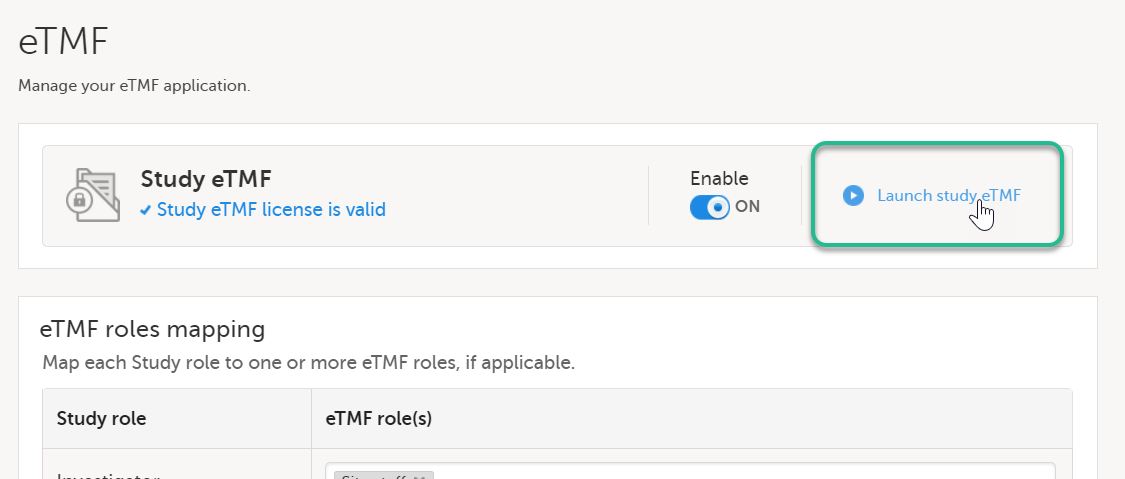 |
This step is performed by the eTMF Manager.
The first time you set up your eTMF application, you begin with a baseline template provided by Viedoc. This template is not intended to be used as it is, but to be adapted to the needs of your organization. See Viedoc-provided templates to download the template.
Once customized, import the template to eTMF, see Import the template.
Imported templates can be customized to fit your study needs.
To export a template for customization:
| 1 |
In Viedoc eTMF, select the TMF Admin view: 
|
| 2 |
Select the Templates tab: 
|
| 3 |
Select Export for the template you want to customize. The template is downloaded in Excel format. 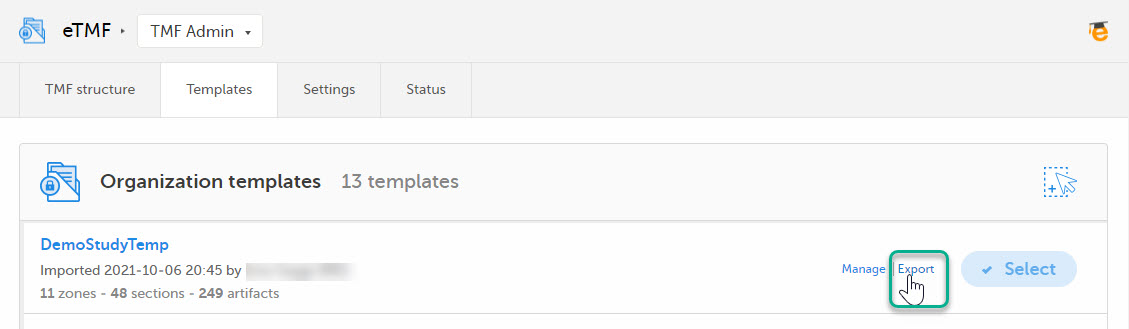
|
There are two types of templates:
It is recommended that you adapt the eTMF template to your specific documentation landscape. For example, you can customize, add, or delete zones, sections, and artifacts.
See also Customizing a template.
This step is performed by the eTMF Manager.
| 1 |
Select Import in Organization templates or Study templates, depending on what type of template you're importing. 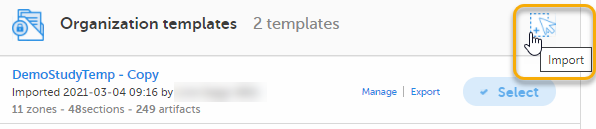
|
| 2 |
Once imported, select your template to make it available in the TMF structure. 
|
This step is performed by the eTMF Manager.
On the TMF structure tab, select the Instantiate button for the template.
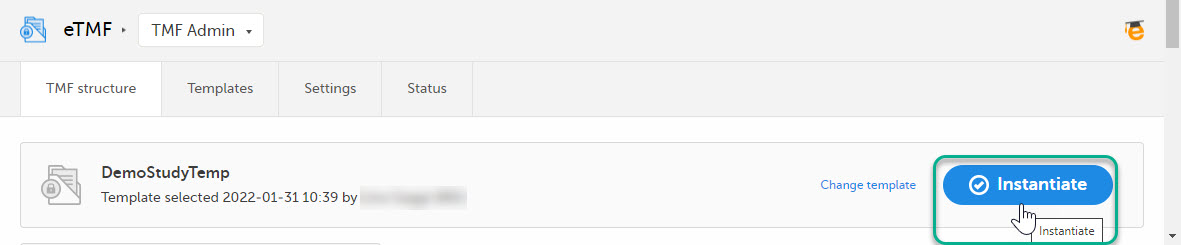
The template is now applied to the trial and the eTMF structure is available for end users to work with.
This step is performed by a Clinic user with a mapped eTMF role.
Select the eTMF icon on the Viedoc landing page:
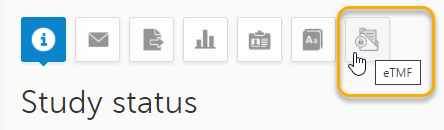
The eTMF application opens.
Thorough preparation for inspection of the EDC system used in a clinical trial is of great importance. The regulatory authorities see the EDC system used for a clinical trial as an important computerized system with regards to both patient safety and data integrity.
To assist in this process, Viedoc has developed the Viedoc Inspection Readiness Packet (VIRP) which provides you with the information you need to prepare for a regulatory inspection and to fulfil regulatory expectations and requirements. The VIRP introduction describes the contents of VIRP in more detail, and also talks about additional documentation you should provide. The VIRP introduction is included in VIRP.
If you decide to use VIRP we provide an eLearning lesson which describes the information needed step-by-step in order to fulfil inspector expectations: Inspection Readiness When Working in Viedoc
You can read about how to download the Viedoc Inspection Readiness Packet here: VIRP
You will need to give full read-only access and invite the inspector to the Regulatory Inspector role in the Viedoc system as described below.
This step is performed by the Designer.
To allow the Regulatory Inspector viewing access to study data, their role must be configured with read-only and view anonymized and blinded data permissions on the Roles page.
Note!
If the study uses Viedoc Logistics, the following role permissions in Logistics Rights for the Regulatory Inspector role must be configured on the Roles page:
See Configuring roles.
Note! Should the inspector also require access to Viedoc Admin or Viedoc Designer, you are always welcome to contact your Viedoc representative if you need assistance.
This step is performed by the Study Manager.
Note! For randomized studies, the inspector should also be invited to the study with the role of Unblinded Statistician, in order to have access to the randomization lists and be able to download them in Viedoc Admin.
See Managing users.
If the study is using the eTMF, map the Regulatory Inspector study role to an eTMF role with the permissions read-only TMF Admin, read-only Trial Master File and Download audit trail.
This step is performed by the Study Manager/eTMF Manager.
Launch Viedoc Clinic and Viedoc eTMF and Viedoc Logistics (if used in the study) from the landing page.
This step is performed by the Regulatory Inspector.
In Viedoc eTMF, the end user roles and permissions determine what kind of access a user has to artifact data (no access/read/write/review) on the different levels:
eTMF permissions can be assigned to users to give them special access or perform certain tasks.
To map the Viedoc study roles to eTMF roles and/or permissions:
| 1 |
In Viedoc Admin, click Show studies to open the study overview page: 
|
| 2 |
Click the eTMF settings button: 
|
| 3 |
In the eTMF roles mapping area, select the eTMF role(s) and/or permission(s) that you want to map to the Viedoc study roles: 
The available eTMF roles are:
The respective permissions for these eTMF roles are specified in the Excel template file, on the Role sheets. For more information, see Customizing a template. The available eTMF permissions are:
For more information, see eTMF Permissions. |
| 4 | Click Save changes. |
If your Viedoc license includes the Viedoc eTMF application, and if you have been assigned the role eTMF Manager, you can enable Viedoc eTMF for your trial.
To enable Viedoc eTMF:
| 1 |
In Viedoc Admin, click Show studies to open the study overview page:
|
| 2 |
Click the eTMF settings button:
|
| 3 |
To enable Viedoc eTMF for your study, toggle the Enable switch to ON in the eTMF settings dialog: 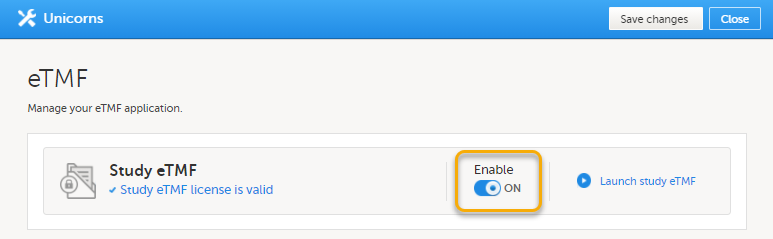
|
Before you launch Viedoc eTMF for the first time, you need to enable it and map the Viedoc study roles to the eTMF role(s) in Viedoc Admin. When Viedoc eTMF has been enabled, you can launch it.
To launch Viedoc eTMF in Admin mode:
| 1 |
In Viedoc Admin, click Show studies to open the study overview page:
|
| 2 |
Click the eTMF settings button:
|
| 3 |
Click Launch Study eTMF: 
|
| 4 |
When you launch Viedoc eTMF for the first time, this message is displayed: 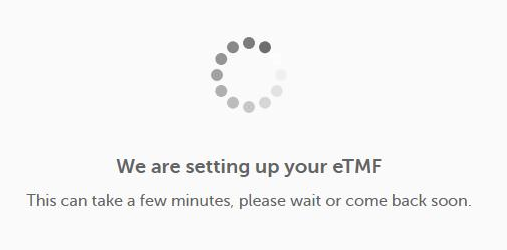
|
Alternatively, if you have a Clinic role in the study, to launch Viedoc eTMF:
| 1 |
Click the eTMF icon on the Viedoc landing page:
|
| 2 |
When the eTMF application opens, you might need to switch to the TMF Admin view: 
|
When the eTMF is ready to be archived, an eTMF Manager can lock the eTMF.
The eTMF can be considered complete and ready for archiving when all the documents are available, reviewed, and finalized, and no more documents are to be added to the study.
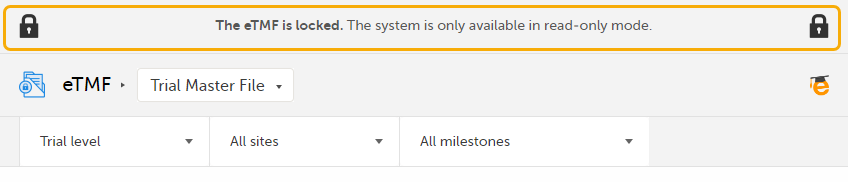
When the eTMF is locked, it is available to users who have access to it in read-only mode. This means that documents can still be viewed by users who have access to them according to their roles and permissions. It is still possible to grant users access to the eTMF. However, no changes can be made to the documents, nor to the eTMF structure, templates, or settings.
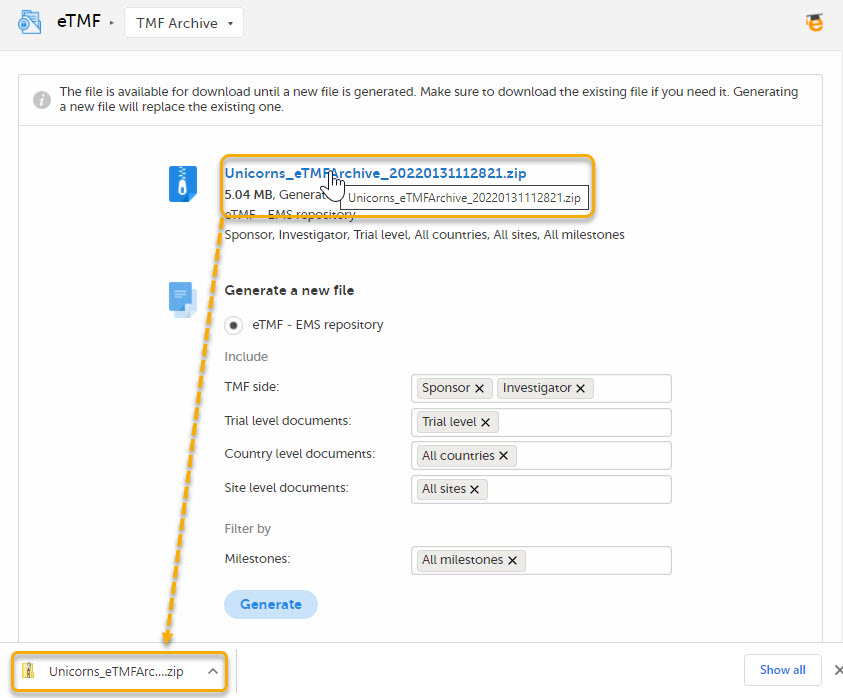
Users who have access to the eTMF Archive can still generate the eTMF-EMS repository and the complete audit trail report.
When the eTMF is locked, an information message is visible in all the views to indicate that the system is locked and available in read-only mode:
|
 |
|
 |
|
 |
The status of the eTMF is shown on the Status tab in TMF Admin, and it can be one of the following:
|
The eTMF is enabled but no structure is instantiated yet. | 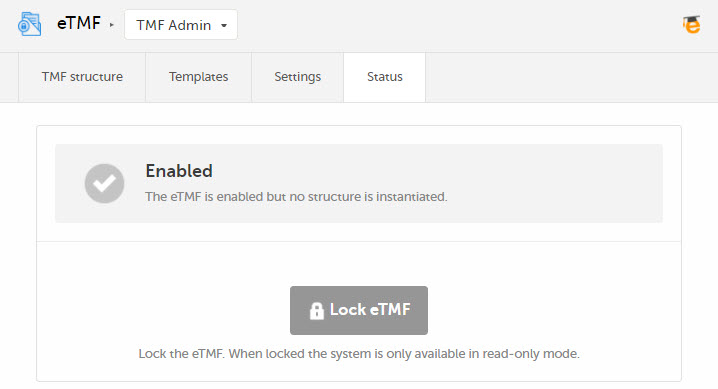 |
|
The eTMF is enabled and there is an instantiated structure. Users who have access to the eTMF can work according to their roles and permissions. | 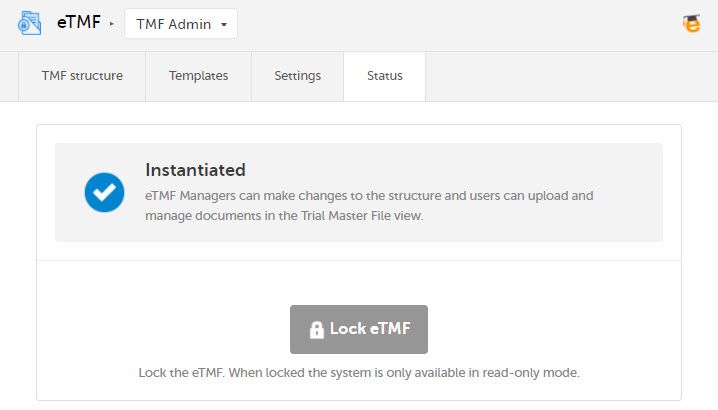 |
|
The eTMF is locked and available for users in read-only mode. Users with permissions to the TMF Archive view can generate and download the TMF-EMS repository and the complete audit trail report. | 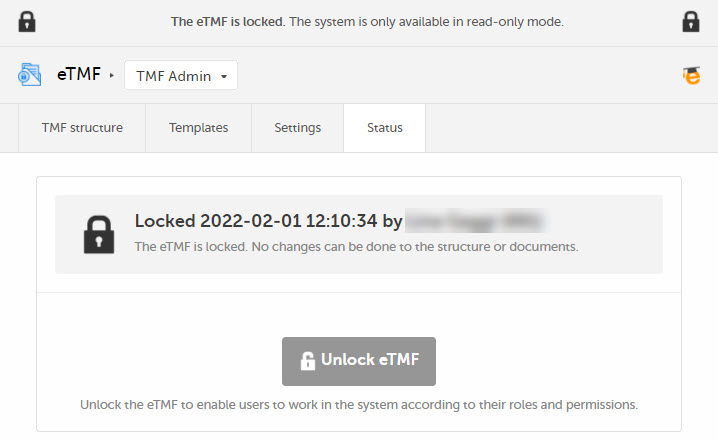 |
Note! It is possible to unlock a locked eTMF and then lock it again.
For traceability purposes, all lock and unlock actions are audit trailed and available in the complete audit trail report. You can generate and download the report from the TMF Archive view.
Note! The eTMF can only be locked by an eTMF Manager.
To lock the eTMF:
| 1 | Launch the eTMF and navigate to the TMF Admin view. |
| 2 |
Navigate to the Status tab. This tab shows the TMF status and provides the possibility to lock/unlock the study eTMF. |
| 3 |
Click the Lock eTMF button. 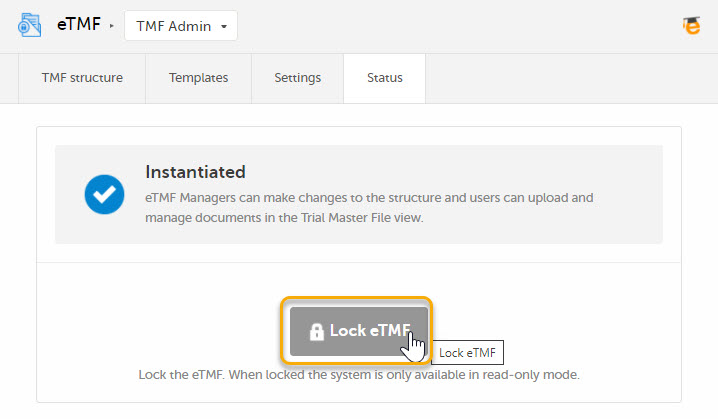
|
| 4 |
A dialog opens. Enter a reason for locking the eTMF and confirm. 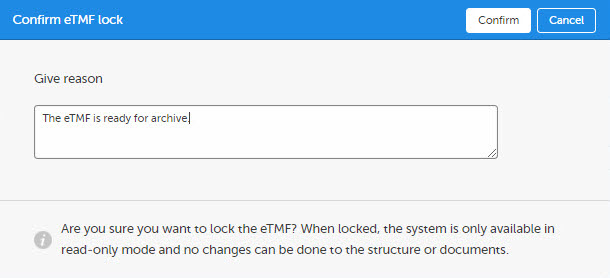
|
| 5 |
The status of the eTMF changes to Locked, and information about when the system was locked and by whom is displayed on the Status tab. 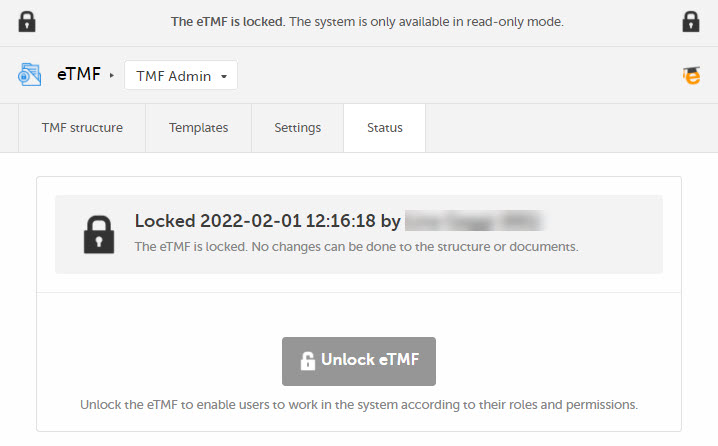
|
Note! The eTMF can only be unlocked by an eTMF Manager.
To unlock the eTMF:
| 1 | Launch the eTMF and navigate to the TMF Admin view. |
| 2 |
Navigate to the Status tab. This tab shows the TMF status and provides the possibility to lock/unlock the study eTMF. |
| 3 |
Click the Unlock eTMF button. 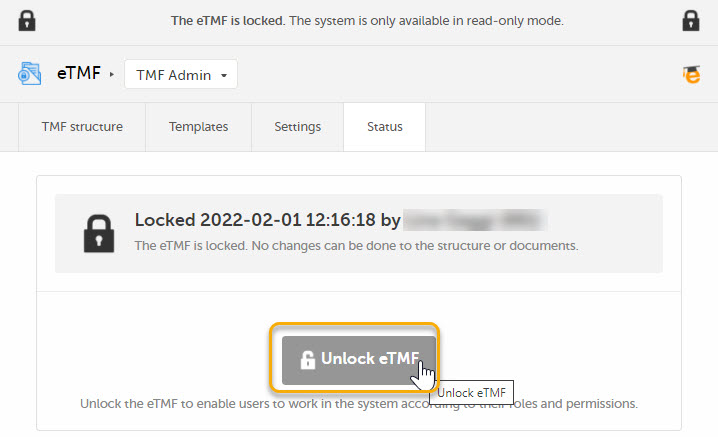
|
| 4 |
A dialog opens. Enter a reason for unlocking the eTMF and confirm. 
|
| 5 |
The status of the eTMF changes to the status it had before locking it. 
|
The Viedoc Share feature is available to eTMF users for sharing documents with Viedoc Me users or Viedoc Clinic users for information sharing or for collecting signatures.
These concepts are used in the following text:
An eTMF user with the permission Manage document sharing for Viedoc Clinic users or Manage document sharing for Viedoc Me users can share documents. The permissions associated with your user role are set up by the eTMF Manager.
A document can only be shared if:
To enable document sharing for an artifact:
| 1 | In the TMF Admin view, when maintenance mode is activated, select the Edit button that appears when you hover over an artifact in the TMF structure. |
| 2 | In the DOCUMENT SHARING section of the Edit artifact window, select the users that the artifact can be shared with - Viedoc Clinic users, Viedoc Me users, or both. |
| 3 | Make sure all required fields are filled in, and select Save. |
| 4 | Select Apply all changes and to make the change take effect. |
The templates currently available for download are for non-device studies and device studies.
You can download the Viedoc Non-device template here.
You can download the Viedoc Device template here.
The Viedoc-provided eTMF templates are baseline templates in Excel format that you can download and customize to cover your organization's needs.
The templates are of standard structure based on the TMF Reference Model by CDISC, and are created according to best practices in Viedoc eTMF considering artifacts and the roles’ permissions to the artifacts.
The templates include artifacts that are meant to be used by the sponsor TMF and Investigator Site File (ISF). The Site staff role is intended to be assigned to Site personnel so that they can upload documents to the ISF. The other roles can be used for different purposes when working on the sponsor TMF.
The template can be used off the shelf or with modifications to suit your study needs. Ensure that your approach is properly validated for your study. For further information on how to handle and use the templates, refer to the lessons around templates in Viedoc User Guide for eTMF Managers.
The eTMF template file defines which zones, sections, and artifacts that your eTMF will have. Furthermore, it defines the permissions associated with the eTMF user roles.
The eTMF template is implemented in an Excel file.
As an eTMF Manager, you have the permission to import, select, instantiate, export, rename, and delete templates.
With your Viedoc eTMF license, a baseline template is provided. This template is not intended to be used as it is, but to be adapted to your organization's needs. See Viedoc-provided templates for more information.
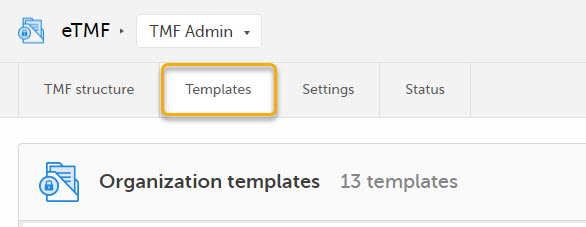
To access the templates in Viedoc eTMF, click the Templates tab at the top of the page:
In Viedoc eTMF, there are two types of templates:
It is recommended that you adapt the eTMF template to your specific documentation landscape. For example, you can customize, add, or delete zones, sections, and artifacts.
However, the following requirements must be fulfilled for Viedoc eTMF to successfully validate the template:
Note! If the following special characters (\/:*?<>|"\r\n) are used in the TMF template, they will be replaced by an underscore (_) during archive generation to ensure the archive completes successfully.
This sheet is based on the TMF Reference Model. Zones, sections, and artifacts can be customized, added, and/or deleted.
These are the requirements for the columns:
| Zone # | Must be unique |
| Zone Name | Must be unique |
| Section # |
Must be unique It consists of two digits that represent the zone number that the section belongs to, followed by a separator and the section number. |
| Section Name | Must be unique within the zone |
| Artifact # |
Must be unique It consists of two digits that represent the zone number, followed by a period (.), then two digits for the section number, a period (.) and the artifact number. Example: |
| Artifact name | Must be unique within the section |
|
Alternate names (artifact also commonly known as) |
This is an alternative name for the artifact. This column is optional. If it exists, its value can be left empty. Note! This column is not currently mapped to system functionality. It is not currently possible to change it in maintenance mode. |
| Definition / Purpose |
A free-text description of the artifact To view the definition in Viedoc eTMF, go to the TMF structure tab, navigate to the artifact, and select View. 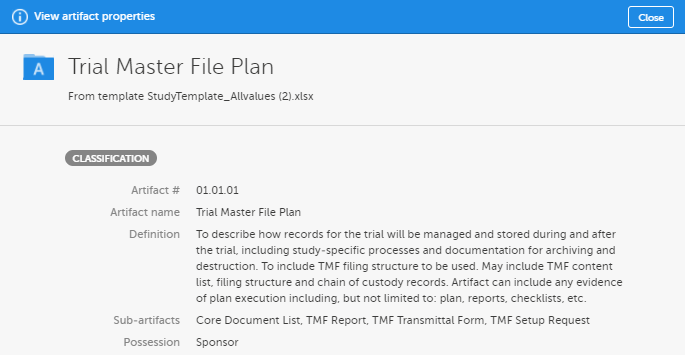
This column must have values. |
| Sub-artifacts |
A newline-separated list of sub-artifacts To view the list of sub-artifacts in Viedoc eTMF, see above. Sub-artifacts can be used by eTMF users to further classify documents. This column can be left empty. |
|
Core or Recommended for inclusion ICH Code |
These columns are related to GCP. These columns can be left empty. Note! This column is not currently mapped to system functionality. It is not currently possible to change it in maintenance mode. |
| Unique ID Number |
An optional unique ID number for the artifact. This number is validated as follows by Viedoc eTMF:
|
|
Sponsor Document Investigator Document |
These columns define what side of the TMF the artifact is: sponsor or investigator (according to GCP). The values can be These columns must have values. |
|
Process Based Metadata - Number Process Based Metadata - Name |
These columns define trial processes that artifacts can be linked to. This can be useful for trials where records are filed across multiple zones. Note! These columns are not currently mapped to system functionality. It is not currently possible to change them in maintenance mode. |
|
Trial Level Document Trial Level MILESTONE/EVENT Country/ Region Level Document Country Level MILESTONE/EVENT Site Level Document Site Level MILESTONE/EVENT |
These columns define which level (Trial/Country/Site) the document should be filed to and which milestones correspond to each. When a Trial/Country/Site level document in the V 3.2.1 sheet in the template is set to:
|
| Dating Convention |
Defines the dating convention that is used in the metadata of documents uploaded to Viedoc eTMF This column can be left empty. If it is empty, the default dating convention will be the version date. If you select New in the Dating convention field in the Edit artifact window, you can, for example, enter an expiration date as the dating convention. |
This sheet contains Viedoc-specific properties for each artifact.
These are the requirements for the columns:
| Artifact # | Unique artifact number as defined on the V 3.2.1 sheet. |
| Sign |
This column is not yet used in Viedoc eTMF, but it must have values. The following values are accepted: |
| Applicable in Trial |
Defines if the artifact is applicable at trial level. The column must have values. The following values are accepted: |
| Applicable in Country |
Defines if the artifact is applicable at country level. The column must have values. The following values are accepted: |
| Applicable at Site |
Defines if the artifact is applicable at site level. The column must have values. The following values are accepted: |
| Metadata properties |
Additional metadata for the artifact. This column can be left empty. To view the additional metadata in Viedoc eTMF, go to the TMF structure tab, navigate to the artifact, and click View. 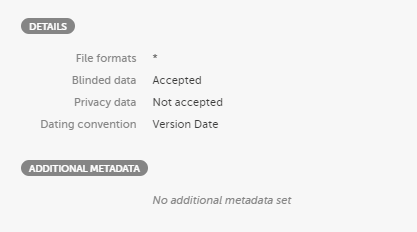
|
| File formats |
A pipe-separated list of accepted file formats for the artifact. Examples:
|
| Accept blinded data |
This column is not yet used in Viedoc eTMF. It defines if blinded data is accepted for the artifact. The following values are accepted: |
| Accept privacy data |
This column is not yet used in Viedoc eTMF. It defines if privacy data is accepted for the artifact. The following values are accepted: |
This is an optional sheet. It includes Viedoc-specific properties for each milestone.
If this sheet is not provided, the system will create a list of milestones, under the group Other, based on the following specified milestones in the V 3.2.1 sheet:
These are the requirements for the columns:
| Id | Unique milestone Id. This column is mandatory. |
| Name | Unique milestone name. This column is mandatory. |
| Group | One of the four milestone groups defined in the CDISC Reference Model. This column is mandatory, and the following values are accepted: Start UP, Study Conduct, Close Out, Other |
| Trial description | Description of trial-level documents this milestone includes. This column can be left empty. |
| Country description | Description of country-level documents this milestone includes. This column can be left empty. |
| Site description | Description of site-level documents this milestone includes. This column can be left empty. |
The role sheets define the permissions associated with each of the eTMF roles.
These are the role sheets:
These are the requirements for the columns:
| Artifact # | Unique artifact number as defined on the V 3.2.1 sheet. |
| Study |
Defines the permission of the role on study/trial level. The following values are accepted:
|
| Country |
Defines the permission of the role on country level. The following values are accepted:
|
| Site |
Defines the permission of the role on site level. The following values are accepted:
|
To import a template:
| 1 |
In Viedoc eTMF, select the TMF Admin view. 
|
| 2 |
Navigate to the Templates tab. 
|
| 3 |
Click the import button.

|
To export an eTMF template:
| 1 |
In Viedoc eTMF, select the TMF Admin view:
|
| 2 |
Click the Templates tab at the top of the page:
|
| 3 |
Click on Export for the template that you want to export: 
|
When an eTMF template is selected, it is made available on the TMF structure tab. There, you can browse through the structure and view the properties of the zones, sections, and artifacts to make sure that the structure corresponds to your needs before you instantiate it.
To select a template:
| 1 |
In Viedoc eTMF, select the TMF Admin view: 
|
| 2 |
Click the Templates tab at the top of the page: 
|
| 3 |
Click the Select button for the template. 
|
| 4 |
When the template has been selected, the Select button is highlighted. 
|
| 5 |
You can now view and browse through the corresponding structure on the TMF structure tab. 
If you need to make changes to the structure, modify the Excel template file and import it to Viedoc eTMF. When you have made sure that the structure corresponds to your needs, you can choose to instantiate it. |
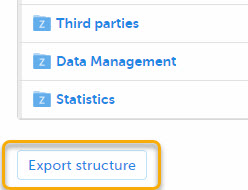
When a template has been selected, you can export the complete eTMF structure to an Excel file from the TMF structure tab by clicking Export structure at the bottom of the page:
To rename a template:
| 1 |
In Viedoc eTMF, select the TMF Admin view: 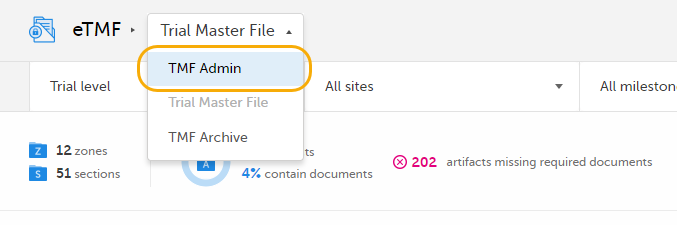
|
| 2 |
Click the Templates tab at the top of the page: 
|
| 3 |
Click Manage for the template that you want to rename: 
|
| 4 |
In the Manage Template pop-up, click Edit: 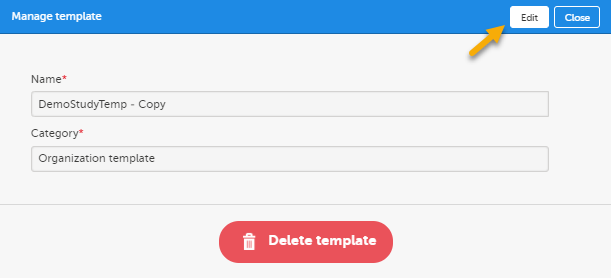
|
| 5 | Change the template name. |
| 6 | Click Save changes. |
To delete an eTMF template:
| 1 |
In Viedoc eTMF, select the TMF Admin view:
|
| 2 |
Click the Templates tab at the top of the page:
|
| 3 |
Click Manage for the template that you want to delete: 
|
| 4 |
Click Delete template in the pop-up: 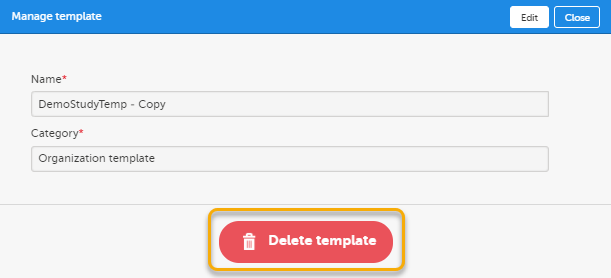
|
| 5 | Click Yes to confirm. |
To instantiate an eTMF structure, that is to apply it to a study:
| 1 |
In Viedoc eTMF, select the TMF Admin view. 
|
| 2 |
Click the TMF structure tab at the top of the page. 
|
| 3 |
Click the Instantiate button. 
|
| 4 | The structure is now applied to the study and available for end users to work with. |
Note! Once a structure has been instantiated for a study, it cannot be un-instantiated. To make changes to an instantiated eTMF structure, you need to switch on Maintenance mode. For more information, see Editing a structure.
To edit an instantiated eTMF structure, you need to operate in maintenance mode.
To activate maintenance mode, click the Maintenance switch on the TMF structure tab in the TMF Admin view.
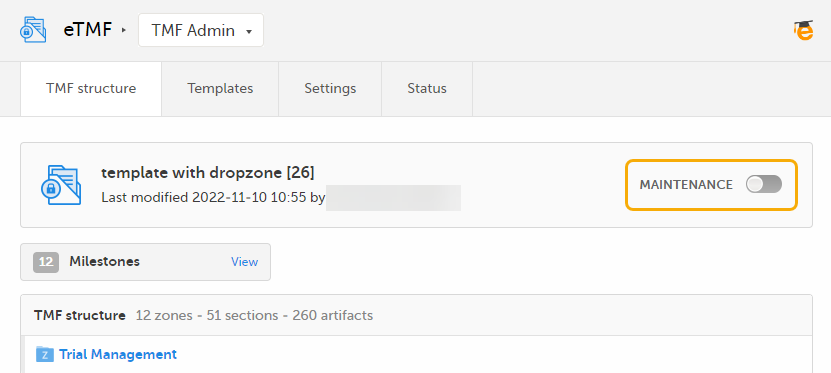
When maintenance mode is activated, all non-applied changes to the active structure are shown.
The edits that you can make on the structure level are as described in the following sub-sections.
To edit the structure name:
| 1 |
In maintenance mode, select Edit on the structure level. 
|
| 2 |
In the window that is displayed, edit the structure name and select Ready. 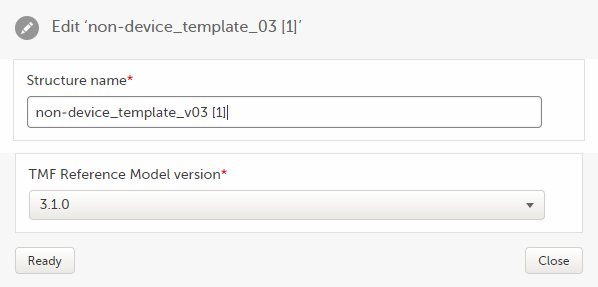
|
To edit the version of the TMF reference model:
| 1 |
In maintenance mode, select Edit on the structure level.
|
| 2 |
In the window that is displayed, select the applicable version of the TMF reference model from the dropdown menu and select Ready. 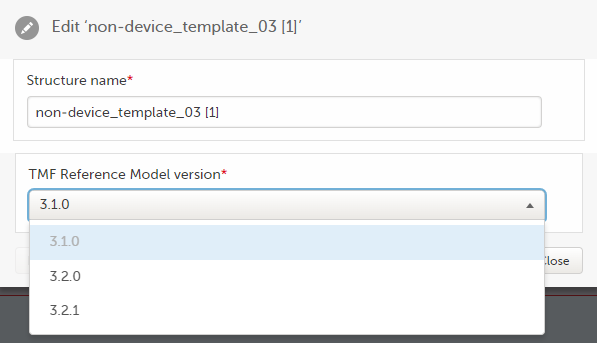
|
To edit a zone or section:
| 1 |
When maintenance mode is activated, select the Edit button that appears when you hover over a zone or section in the TMF structure. 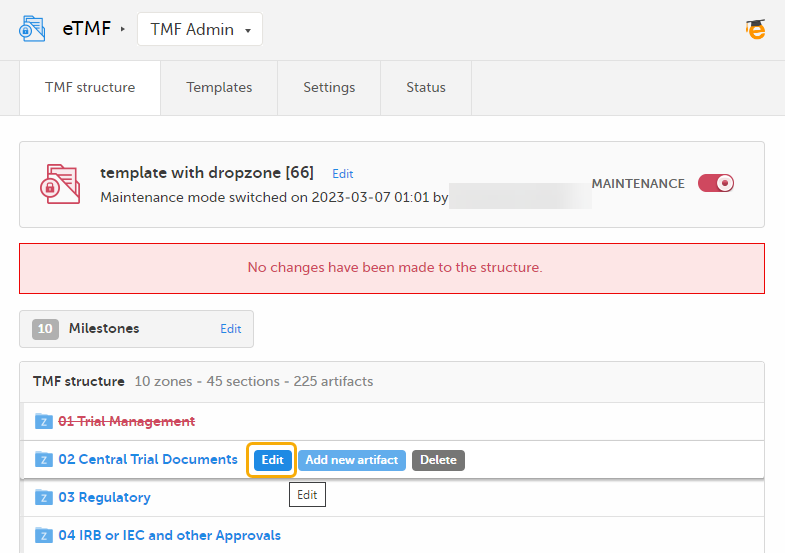
|
| 2 |
In the Edit window, make your changes to the zone or section name. 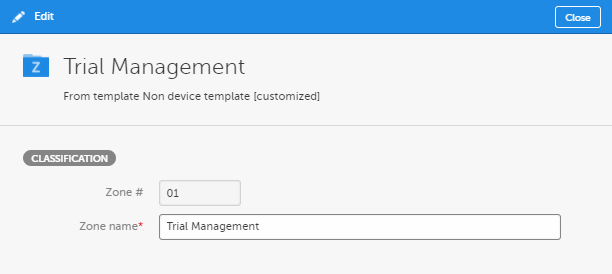
|
| 3 | Select Save changes. |
To edit an artifact:
| 1 |
When maintenance mode is activated, select the Edit button that appears when you hover over an artifact in the TMF structure. 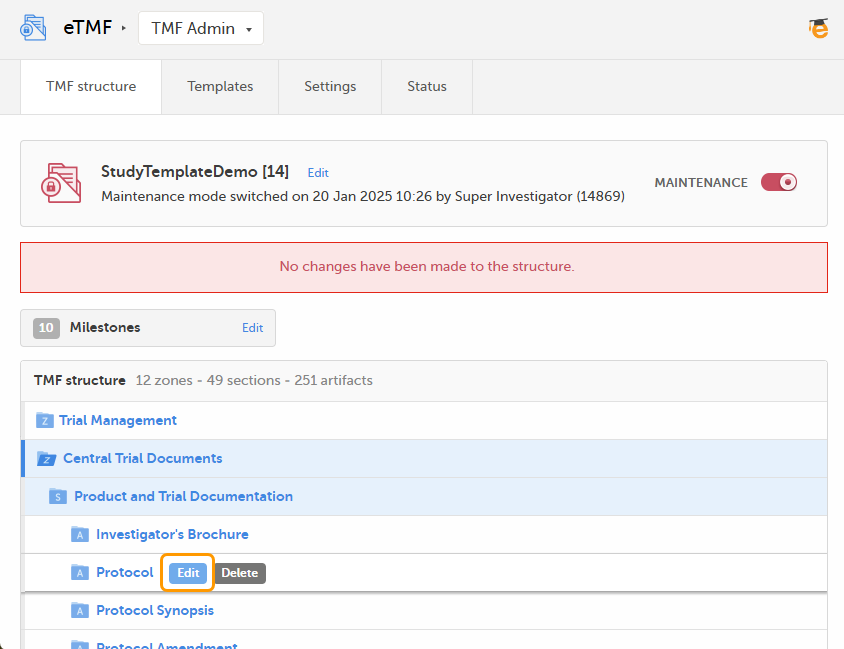
|
| 2 |
Make your changes in the Edit artifact window. 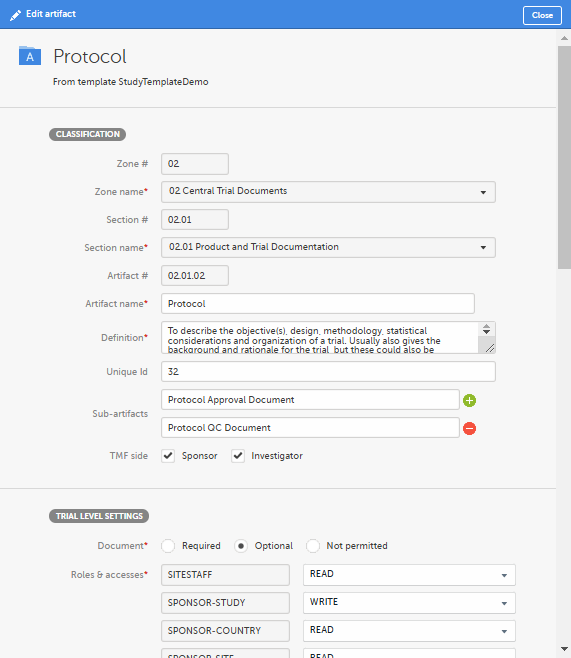
For more information about the artifact properties, see Customizing a template, specifically the sections The V 3.2.1 sheet and Role sheets. |
| 3 | Click Save. |
To add an artifact:
| 1 |
To add a new artifact to a specific zone or section, click the Add new artifact button that appears when you hover over a zone or section in the TMF structure. 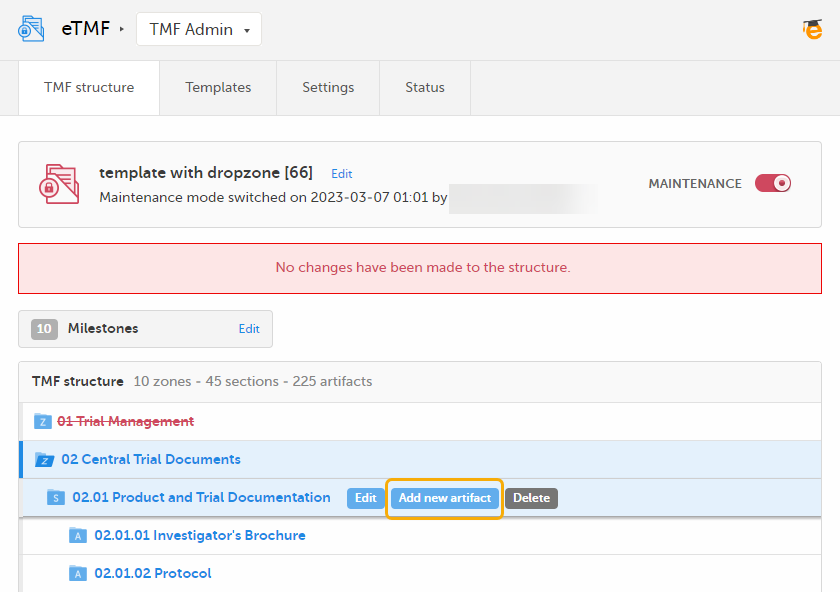
Alternatively, click Add new artifact at the bottom of the structure. 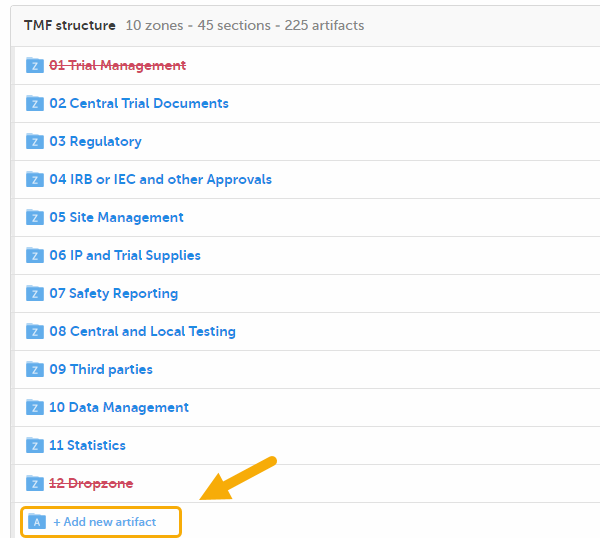
|
| 2 |
Fill in the artifact information in the Add new artifact window. 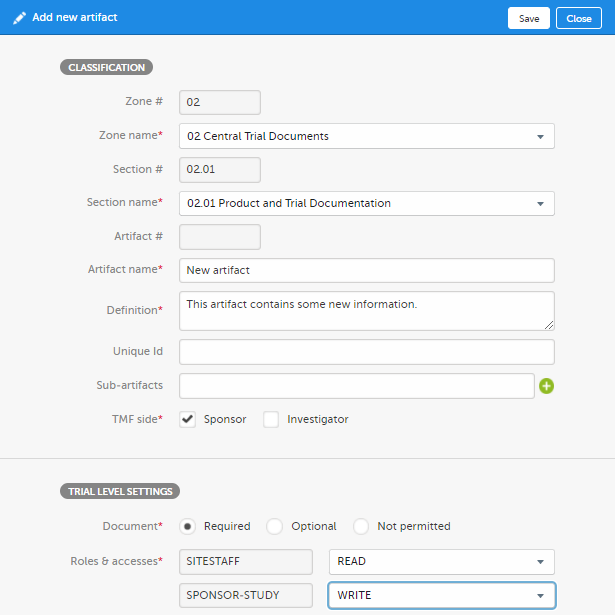
If you select New in the Zone name or Section name dropdown menu, you can create a new zone or section where the artifact will be added. Note! The required fields are marked with red. |
| 3 | Click Save. |
To delete artifacts:
| 1 |
Click the Delete button that appears when you hover over a zone, section, or artifact. 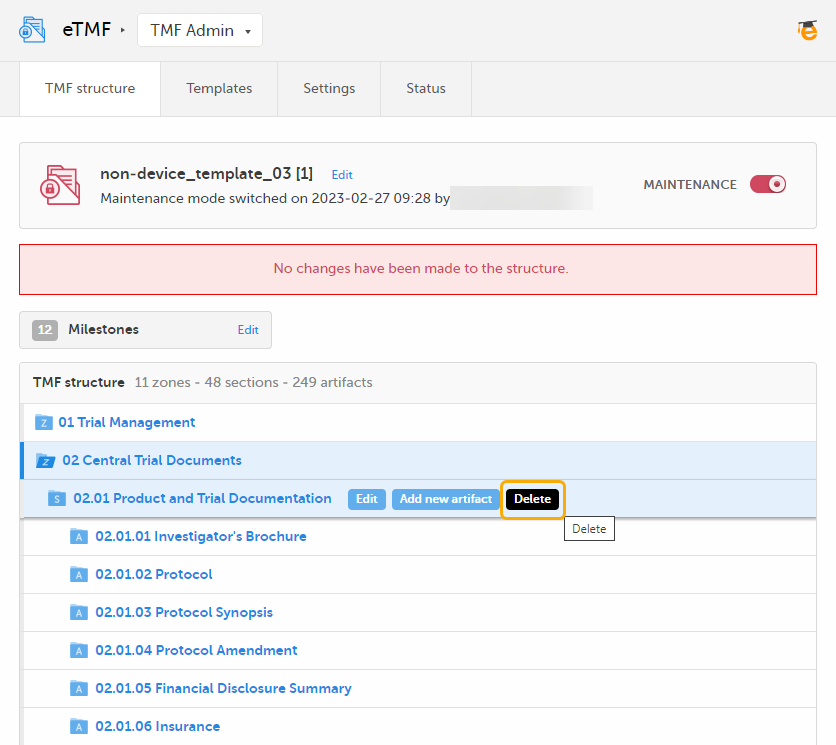
|
| 2 |
The zone or section and all its artifacts are then marked as red strike-through text in the TMF structure. 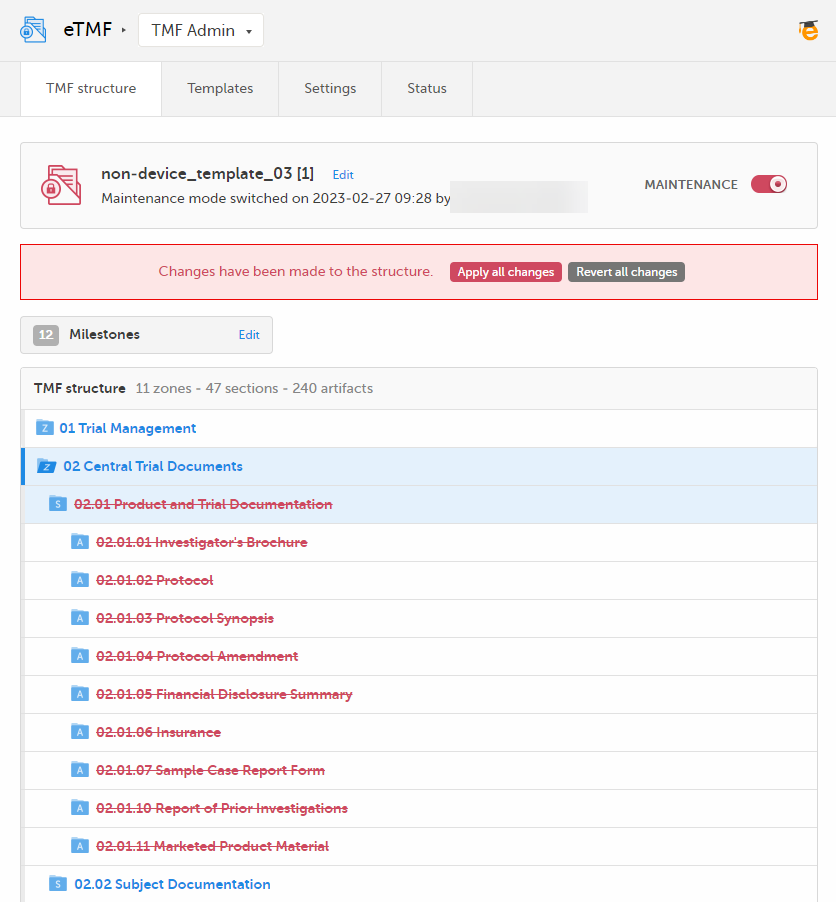
|
| 3 |
If you delete on zone or section level, all artifacts in the zone or section are deleted when you apply the changes to the structure. If you delete on artifact level, only that specific artifact is deleted when you apply the changes to the structure. If you delete the only artifact in a section, the section is also deleted. Likewise, if you delete the only section or artifact in a zone, the zone is also deleted. For information about how to apply or revert changes to the structure, see Applying or reverting changes to the structure. |
Note! If you delete a zone, section, or artifact, its associated documents will not be deleted. Instead, the end user view will display the zone, section, and artifact as deleted to indicate that the documents in it should be moved.
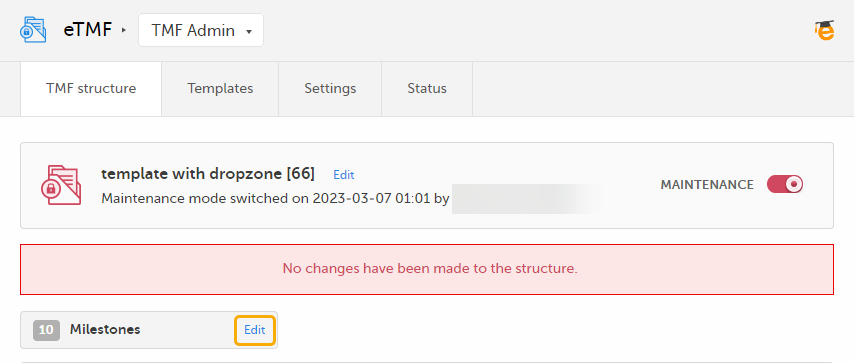
Milestones are a tool for filtering documents. Milestones are defined at the artifact level, and all documents within that artifact will have the same milestone. Milestones may be used to search for documents, to categorize documents within a study timeline, or to filter audit trail reports or EMS repositories.
To manage the milestones defined for the study, click Edit in the Milestones section on the TMF structure tab.
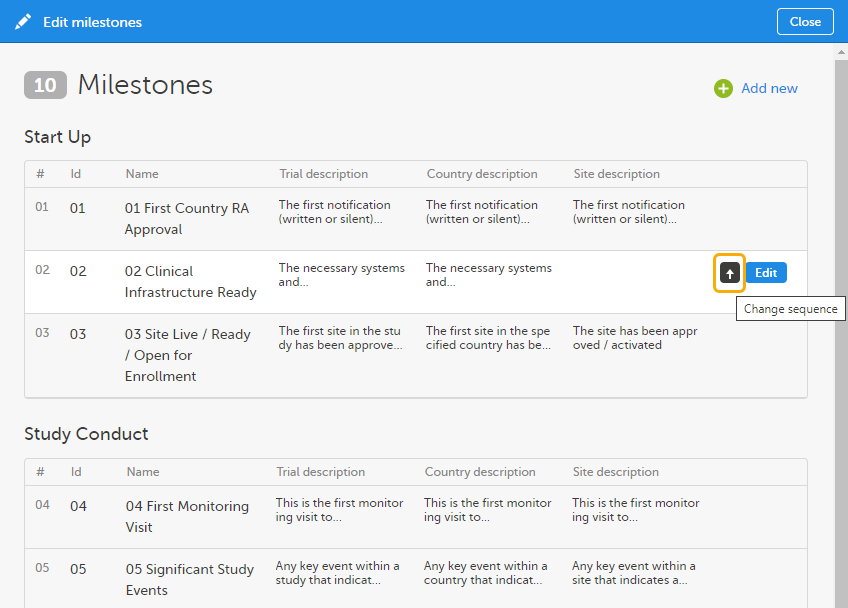
The sequence of milestones is how they will appear in the milestones filter in the Trial Master File view, as well as in the milestones dropdown menus in the View artifact properties and the Edit artifact windows in the TMF Admin view.
To change the sequence of milestones within the group, click the up arrow on a milestone level. The changed sequences will be highlighted in red until the changes are applied to the structure or reverted
To edit the properties of a milestone, click Edit at that milestone level.
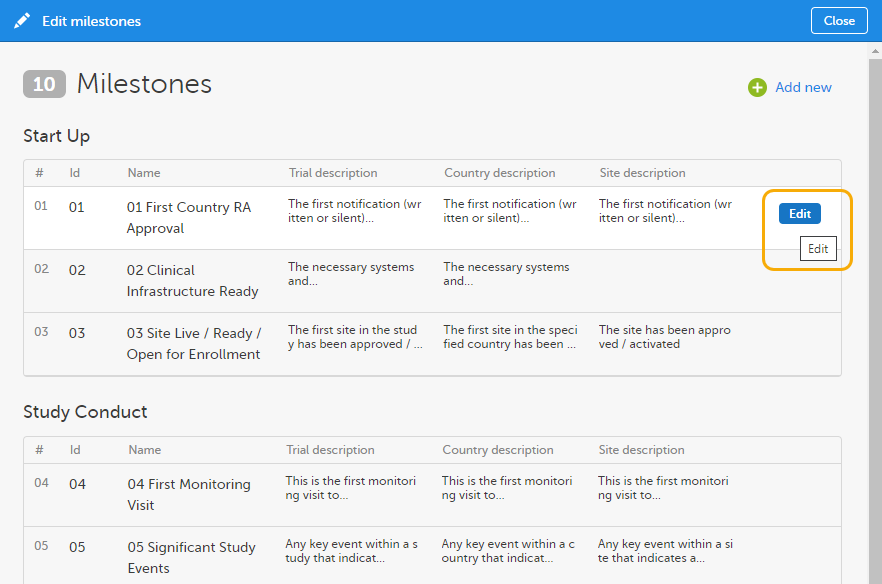
The following applies when editing the properties:
To add a new milestone to the list, click Add new in the Edit milestones window.
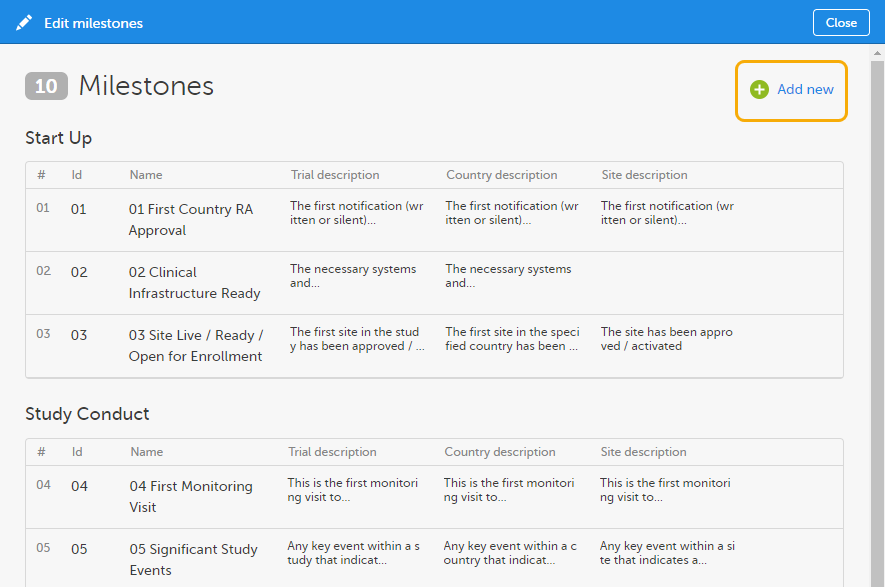
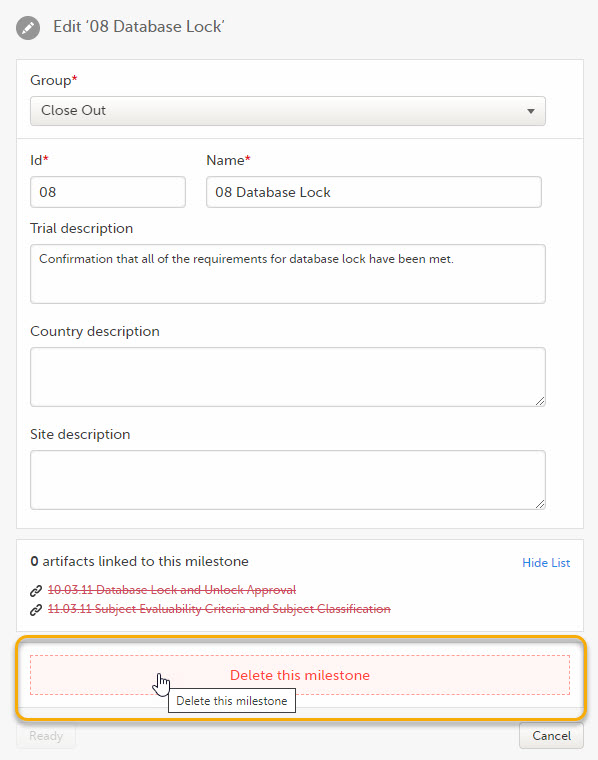
Milestones that are linked to active artifacts cannot be deleted. To delete a milestone, you must remove these links either by deleting the artifact linked to it or by linking the artifact to another milestone.
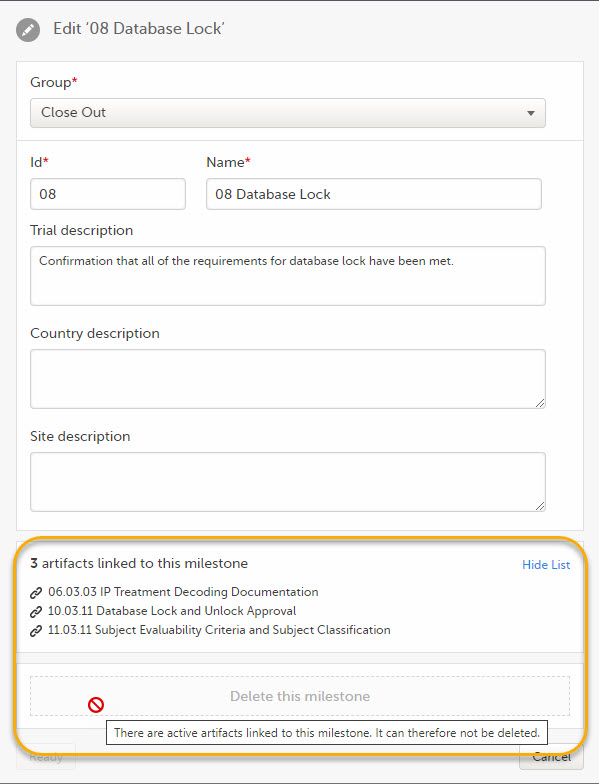
To delete a milestone, click Delete this milestone at the bottom of that milestone edit window.
The Viedoc eTMF application automatically recognizes when changes have been made to the TMF structure and displays a message where you can choose to apply or revert all changes that were made during the current maintenance session.
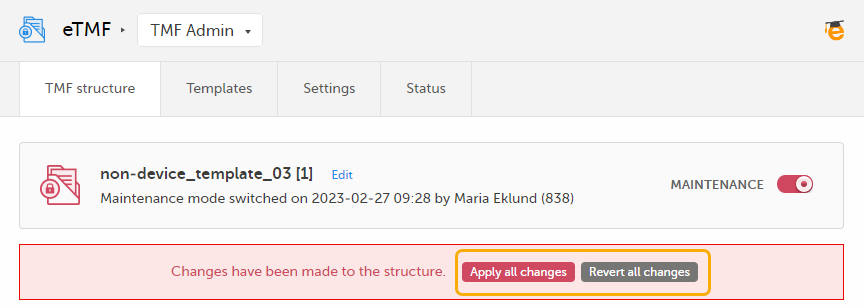
The confirmation window lists the changes that have been made and lets you confirm to apply or revert all changes.
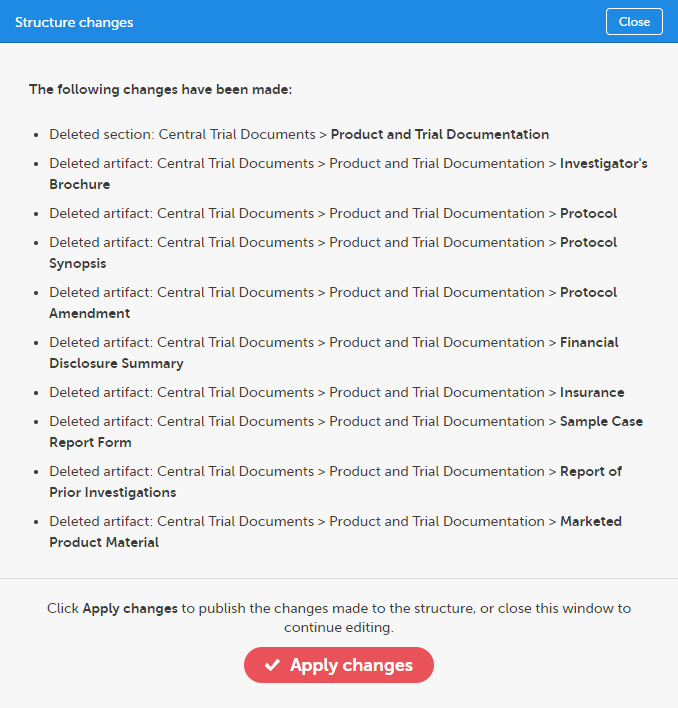
Any applied changes to the structure will be listed in the complete audit trail report.
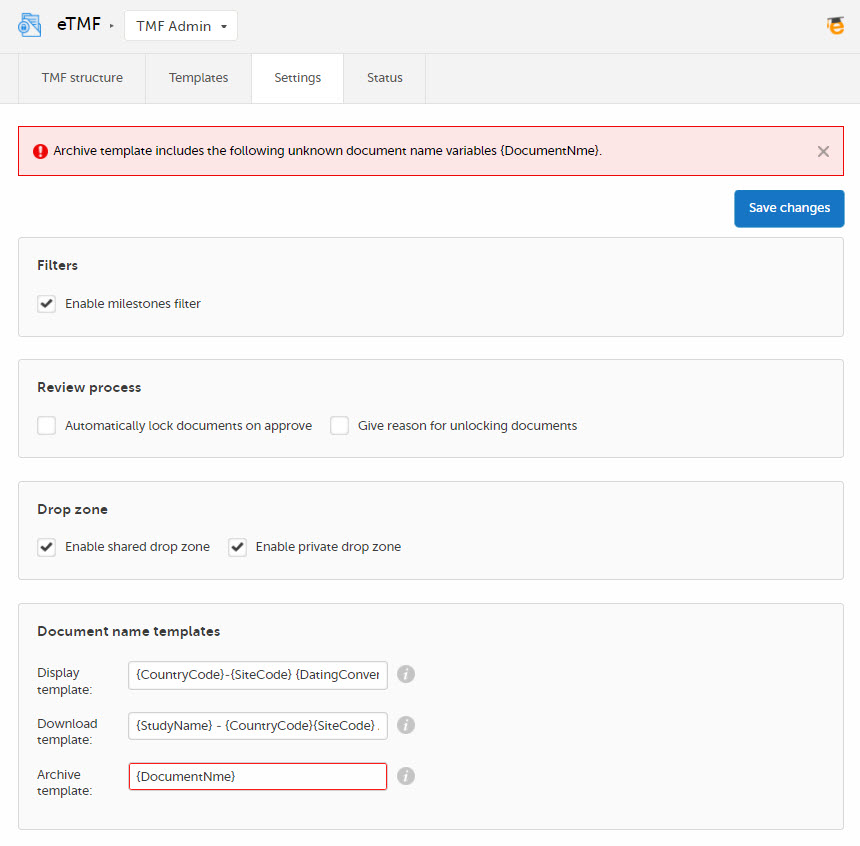
On the Settings tab, you can configure different sections and set the behavior of the system in different scenarios.
Note! To configure the patterns for time, date, and date & time, use the general study setting in Viedoc Admin. For more information, see General Study Settings.
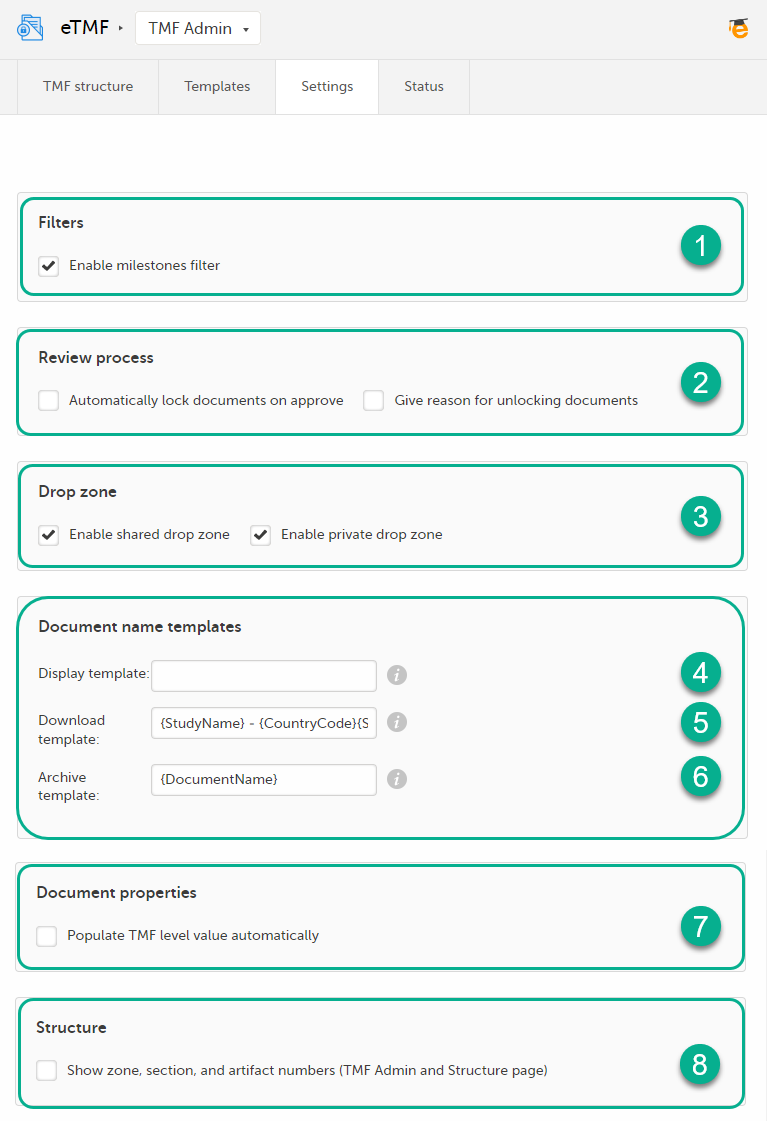
You can configure the following:
1. Filters
2. Review process
3. Drop zone
Note! Much of the info about the drop zones is available also in the lesson eTMF>Managing documents.
Anyone who has any kind of access to the study eTMF can upload files to the drop zones. However, moving files from the drop zones to the structure is similar to uploading documents to artifacts in the structure, in the sense that both require that the user has write access to the artifact in question.
Note! When placing files from within a zipped folder into a drop zone, the system will not recognize the file. It will recognize the zipped folder and extract the files. Unzip the folder, and then select the files you want to drop into the the drop zone.
Document name templates
In this section, you can define templates for the document names. The templates can include any set of static characters and document name variables. If a document name variable value is not available for a document, it will be translated as empty value by the system. And if no template is defined, the system will fall back to the document name defined for the document.
The eTMF supports the following set of document name variables:
| Variable | Description |
|---|---|
| {StudyName} | Study name |
| {CountryCode} | If the document is linked to many countries, the value will be "Multiple countries" |
| {CountryName} | If the document is linked to many countries, the value will be "Multiple countries" |
| {SiteCode} | If the document is linked to many countries, the value will be "Multiple sites" |
| {SiteName} | If the document is linked to many countries, the value will be "Multiple sites" |
| {VersionLabel} | User-defined version |
| {DocumentVersion} | The latest version of the document |
| {FileVersion} | The number of files uploaded to a document |
| {DocumentStatus} | Unpublished/Awaiting review/Flagged by QC/Finalized |
| {ZoneNumber} | Zone # |
| {ZoneName} | Zone name |
| {SectionNumber} | Section # |
| {SectionName} | Section name |
| {ArtifactNumber} | Artifact # |
| {ArtifactName} | Artifact name |
| {SubArtifactName} | Sub-artifact/Other name depending on the document type |
| {TMFLevel} | TMF level |
| {DatingConventionLabel} | Dating convention label |
| {DatingConventionValue} | Dating convention value in the format YYYYmmDD |
| {DocumentName} |
The defined document name by the user in the Document properties. |
| {DocumentId} | The document counter Id |
There are three types of templates:
4. Display template
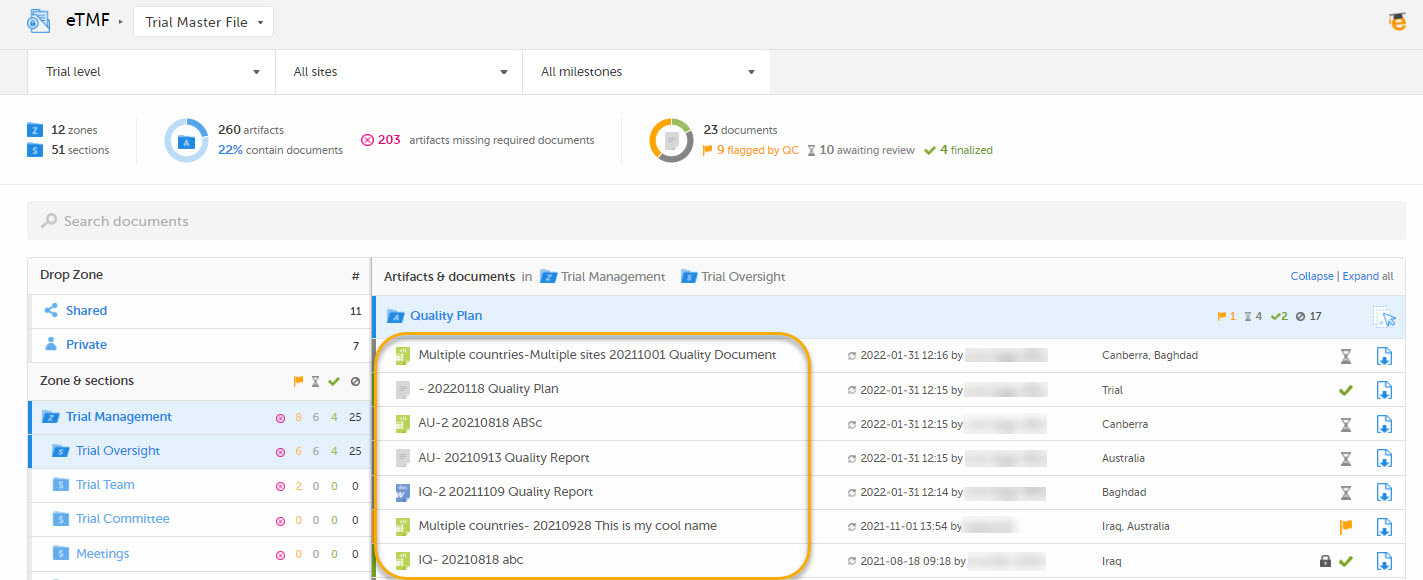
This template is used for document names when displaying documents in the Trial Master File view:
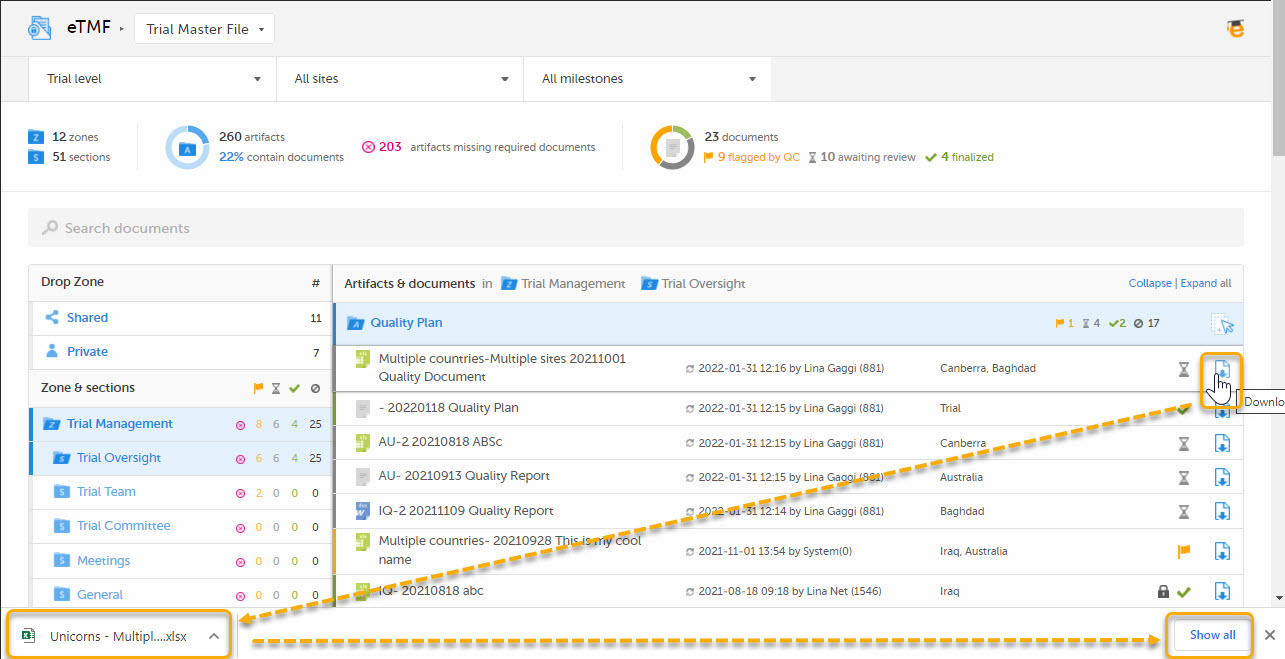
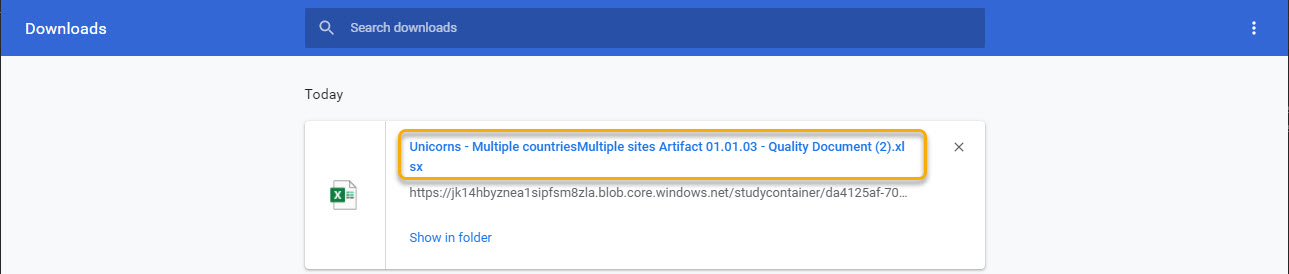
5. Download template
This template is used for document names when downloading the latest version of the document:
6. Archive template
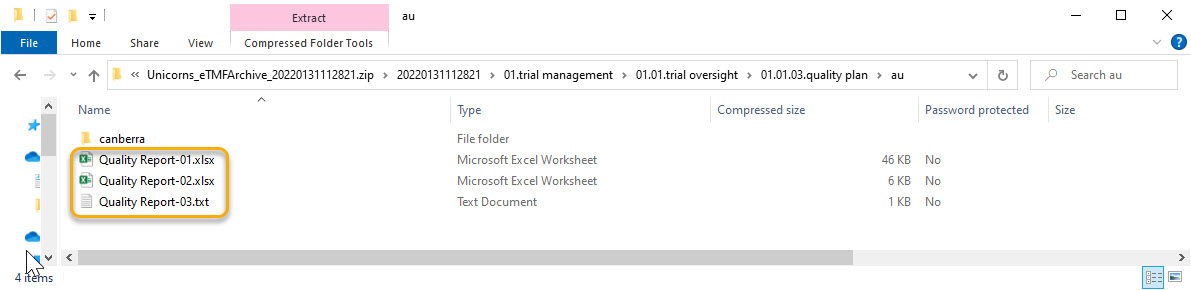
This template is used for document names when archiving documents. The name of documents in the archive will always be followed by a hyphen and the latest version of the document, that is {DocumentVersion}. The example below shows 3 versions of the same document in the archive:
Note! The system validates values written inside curly brackets as document name variables, and error messages will be displayed if these values are not recognized as valid variables by the system.
7. Populate TMF level value automatically
Selecting this option automatically fills in the field TMF level in the Document properties dialog in the Trial Master File view (when there is only one TMF level option available for the user for the selected document). This means that users will not need to explicitly select a TMF level for documents that they upload or move. This option is deselected by default for studies that started before the release of Viedoc 4.70. For studies starting after the release of Viedoc 4.70, the option is selected by default.
8. Show zone, section, and artifact numbers (TMF Admin and Structure page)
When this option is selected, the Structure page in the Trial Master File view and the TMF structure tab in the TMF Admin view display the zone, section, and artifact numbers and names in the same way as in the tooltip text that is displayed when hovering over them.
The option is deselected by default for studies that started before the release of Viedoc 4.73. For studies starting after the release of Viedoc 4.73, the option is selected by default.
The following table lists a number of tasks that study users can face, together with the eTMF roles, the Viedoc Clinic site groups, and the eTMF level access that they would need to perform the respective task.
For more information about site groups, see Managing users and Managing study sites.
| Study role | Task | eTMF role | Viedoc Clinic site group | eTMF level access | Permissions | Comments |
|---|---|---|---|---|---|---|
|
Study coordinator General site user |
Drop documents in the shared drop zone | Site staff - customized with no access for all artifacts | Site | No access to all artifacts | None | |
|
Study coordinator General site user |
View, file, and classify site-level documents, view some artifacts on country and study levels, archive the Investigator site TMF | Site staff | Site | Write access to pre-defined artifacts on site level, read access to pre-defined artifacts on study, site, and country levels | 1. Archive Investigator TMF | |
| Project manager | File study-level documents, view all sponsor-side documents, archive the sponsor TMF, download audit trail, and see TMF settings and structure | Sponsor study | All production sites* |
1. Download audit trail 2. Archive sponsor TMF 3. Read-only TMF Admin |
*Clinic access needs to be on study level and not every site one by one, otherwise the write permission will be translated to read permission. | |
| Monitor | File site-level documents, view all documents for the study, my country, and my site, manage drop zone documents, review site level documents |
Sponsor site Reviewer* |
Site** |
Write and review access on site level Read access on all levels |
1. Manage drop zone |
*Although the role sheet grants review rights for study and country level documents too, the end user will only have read rights to those documents, as long as they are not invited on study or country level for their clinic role. **Clinic access needs to be given to all applicable sites. |
|
Country manager Trial manager |
File country-level documents, view all sponsor-side documents at all levels and review all documents |
Sponsor country Reviewer |
All production sites* | *Clinic access needs to be on study level and not every site one by one, otherwise the review permission will be translated to read permission. | ||
|
Read-only role Regulatory inspector |
Read-only access to all documents* and settings Access to audit trail |
No role, permissions only | All production sites** |
1. Read-only Trial Master File* 2. Read-only TMF Admin 3. Download audit trail |
*If read-only Trial Master File permission is assigned, any NO ACCESS permission will be overridden by read access by the system. This means that all artifacts set as optional or required (including blinded and investigator-side artifacts) will be visible. These permissions should be reserved for a role that requires all access, such as a regulatory inspector. **Clinic access needs to be on study level and not every site one by one, otherwise the review permission will be translated to read permission. |
|
|
Unblinded role Sponsor or statistician |
View, file, and classify blinded documents only on all levels | Sponsor unblinded | All production sites* |
Write access to blinded documents on study level and site level (when applicable) No access to non-applicable documents on all levels |
1. Download audit trail | *Clinic access needs to be on study level and not every site one by one, otherwise the review permission will be translated to read permission. |
The following table contains examples of common use case scenarios together with the requisites for performing them.
| Scenario | Requisites |
|---|---|
| Drop zone: As a General site user, I want to be able to drop site-generated or site-signed documents in the drop zone. |
|
| eISF: As a General site user, I want to be able to file pre-defined documents on site level, view some artifacts on study and country levels and archive the Investigator site TMF/eISF. |
|
| As a Project manager, I want to be able to file documents at study level, view all sponsor-side documents at all levels in the study, archive the TMF (sponsor side), download the audit trail, and see the TMF settings and structure. |
|
| As a Monitor, I do not have access to patient information documents on site level. I file site-level documents that belong on the sponsor-side TMF, view documents for my country and the study, manage drop zone documents, and review site-level documents. |
|
| As a Country Manager or a Trial Manager, I want to be able to file documents at country level, view all sponsor-side documents at all levels in the study, and review all sponsor-side documents. |
|
| As a Regulatory Inspector, I want to have read-only access to all documents (sponsor side and investigator side), TMF settings, and access to the audit trail. |
|
| As an Unblinded Statistician, I want to view, file, and classify blinded documents only on all levels. |
|
| Check | To resolve |
|---|---|
| Check that the user is invited to a clinic role with a mapped eTMF role with at least Read to the artifact at the expected level. | Invite the user to a clinic role with a mapped eTMF role with read/write permissions to the artifact or edit the roles and accesses for the artifact in TMF Admin maintenance mode. |
| Check that the artifact itself is Optional or Required at the expected level, as Not permitted documents will override any role access for the artifact. | Edit the trial/country/site level settings for the artifact in TMF Admin maintenance mode. |
| Check | To resolve |
|---|---|
| Check that the user is invited to a clinic role with a mapped eTMF role with Write access to the artifact at the expected level. | Invite the user to a clinic role with a mapped eTMF role with write permission to the artifact or edit the roles and accesses for the artifact in TMF Admin maintenance mode. |
| Check that the user is invited to a clinic role on at least Country level (for write permission to Country level documents) or Study level, All production sites (for write permission to Study level documents), otherwise Write will be translated to Read. | Invite the user to a clinic role on at least Country level (for write permission to Country level documents) or Study level, All production sites (for write permission to Study level documents). |
| Check | To resolve |
|---|---|
| Check that the user is invited to a clinic role with a mapped eTMF role with Review access to the artifact at the expected level. | Invite the user to a clinic role with a mapped eTMF role with review permission to the artifact or edit the roles and accesses for the artifact in TMF Admin maintenance mode. |
| Check that the user is invited to a clinic role on at least Country level (for review permission to Country level documents) or Study level, All production sites (for review permission to Study level documents, otherwise Review will be translated to Read. | Invite the user to a clinic role on at least Country level (for write permission to Country level documents) or Study level, All production sites (for write permission to Study level documents). |
| Check | To resolve |
|---|---|
| Check that the user is invited to a clinic role with a mapped eTMF permission Manage drop zone. | Map the Manage drop zone permission to the applicable clinic role. |
| Check | To resolve |
|---|---|
| Check that the user is invited to a clinic role with a mapped eTMF role with Write access to the artifact at the expected level. | Invite the user to a clinic role with a mapped eTMF role with write permission to the artifact or edit the roles and accesses for the artifact in TMF Admin maintenance mode. |
| Check that the user is invited to a clinic role on at least Country level (for write permission to Country level documents) or Study level, All production sites (for write permission to Study level documents, otherwise Write will be translated to Read. | Invite the user to a clinic role on at least Country level (for write permission to Country level documents) or Study level, All production sites (for write permission to Study level documents). |