Configuring roles
Introduction
The clinic roles, and their permissions, are configured in the study design in Viedoc Designer. The clinic roles are configured on the Roles page in Viedoc Designer.
You can set up roles by:
- using and - if necessary - modifying the pre-defined roles that are set up in the system, see Using predefined roles below.
- add a new role from scratch, see Adding a new role below.
Where are roles configured?
The Roles page
Roles are configured on the Roles page. In Viedoc Designer, in the study design, select the Edit icon in the Roles field to open the Roles page.
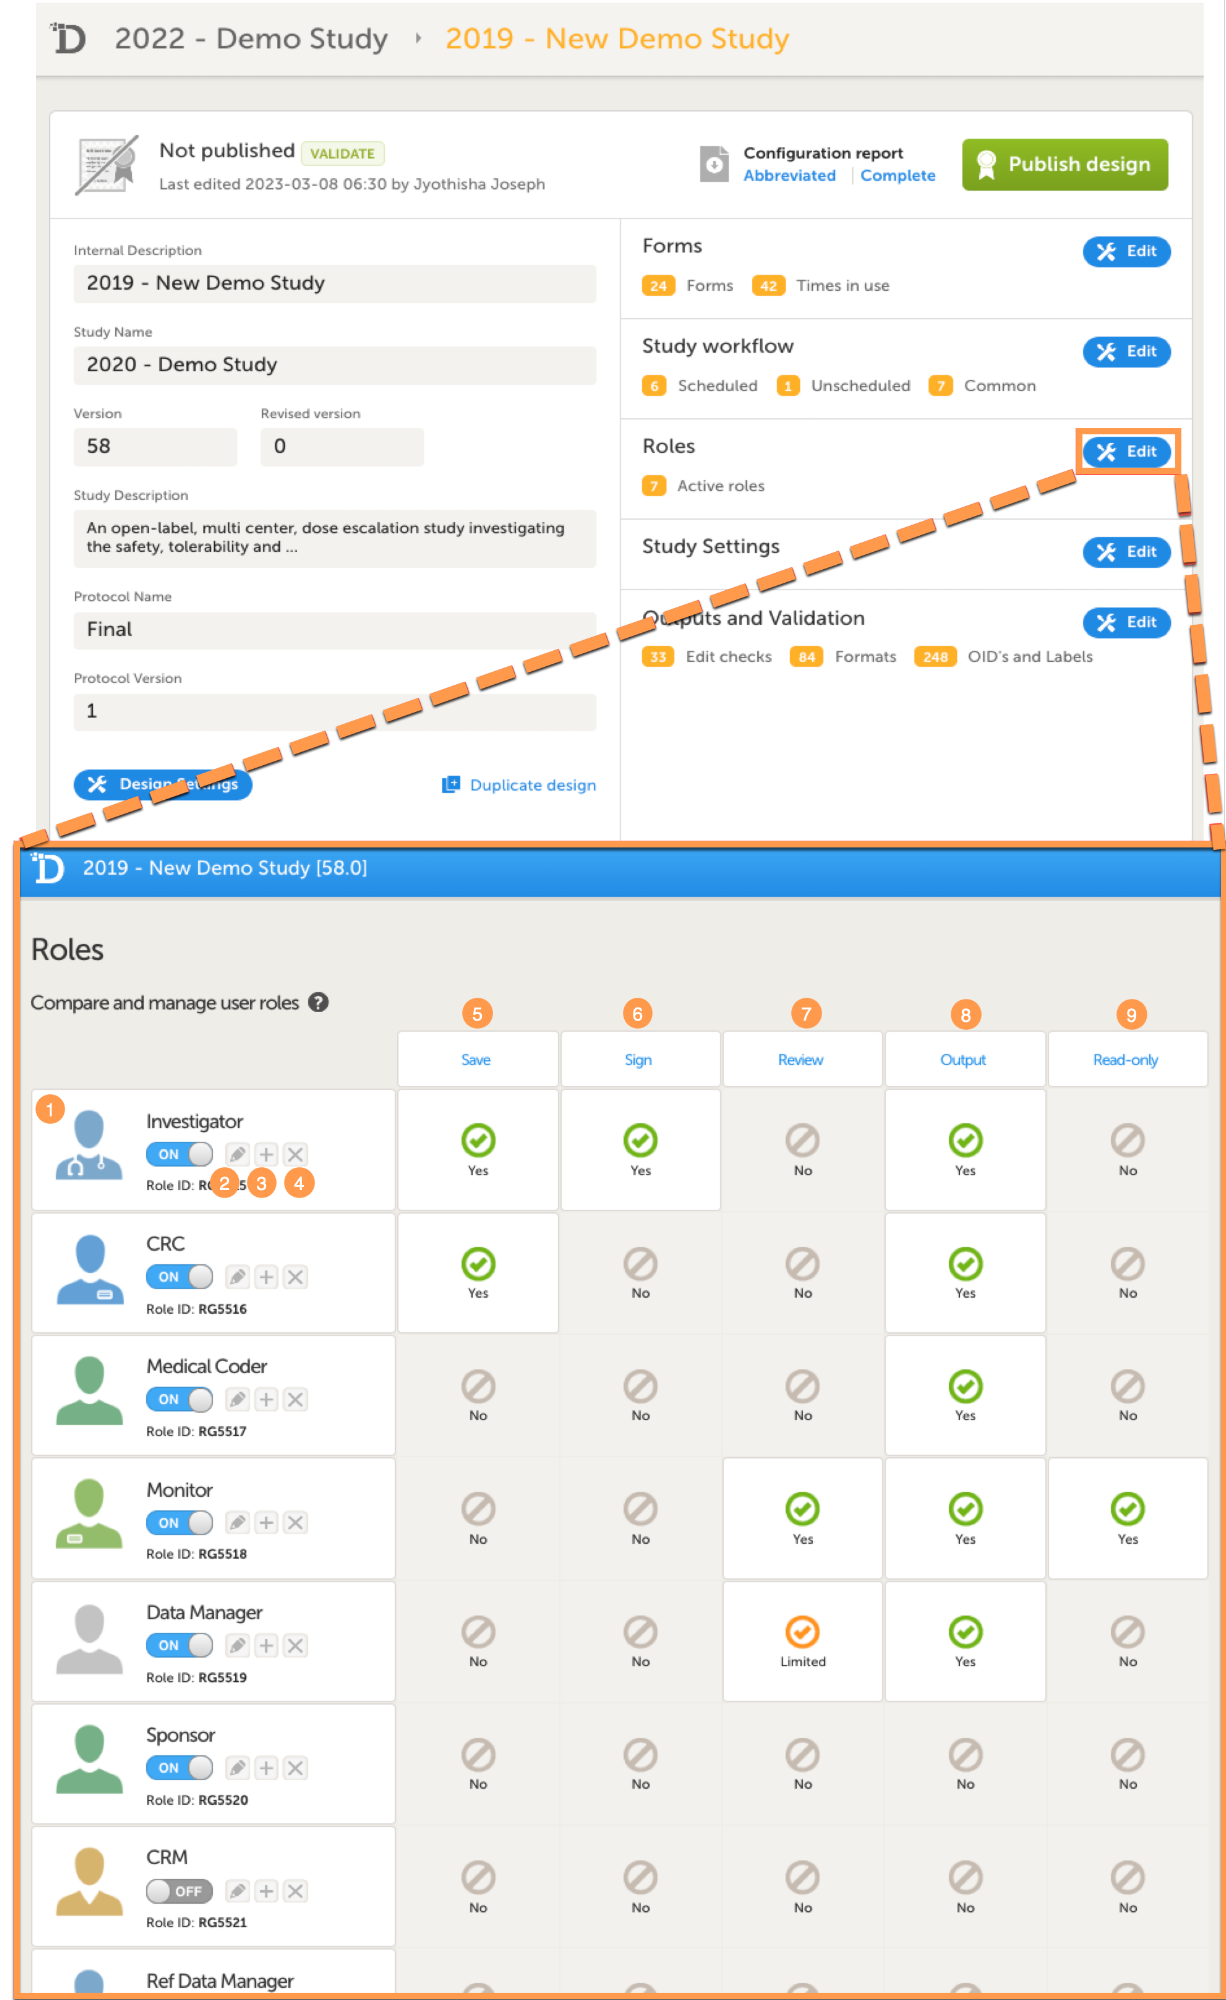
On the Roles page you can view or do the following:
1. View the roles in your study. For each role, the following is displayed: the name of the role, an avatar, a switch to set the role to ON or OFF, and an overview of the rights this user has, see below.
2. Edit the role by selecting the pen icon. The Edit role page opens, see The Edit role ("...") page.
3. Create a copy of a role by selecting the + icon. A duplicate of that role is created and added at the bottom of the list.
4. Delete a role by selecting the cross icon.
Note! To avoid a mismatch of roles between different design versions, we recommend that you do not delete a role, but instead set the switch to OFF to disable the role.
5-9. For each role, quickly get an overview of the rights that concern saving (5), signing (6), reviewing (7), exporting (8) data, and viewing (9) data (in read-only mode).
The Edit role ("...") page
If you select the pen icon for a role, the Edit role "(Role name)" page opens:
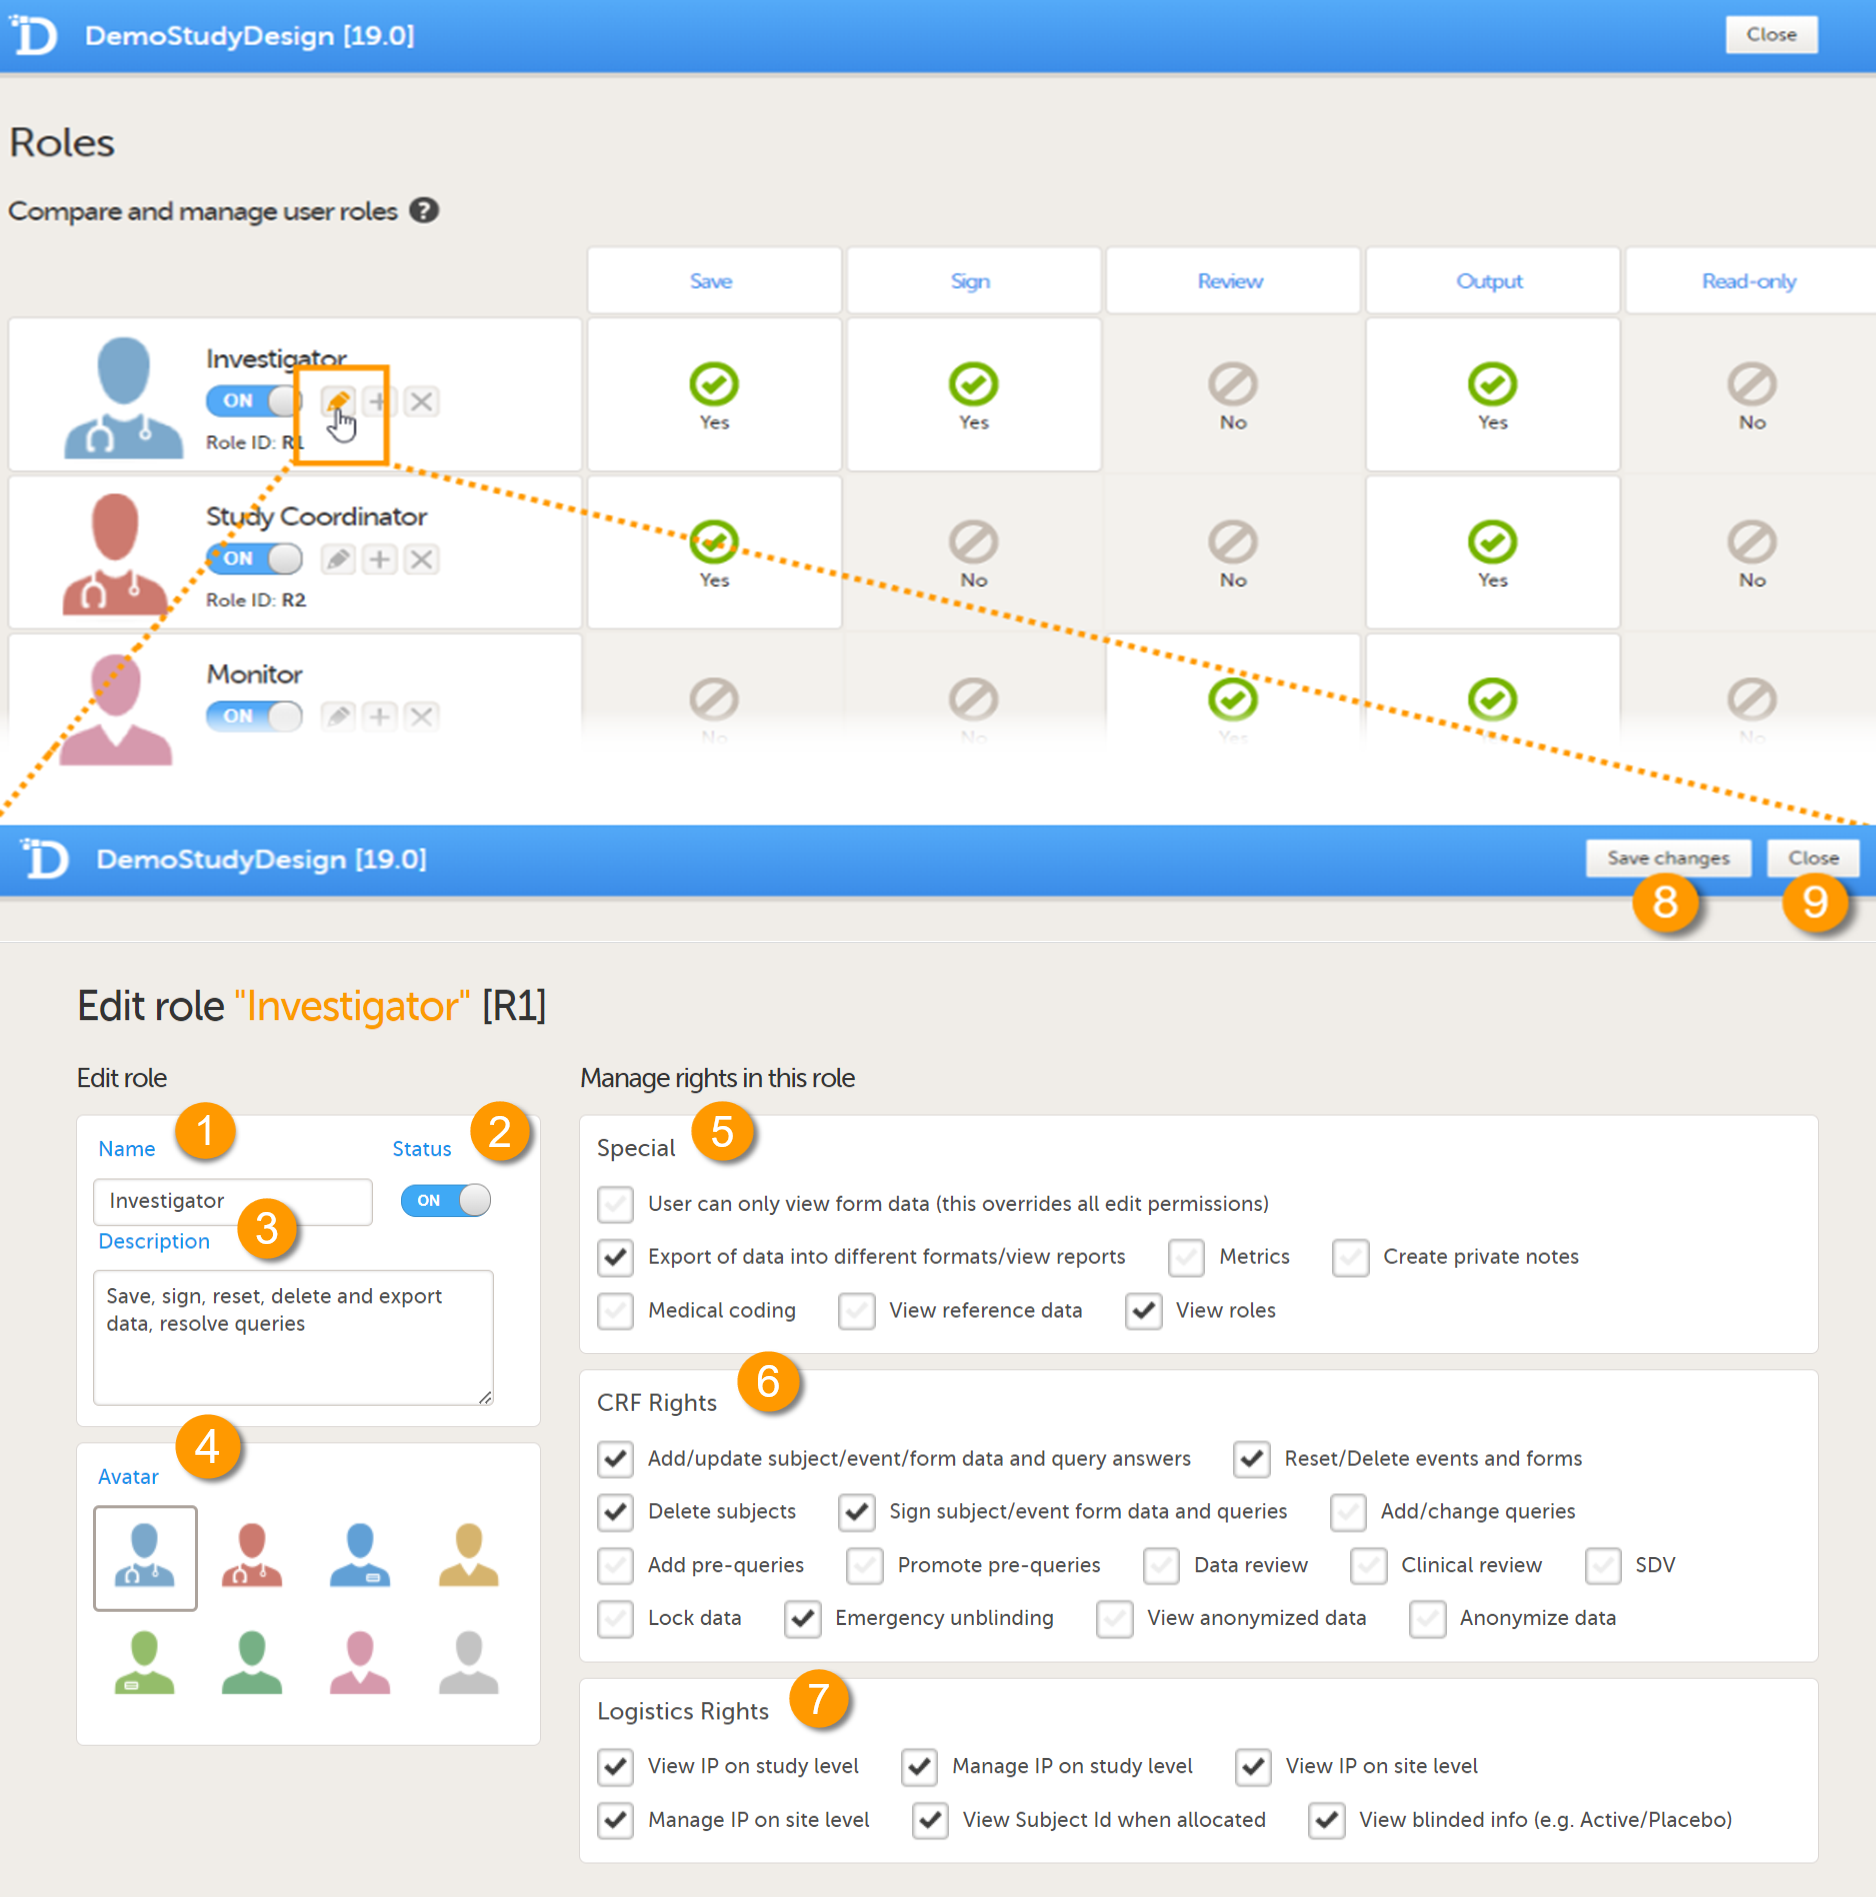
On the Edit role page you can edit the following:
1. Enter a name for the role. This will be the name for the role as used in Viedoc Clinic and Viedoc Admin, as well as in the e-mails with the role invitation.
2. Set the status to ON or OFF to enable or disable the role. This is the same switch as on the Roles page, see Switching a role ON or OFF.
3. Enter an optional description of the role.
4. Select an avatar. The avatar is displayed on the Roles page, but not anywhere else in Viedoc.
5-8. The rights that can be activated or de-activated for a certain role, divided into special rights (5),
Case Report Form (CRF) rights (6), and eLearning (7), see also User rights.
Note! In special rights, the rights to configure permission to view the Roles page, View roles in Clinic is selected by default.
8. Save the changes.
9. Close the page and return to the study design.
User rights
The following rights can be selected from:
- Special rights - rights that give access to specific features.
- User can only view form data (this overrides all edit permissions)
- Export of data into different formats/view reports
- Metrics
- Reports (only visible when Metrics is selected). For export/download rights in Viedoc Reports, the user must also have "Export of data into different formats/view reports" selected. The rights may not be applied directly due to the 24 hour data sync in Viedoc Reports.
Note! For Demo sites to work with Viedoc Reports, a user must be invited with direct site access (not through All sites site group). For Production sites, Viedoc Reports is available for all site groups (All sites and the country-specific groups). - Create private notes
- Medical coding, and if selected:
- Perform medical coding
- Approve medical coding
- Launch and view subject data
- View reference data, and if selected:
- Edit reference data
- Publish reference data
- View roles
- CRF Rights - rights with regard to adding/editing/saving data and queries.
- Add/update subject/event/form data and query answers
- Reset/Delete events and forms
- Delete subjects
- Sign subject/event form data and queries
- Add/change queries
- Add pre-queries
- Promote pre-queries
- Data review
- Clinical review
- Source Data Verification (SDV)
- Lock data
- Emergency unblinding - the user role having this permission is able to unblind a subject.
Important!
- Unblinding a subject will reveal the subject's treatment and unblind all personnel with permission to view this data in the study.
- If the role that has the Emergency unblinding permission also has a role visibility condition that makes the blinded outcome hidden for this role, after unblinding the outcome gets hidden for all roles and not just the role specified in Designer.
- View anonymized data
- Anonymize data
Note! For an explanation of what anonymize means in Viedoc please select this link.
- Logistics rights - permissions that allow the user to manage kits if the Logistics functionality is enabled (see Viedoc Logistics User Guide):
- View IP on study level - Note! This permission enables the user to view unblinded information in the Study supply overview page regardless if the permission "View blinded info" is selected or not.
- Manage IP on study level
- View IP on site level
- Manage IP on site level
- View Subject Id when allocated
- View blinded info (for example Active/Placebo) - Note! This refers to the items set as blinded when configuring the allocation list, NOT to the items set as Blinded outcome of a randomization.
- eLearning - this is visible only if Enable documentation and training is NOT selected in Viedoc Admin under Study Settings (see General study settings) - the eLearning curriculum(s) that the user will receive access to. By default, the following options are available:
- Viedoc User Guide for Site Users
- Viedoc User Guide for Monitors
- Viedoc User Guide for Data Managers
- Viedoc User Guide for Project Managers
- Viedoc User Guide for Medical Coders
It is possible to customize the eLearning for your study and add other/your own curriculums. See the section eLearning settings for more information.
Using predefined roles
By default, a set of predefined roles is set up by the system, and it can be modified for your study.
The default roles and default permissions are listed in the following table:
| Role | Special rights | CRF rights | Logistics rights | eLearning |
|---|---|---|---|---|
| Investigator | - Export of data into different formats/view reports |
- Add/update subject/event/form data and query answers |
Viedoc User Guide for Site Users | |
| Study Coordinator | - Export of data into different formats/view reports | - Add/update subject/event/form data and query answers - Reset/Delete events and forms - Delete subjects |
Viedoc User Guide for Site Users | |
| Monitor |
- Export of data into different formats/view reports |
- Add/change queries - Promote pre-queries - Clinical review - SDV - Lock data |
- Viedoc User Guide for Monitors - Viedoc Reports User Guide |
|
| Project Manager | - User can only view form data (this overrides all edit permissions) - Export of data into different formats/view reports - Metrics - Viedoc Reports - Create private notes |
None | - Viedoc User Guide for Project Managers - Viedoc Reports User Guide |
|
| Data Manager | - Export of data into different formats/view reports - Metrics - Viedoc Reports - Create private notes |
- Add pre-queries - Data review |
- Viedoc User Guide for Data Managers - Viedoc Reports User Guide |
|
| Medical coder | - User can only view form data (this overrides all edit permissions) - Export of data into different formats/view reports - Medical coding - Perform medical coding - Approve medical coding |
- Add/change queries | Viedoc User Guide for Medical Coders | |
| Study Supply Manager | - Manage IP on study level - View blinded info (for example Active/Placebo) |
|||
| Site Supply Manager | - Manage IP on site level - View Subject Id when allocated |
|||
| Regulatory Inspector | - User can only view form data (this overrides all edit permissions) | - View anonymized data |
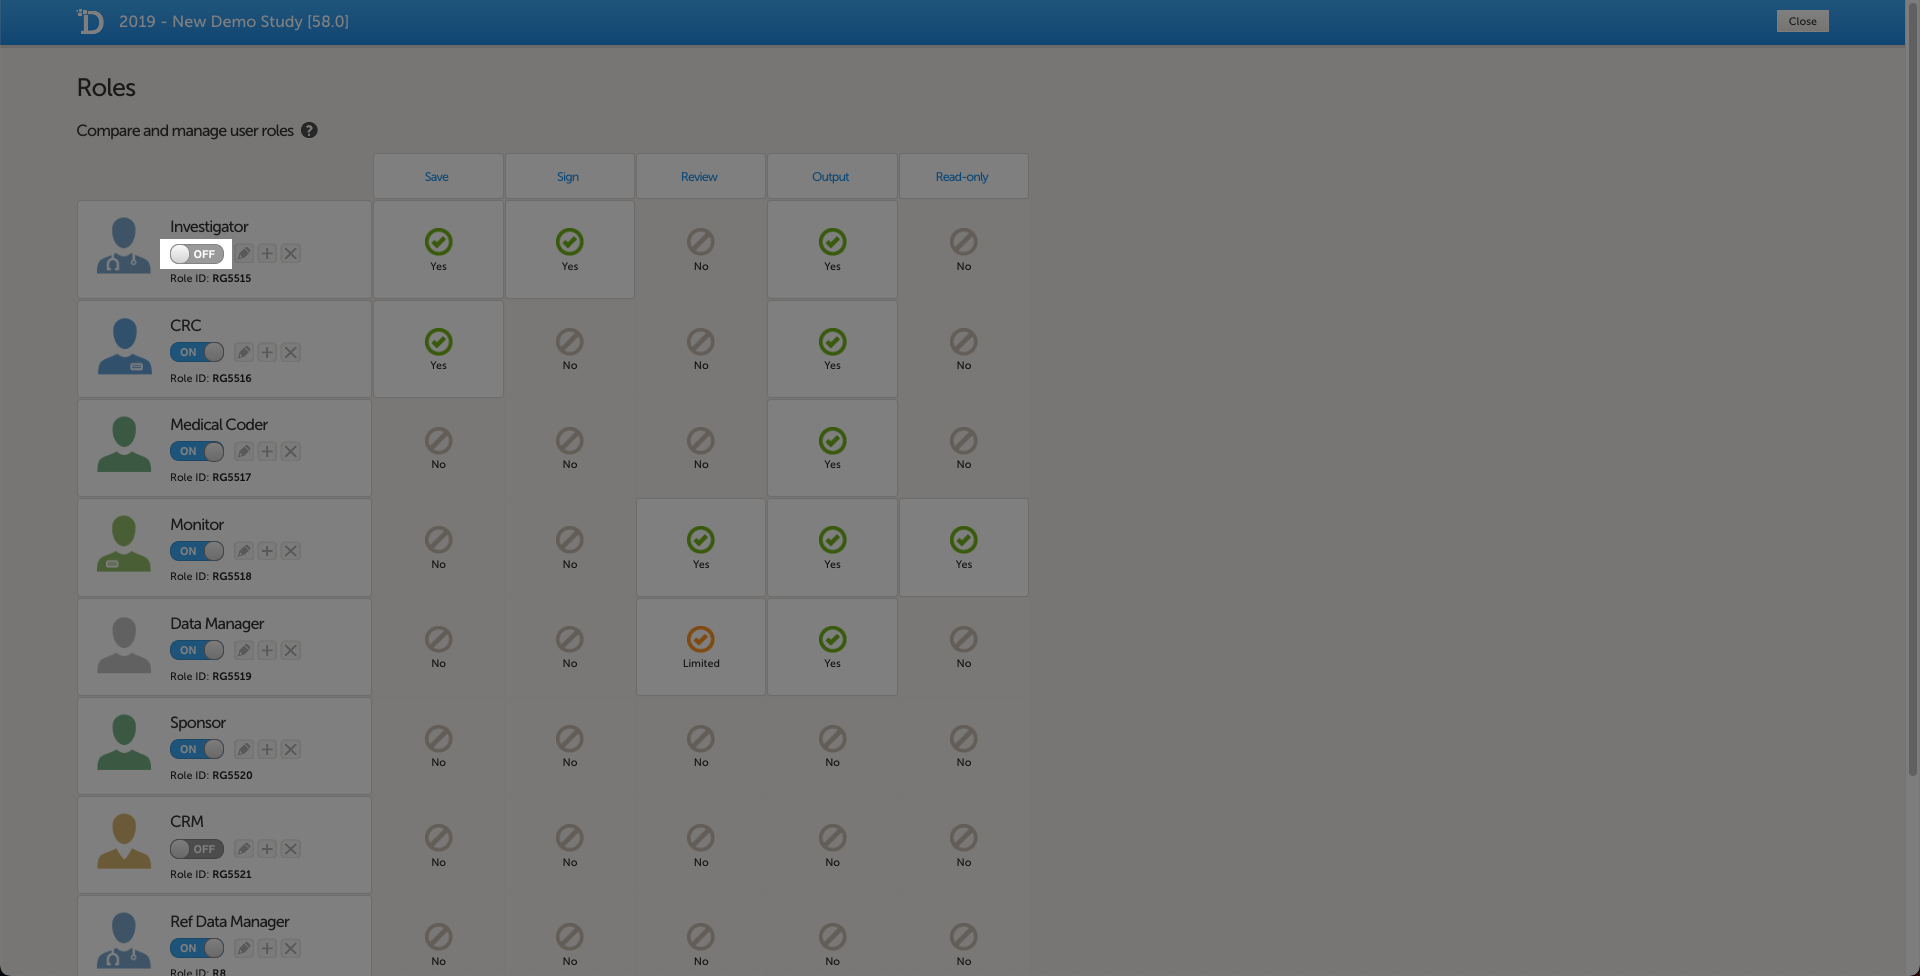
Switching a role ON or OFF
To enable a role in your study, set the switch to ON.
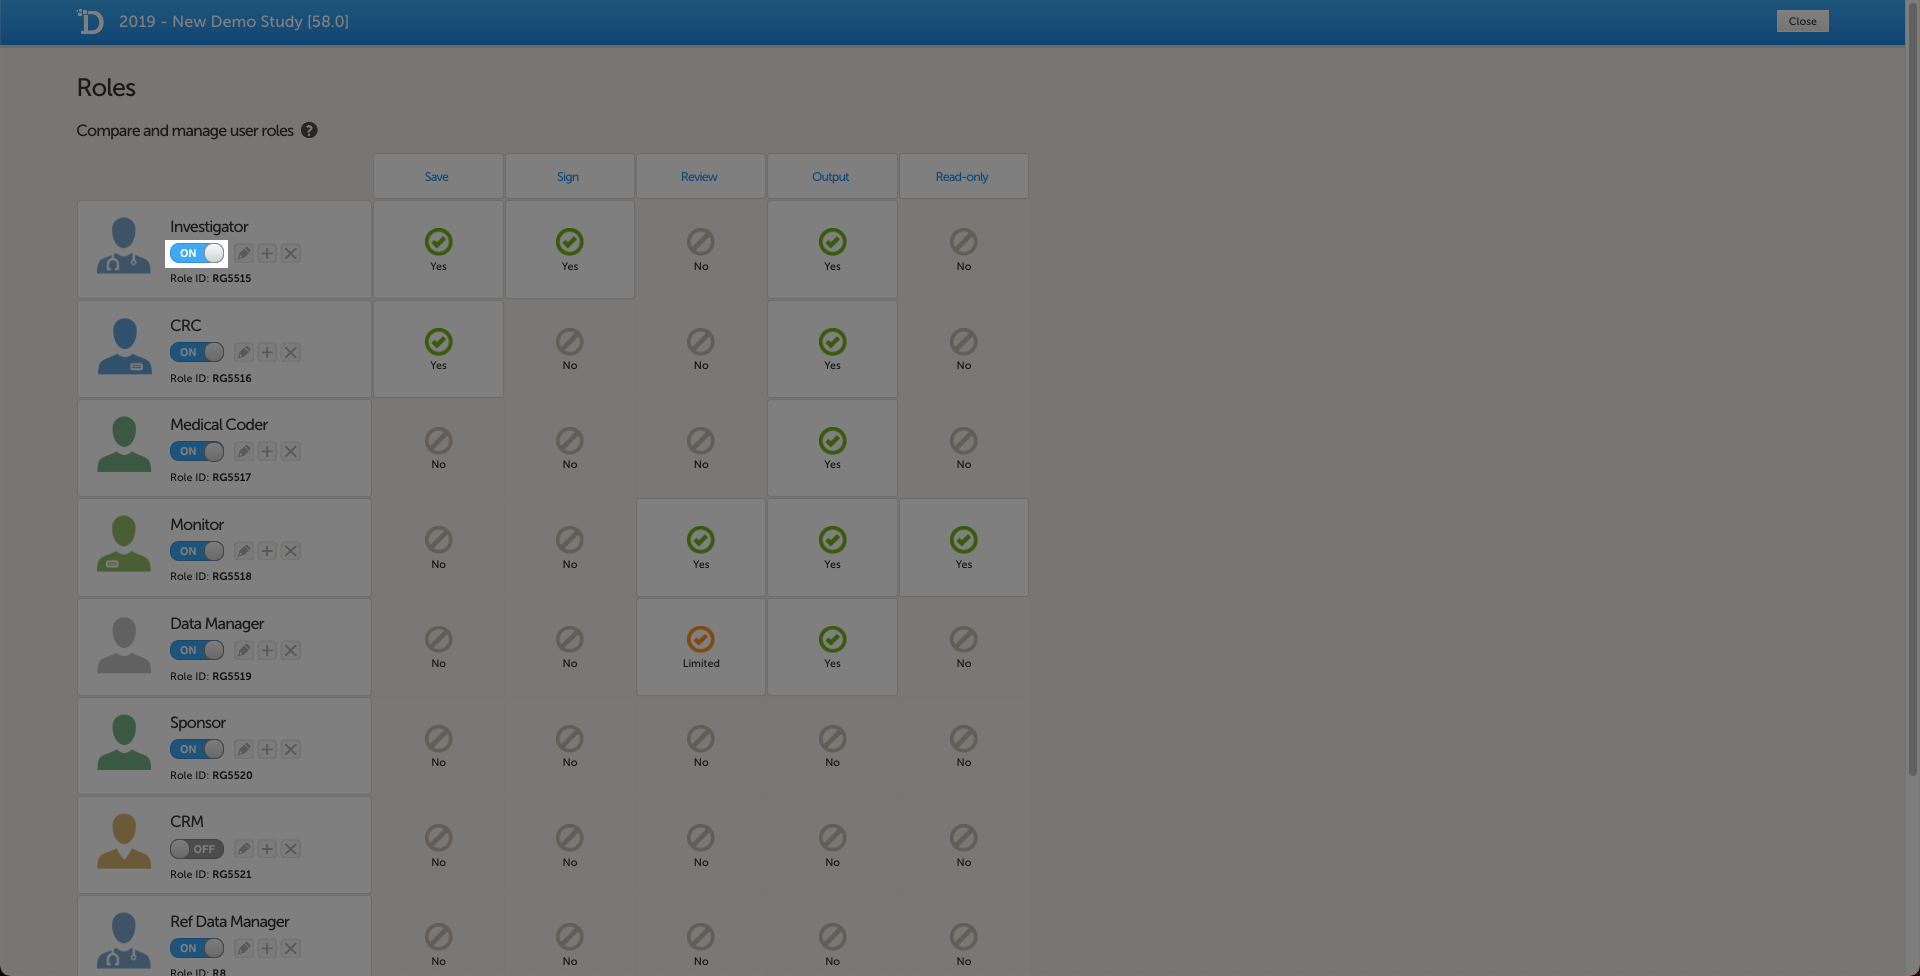
To disable a role in your study, set the switch to OFF.
Modifying a role
To modify a role, select the pen icon. The Edit role "(Role name)" page opens (see The Edit role ("...") page). Select the permissions that you want users with this role to have, and select Save changes to save. The Edit role page closes and you return to the Roles page.
If you do not want to save any changes, select Close to return to the Roles page.
Adding a new role
To add a new role, select Add new role at the bottom of the Roles page.
The Edit role page opens.
Enter a name for the role and an optional description, and select an avatar.
Enable the role by setting the status to ON.
Select the rights that users with this role should have, and select Save changes.
Note! To avoid a mismatch of roles between different designs, we recommend that you do not delete a role, but instead set the status to OFF if a role is not used.