Study workflow
Creating booklets and setting a workflow
In a PMS study, adding a single event with the relevant forms to the Study workflow creates a single booklet.
For more information about study workflows, see Study Workflow.
To create a booklet:
| 1 |
On the Overview of study design page, in the Study workflow field, select Edit. 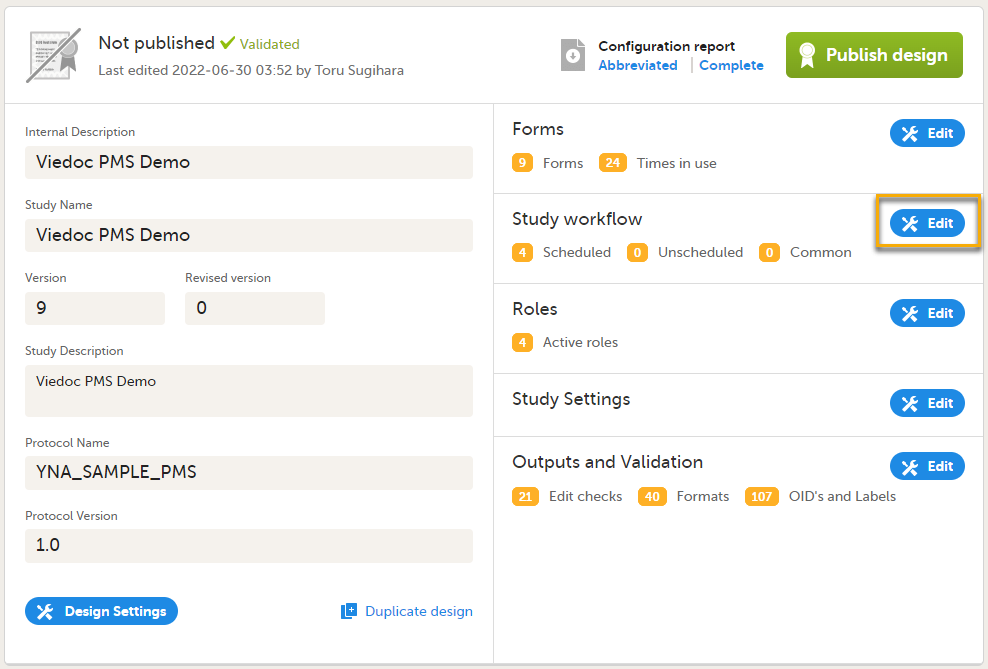
|
|
| 2 |
Select Add study event (add a booklet) in the Study workflow window. 
|
|
| 3 |
Study start booklet The example below shows a booklet with the Study event ID - REG, Booklet (Event) Name - Registration. 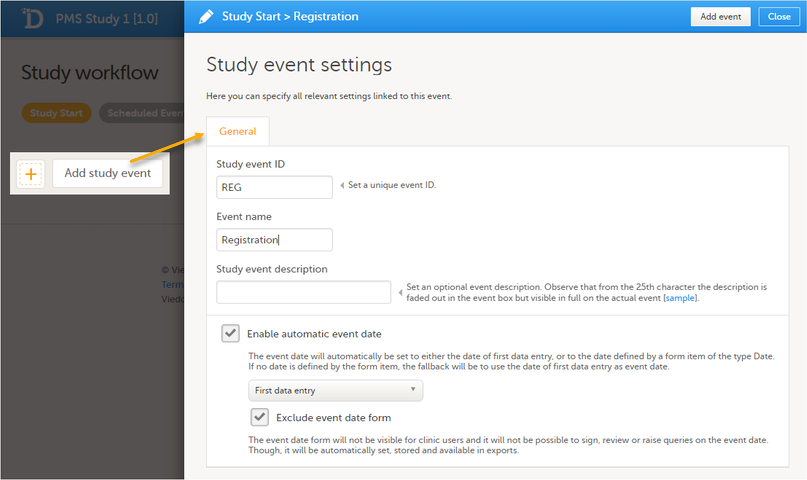
|
|
| 4 |
To add an activity to an event, select the (+) icon in the Registration booklet (event) field to open Activity settings and enter the activity ID. In the example below, the activity ID: REG_ACT01 has been added. 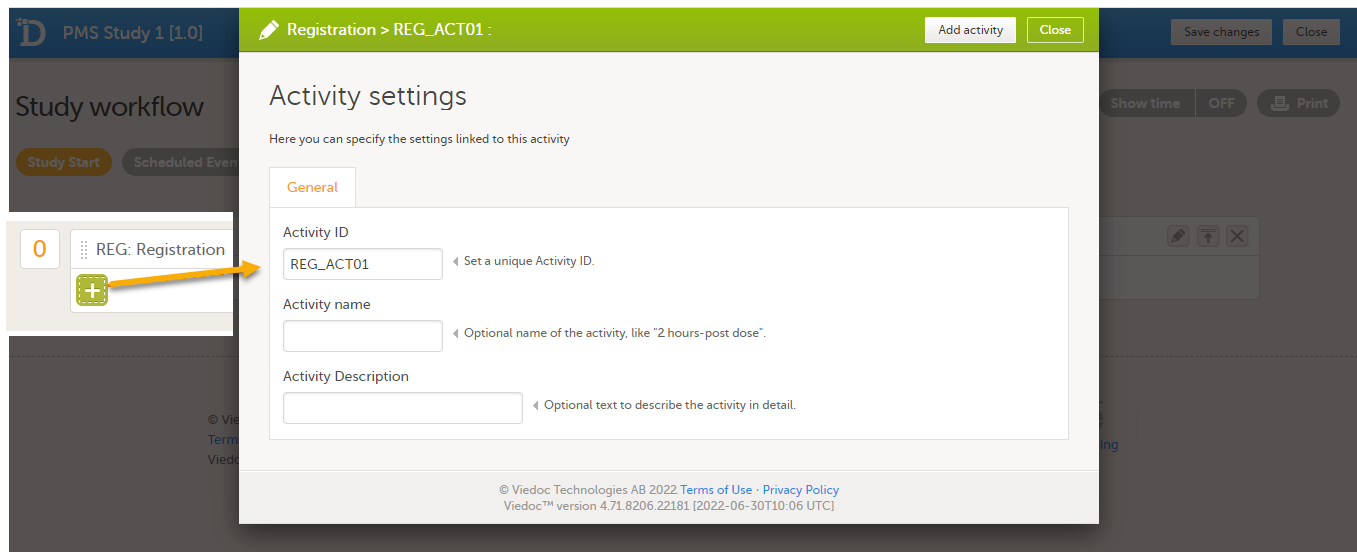
|
|
| 5 |
Add the form(s) you want to include in the Study Start event to the activity. In the example below, the Registration form has been added to the activity. 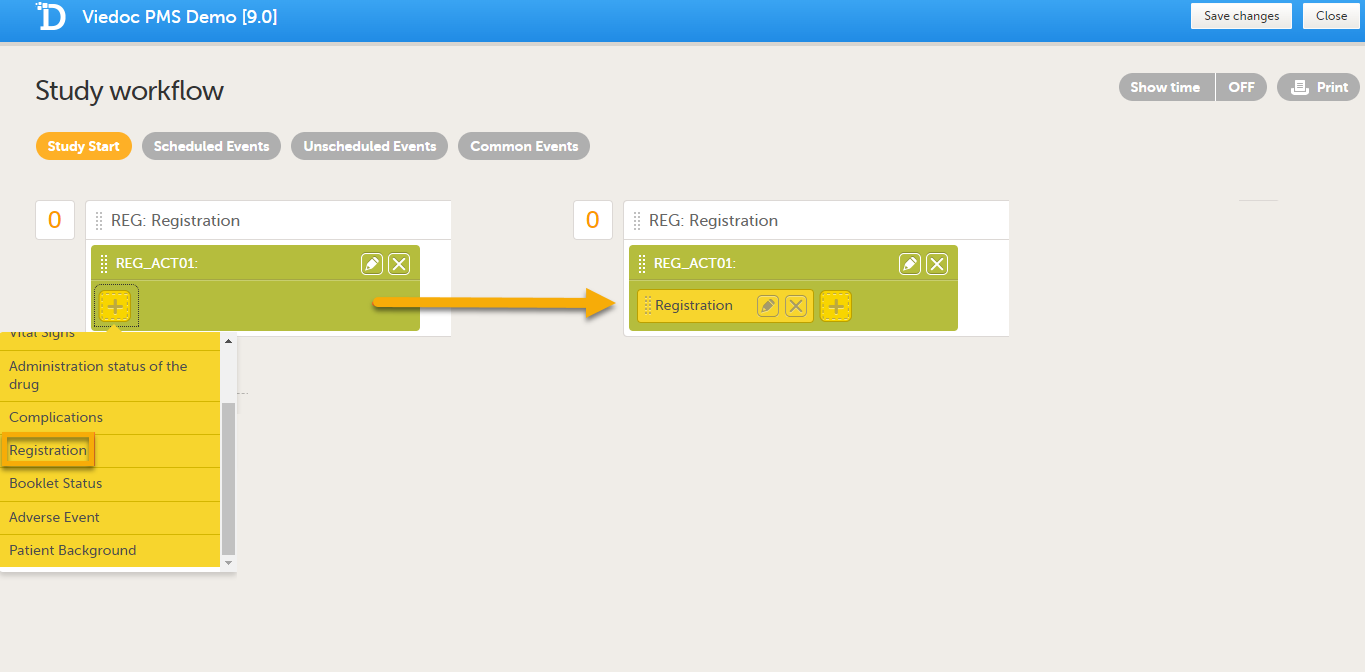
|
|
| 6 |
Add the booklets you require in Scheduled Events. You can add multiple activities to each event, and the name you give to the activities can be used to separate them within the booklets (for example, the number of months from the study start, Adverse Event, as shown in the example below). 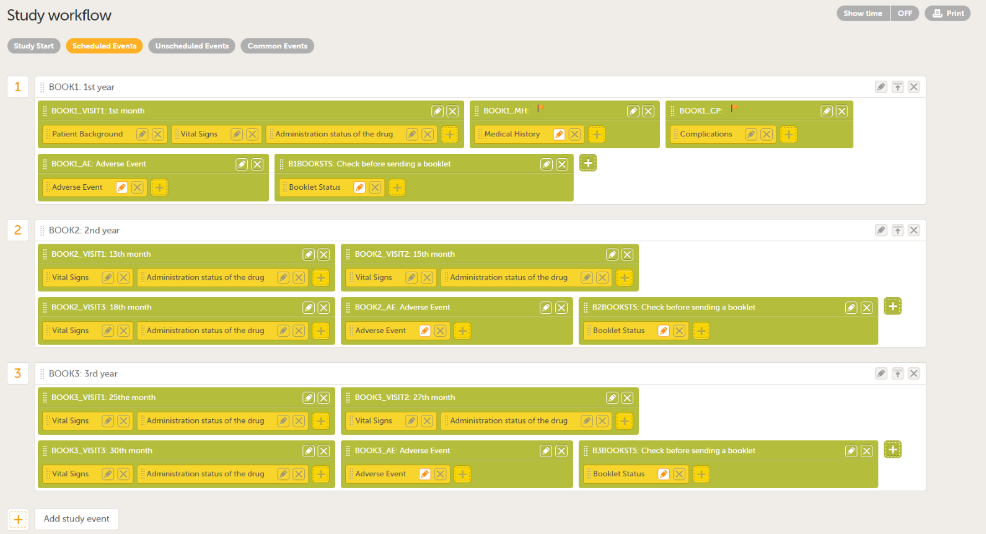
Note! To set a form as repeating, select Allow form to repeat for forms that can occur more than once, such as Adverse events. 
|
Scheduling booklets
To set a schedule for a booklet:
| 1 |
Select the pen icon to open the Study event settings dialog to edit the booklet schedule. 
|
| 2 | On the Scheduling tab, select Enable proposed date calculation if you want to activate calculation of a proposed date for the booklet, and configure the following:
Note! If Actual or Planned is selected for the Reference date, then the scheduled date is calculated on the Reference date entered by the site. However, if the reference event has not been initiated, then the Planned date is used. And if the reference event has not been planned, then the Proposed date of the reference event is used. In the following example, the Registration booklet date is the reference date, and 30 days is the time period during which you can enter data for the booklet. 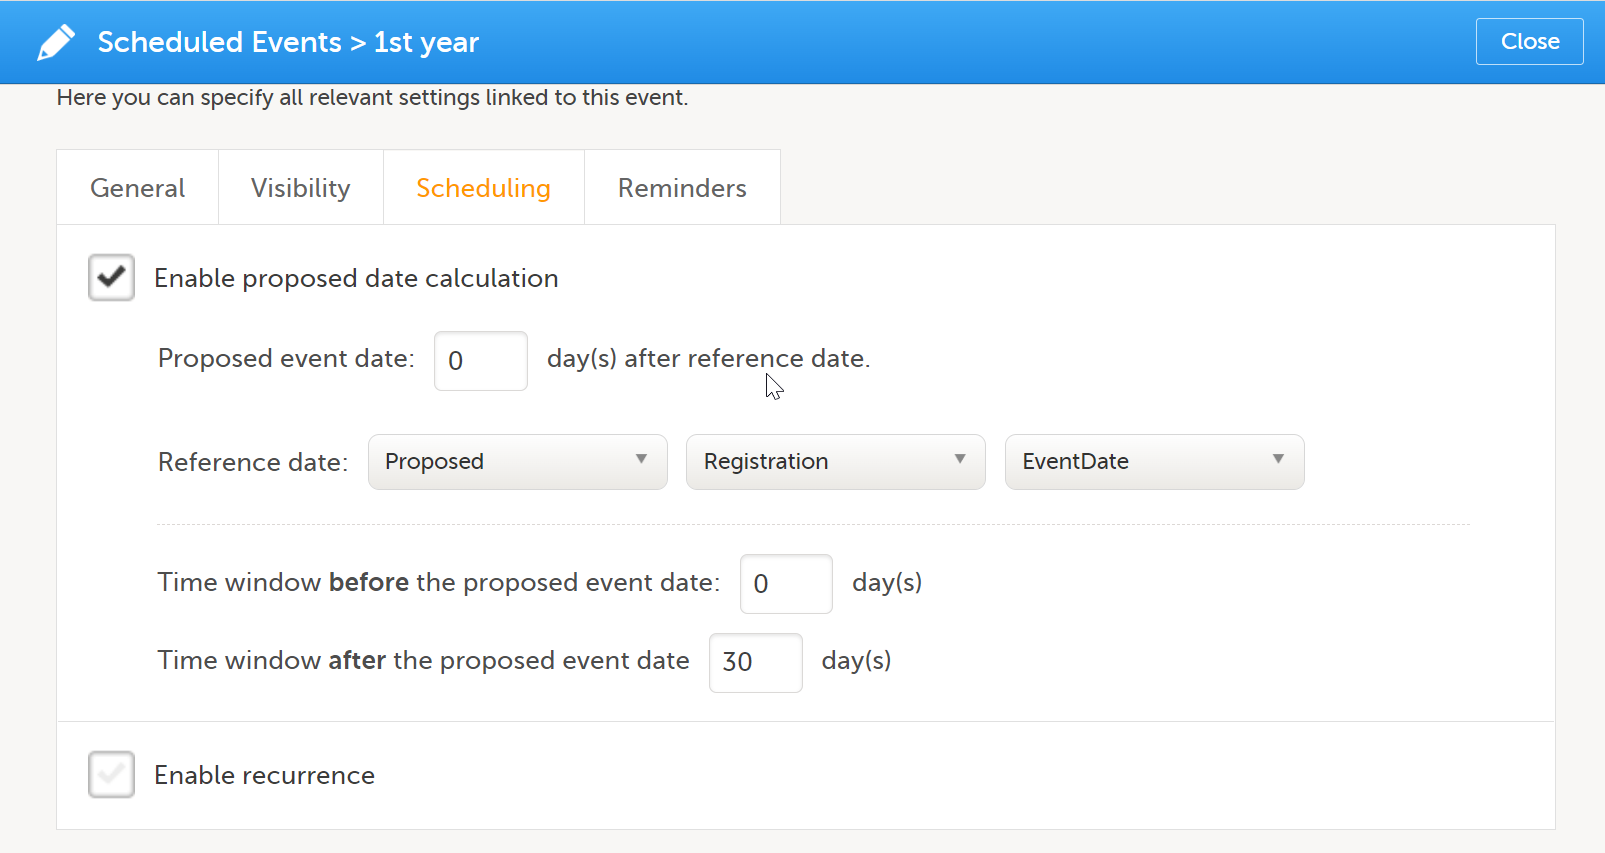 |
Duplicating the event settings
When creating a new event, it is possible to start configuring it by duplicating the settings of an existing event. This is done by selecting Use an existing event to duplicate settings, activities and forms and selecting from the dropdown list the event the settings will be copied from:
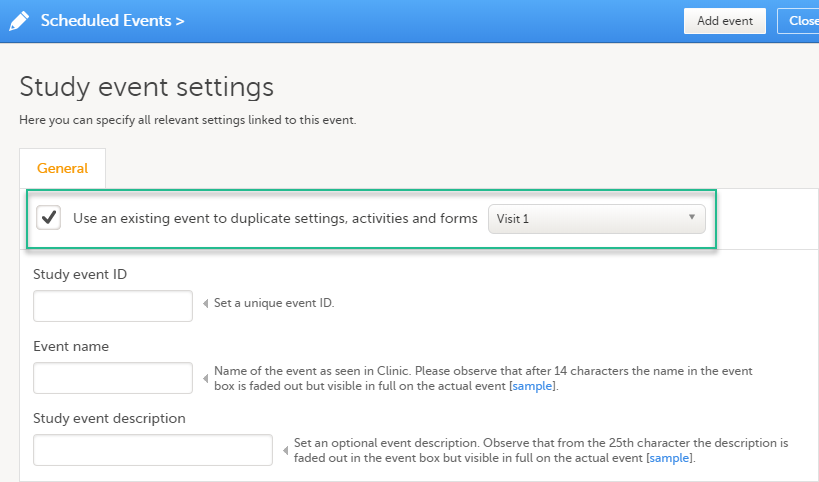
After entering the Study event ID, Event name, Study event description and selecting Add event, a new event is created with the same configuration as the selected event with regards to:
- The activities and forms
- Visibility
- Scheduling
- Automatic event date
- Short/long summary format
- Source (clinic/subject initiated)
On the Reminders tab, you can set reminders according to the scheduled settings. The reminders are shown as messages in Viedoc Clinic, and, optionally, sent as emails.
Note!
- The reminders are for incomplete events, and for PMS studies, the definition of a complete event is that the booklet is not in control of the site (it is Submitted/Received/Frozen).
- For PMS studies, only roles with access to Clinic side data are available as recipients.
For more information, see Setting scheduled event reminders
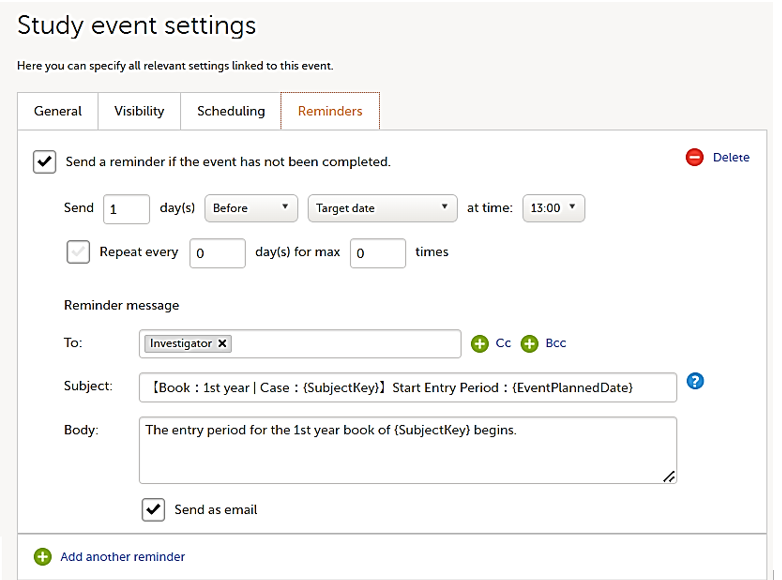
Any static string and/or the following variables can be embedded in both the Subject and Body fields:
- Context form variables - can be referenced directly using item ID, for example {SAE}.
- System variables. For a list of available system variables, see the section System variables in the lesson Using JavaScript in Viedoc.
- Other variables - can be referenced using the format EventId.FormId.ItemId, for example {SCR.PATINFO.SEX}.
Note! The item values included in the message are visible for all the users with the defined roles in To:, Cc:, and Bcc: without respecting the role visibility settings.
