The first time you are invited to be a part of a study in Viedoc, you will recieve an invitation by email with an account activation link.
To activate your account:
| 1 |
Select the link in the invitation email. The account activation window is displayed: 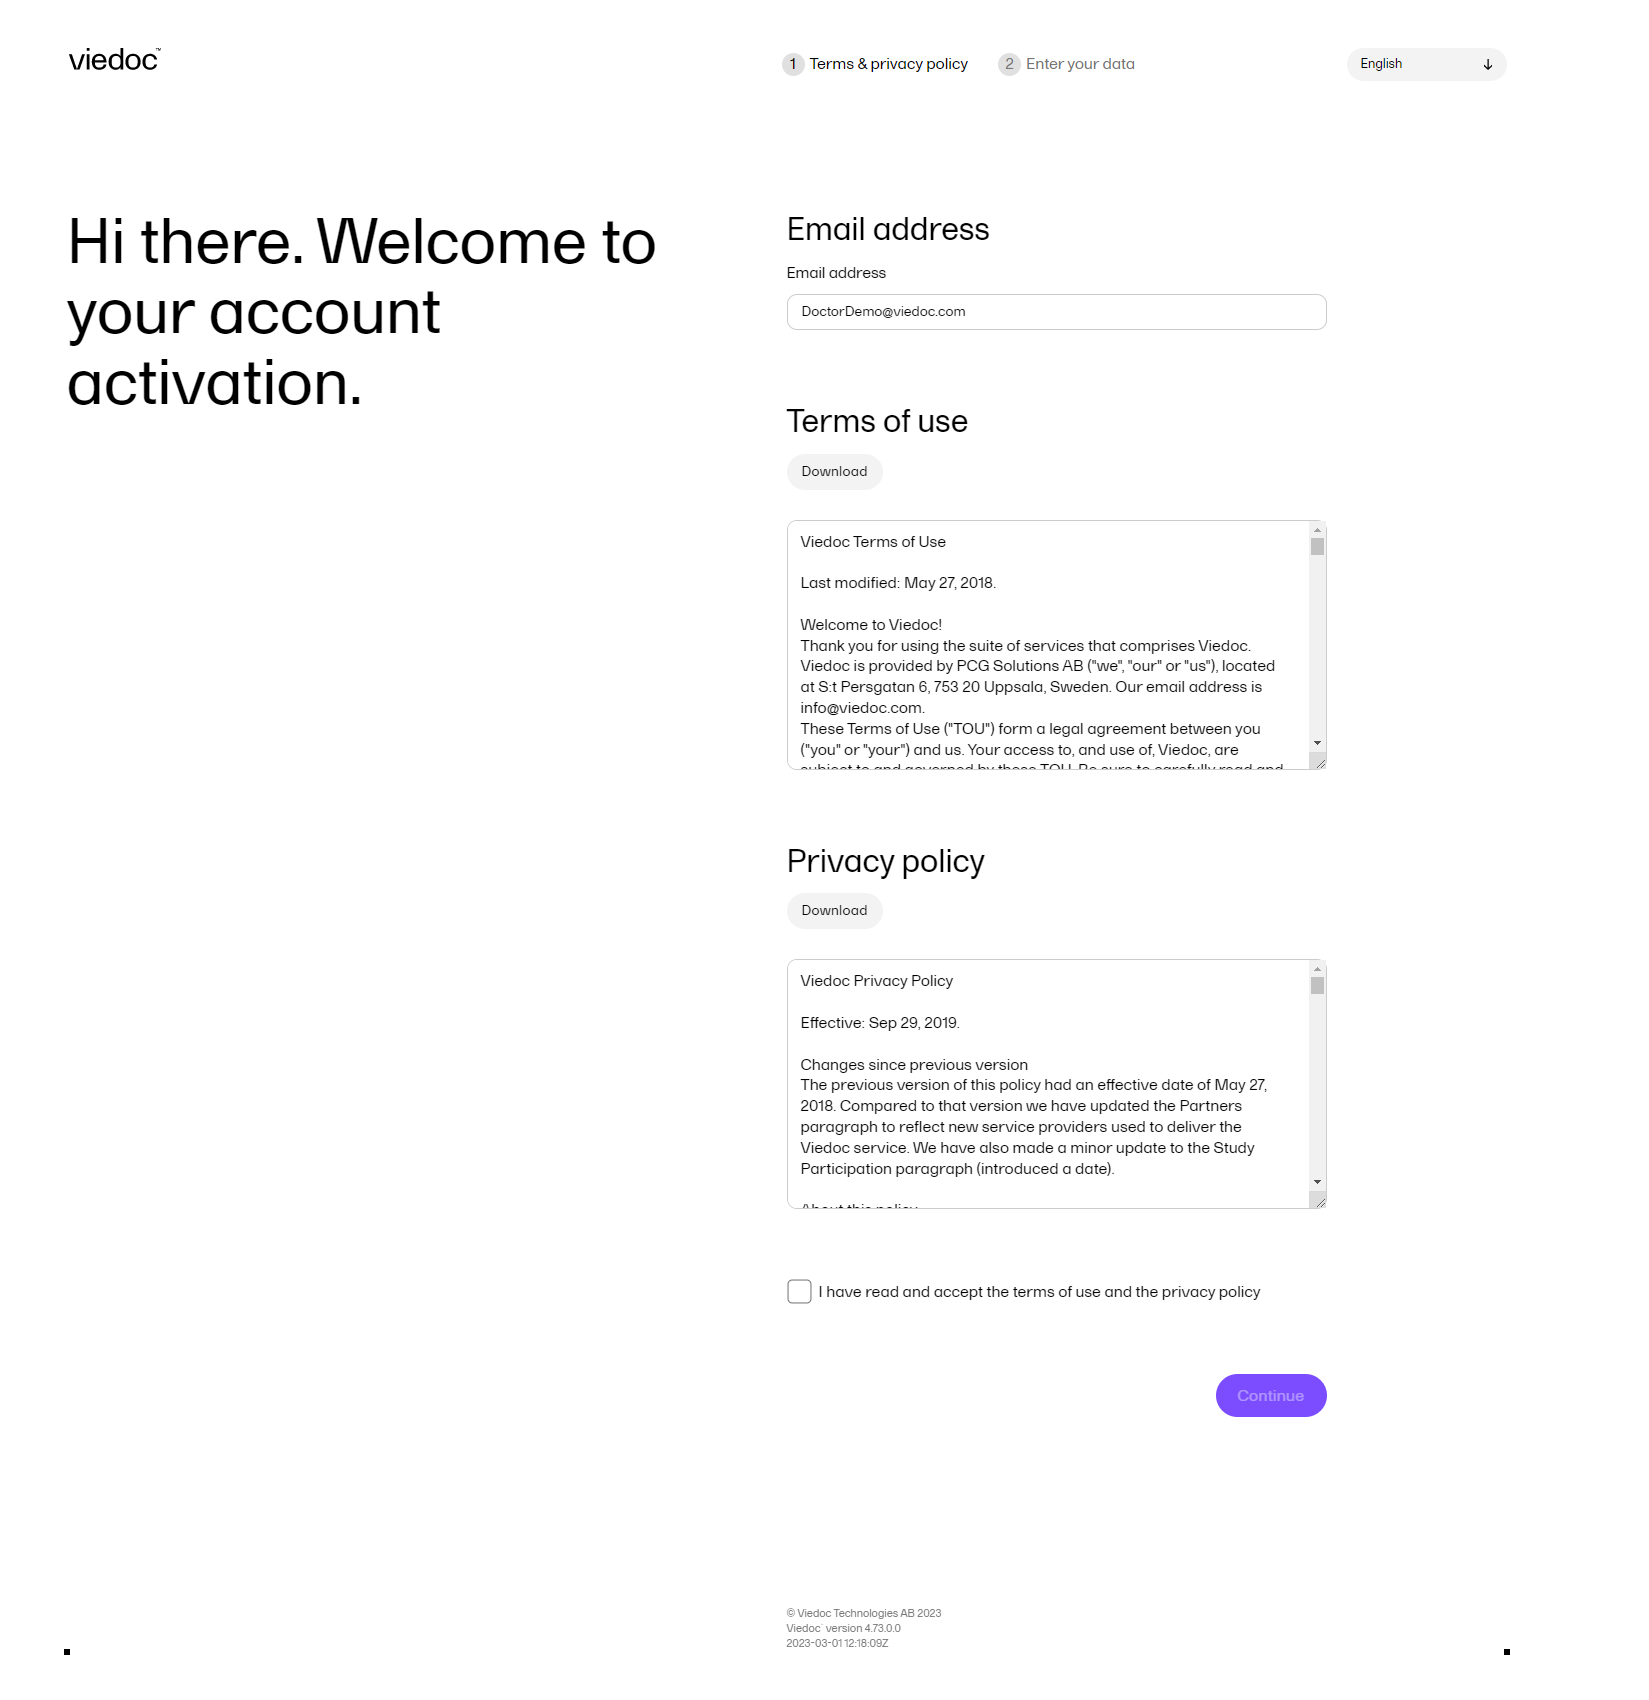
|
| 2 | Read the Terms of use and the Privacy policy documents, and then select the checkbox to confirm you have read and accepted them. |
| 3 |
Select Continue. You will be directed to Step 2/2: 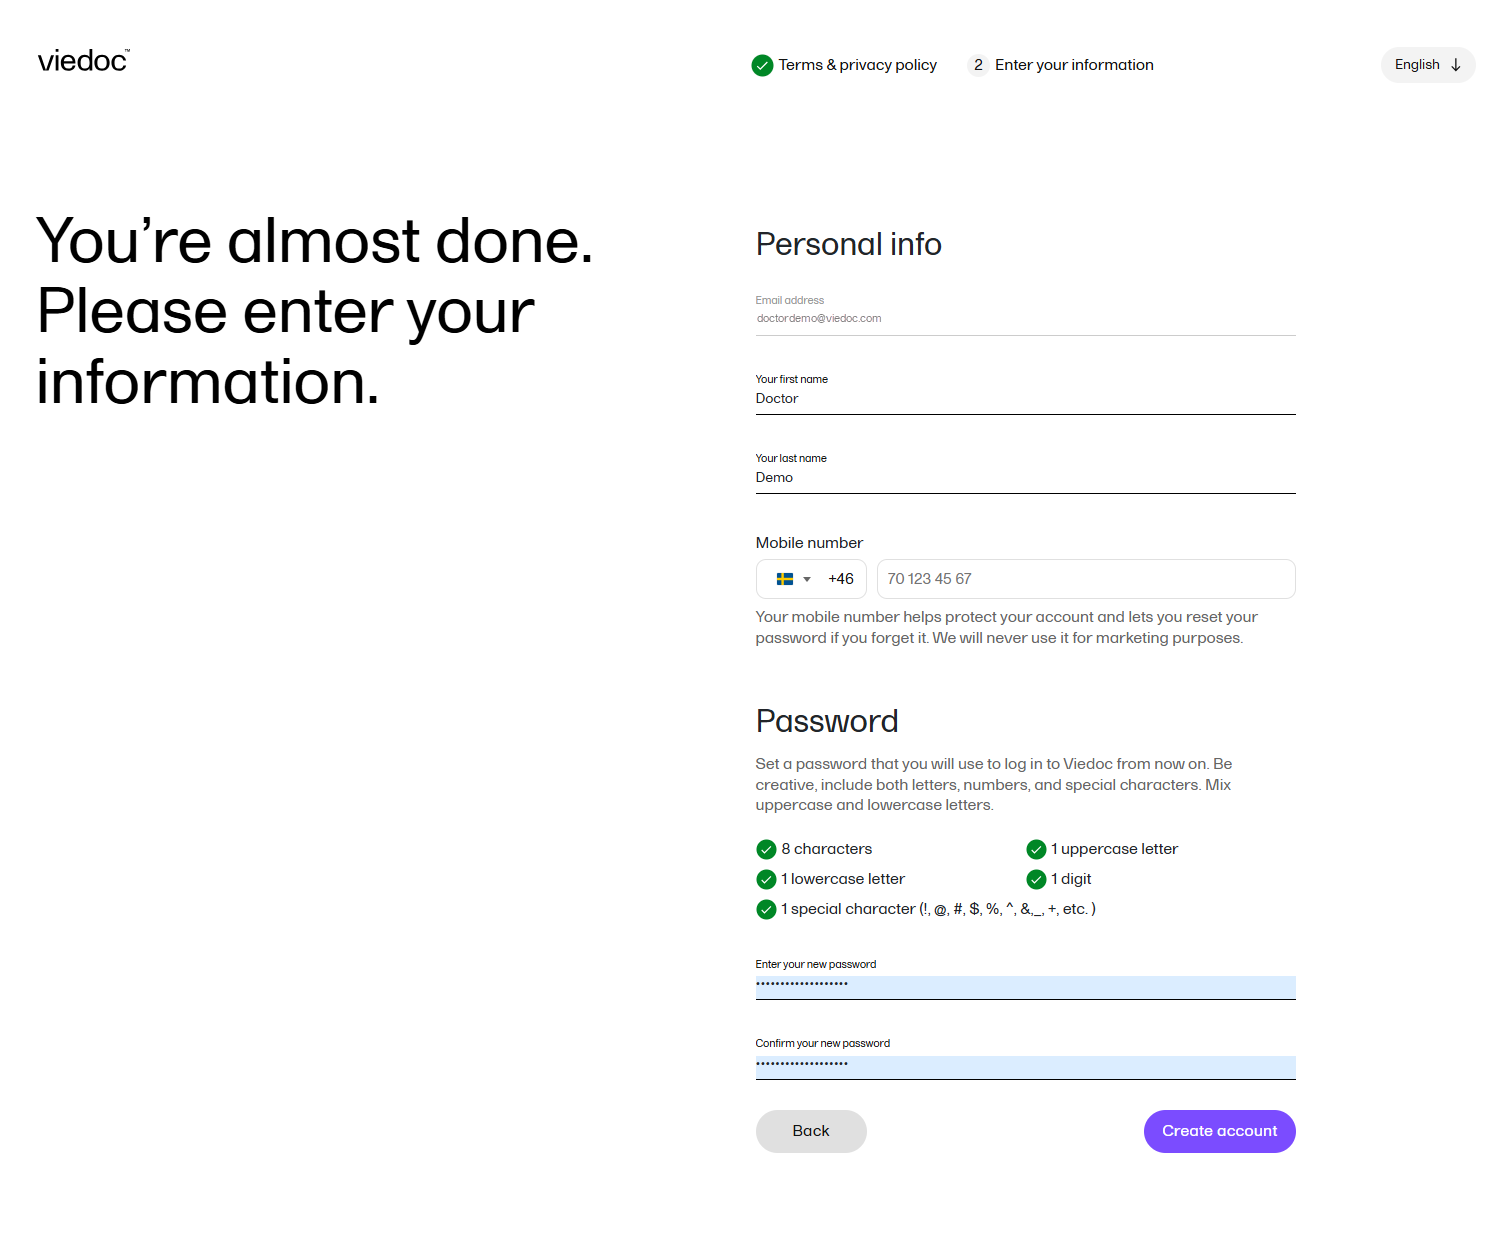
|
| 4 | Enter your first name and last name in the Your first name and Your last name fields. |
| 5 |
Select your country code and enter your mobile number: 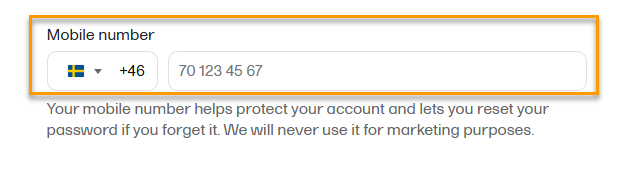
|
| 6 |
You are prompted to verify your mobile number: 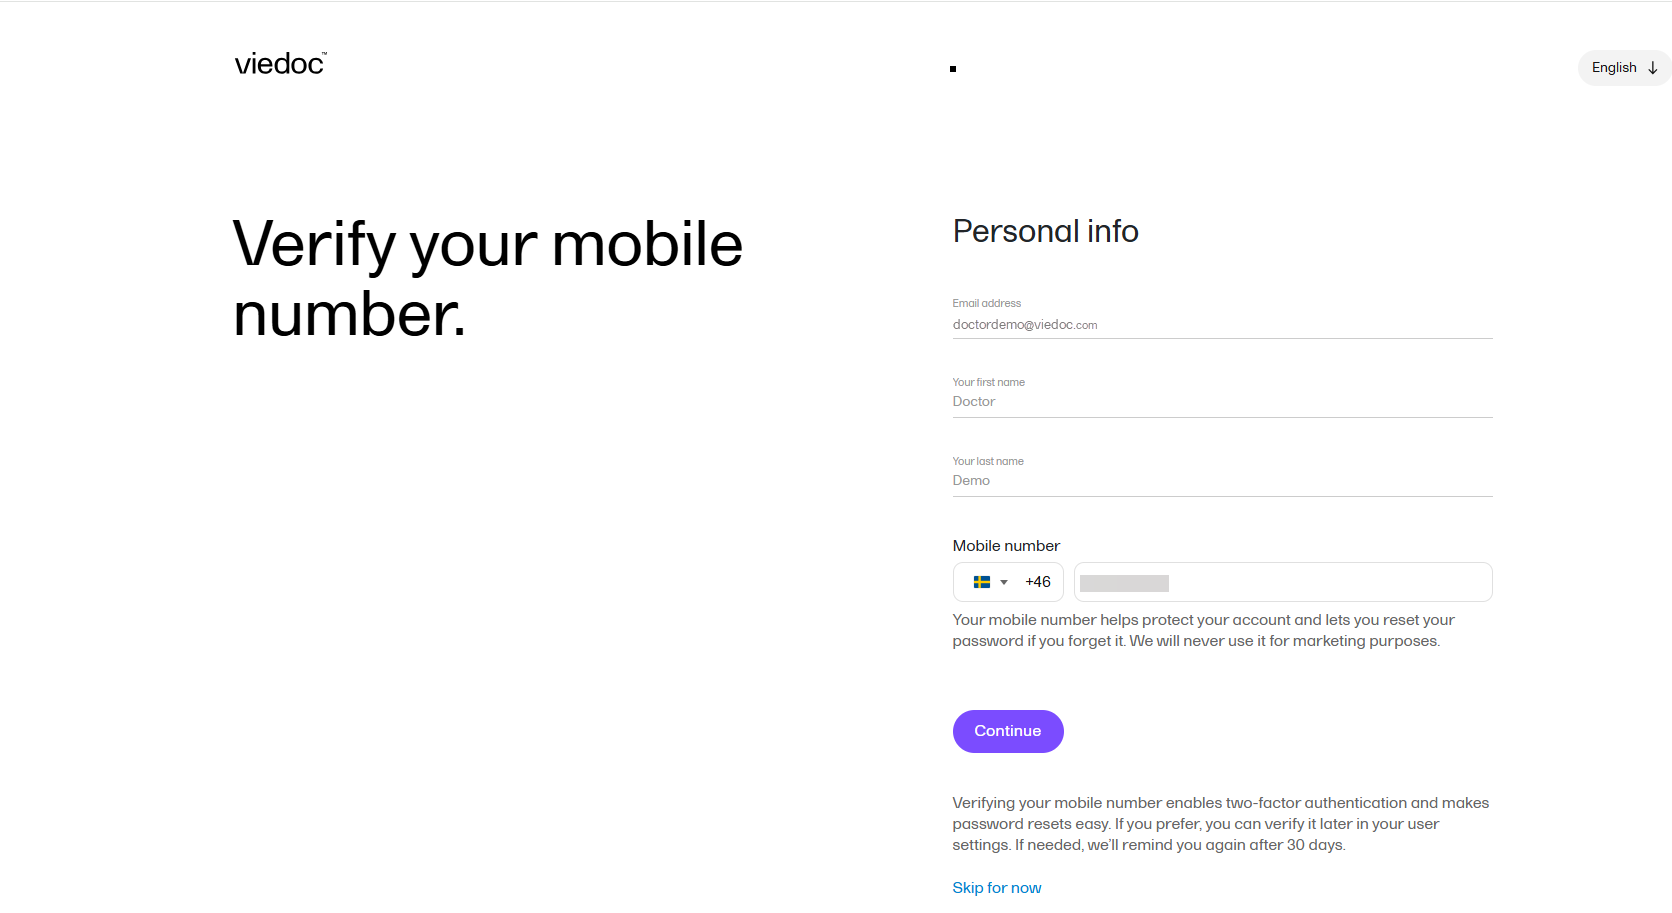
Select Continue to save and and create your account. Your account has now been created and you will be asked to verify your mobile number. This ensures that a verified mobile number is available for use as a second authentication factor when restoring a password. You can choose to close the verification screen without verifying your mobile number and select |
| 7 | Enter a password in the Enter your new password field. The indicators to the right inform you when you have fulfilled all of the requirements for a strong password. |
| 8 | Confirm the chosen password by entering it again in the Confirm your new password field. |
| 9 | Select Continue. You will get a notification message saying that your account was created. |
To log into Viedoc:
| 1 |
Go to the Viedoc login page: 
|
| 2 |
Enter your primary email address and your password. Note! After three failed attempts to enter a correct password, your account will be locked. To unlock it, you need to change your password. To do so, select the link to recover your password, see Recover your password. |
| 3 |
Optionally, select your language from the dropdown list. Note! This language setting applies only to this login page. For instructions on how to change the language after login, see User settings. |
| 4 |
Select Log In to access Viedoc. |
Depending on how your account is set up, there are two ways to log in to Viedoc:
Without two-factor authentication:
| 1 |
After you select Log In, if you are not using single sign-on (SSO) and your account does not have a second authentication factor configured and verified, you are reminded to enter a mobile number as a second authentication factor: 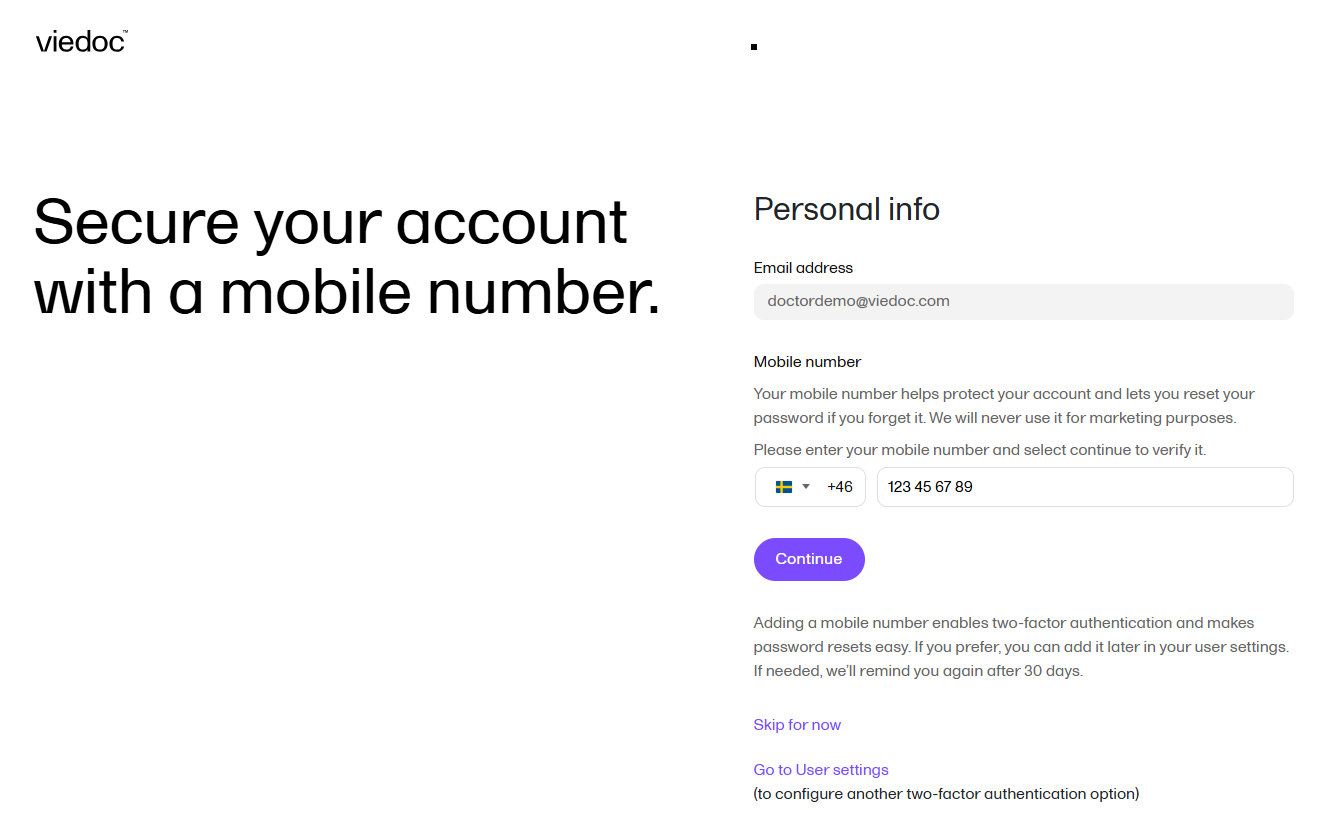
|
| 2 | Secure your account by adding and verifying a mobile number. |
| 3 |
To verify your mobile number:

|
| 4 |
Select Confirm. 
You can also choose to:
Adding a mobile number enables two-factor authentication and supports password recovery. If you skip this step, the system reminds you after 30 days. |
| 1 | After you select Log In: If you are using two-factor authentication (see Security settings), you are prompted to enter a security code before you are given access to Viedoc. |
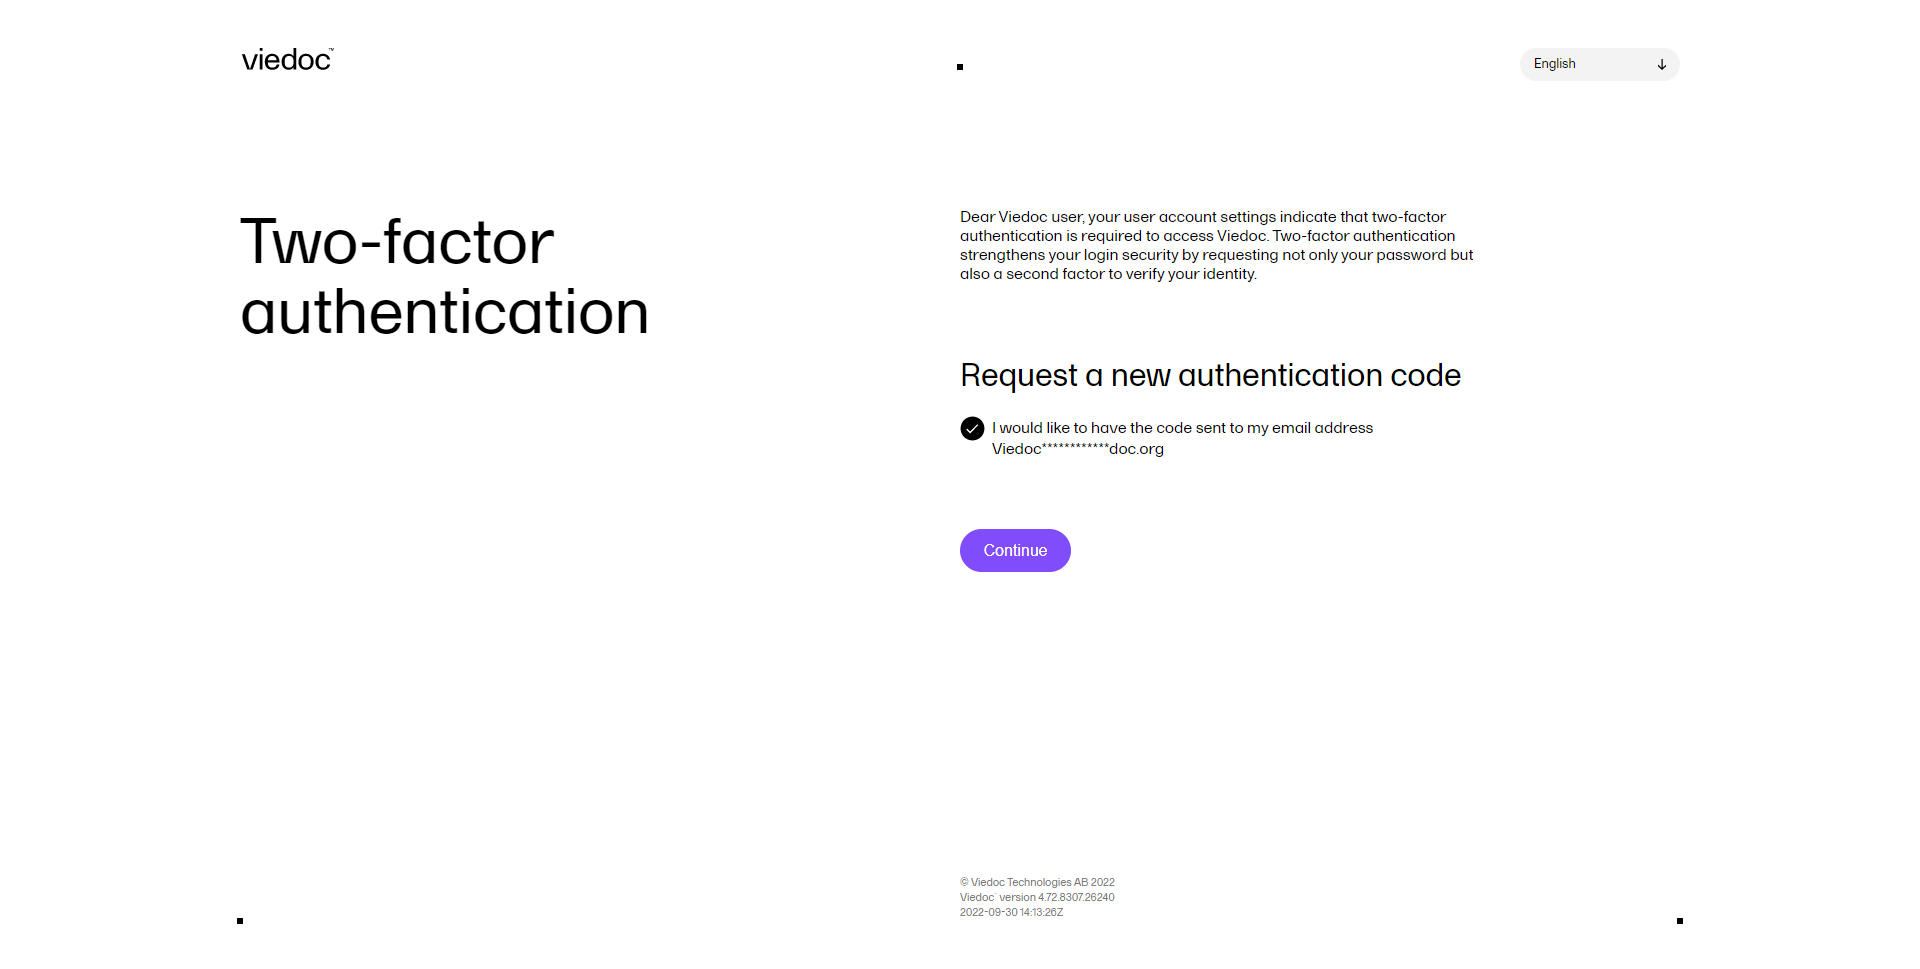
| 2 |
The Two-factor authentication page opens and you are required to enter the authentication code you received by email, according to your settings in Security settings: 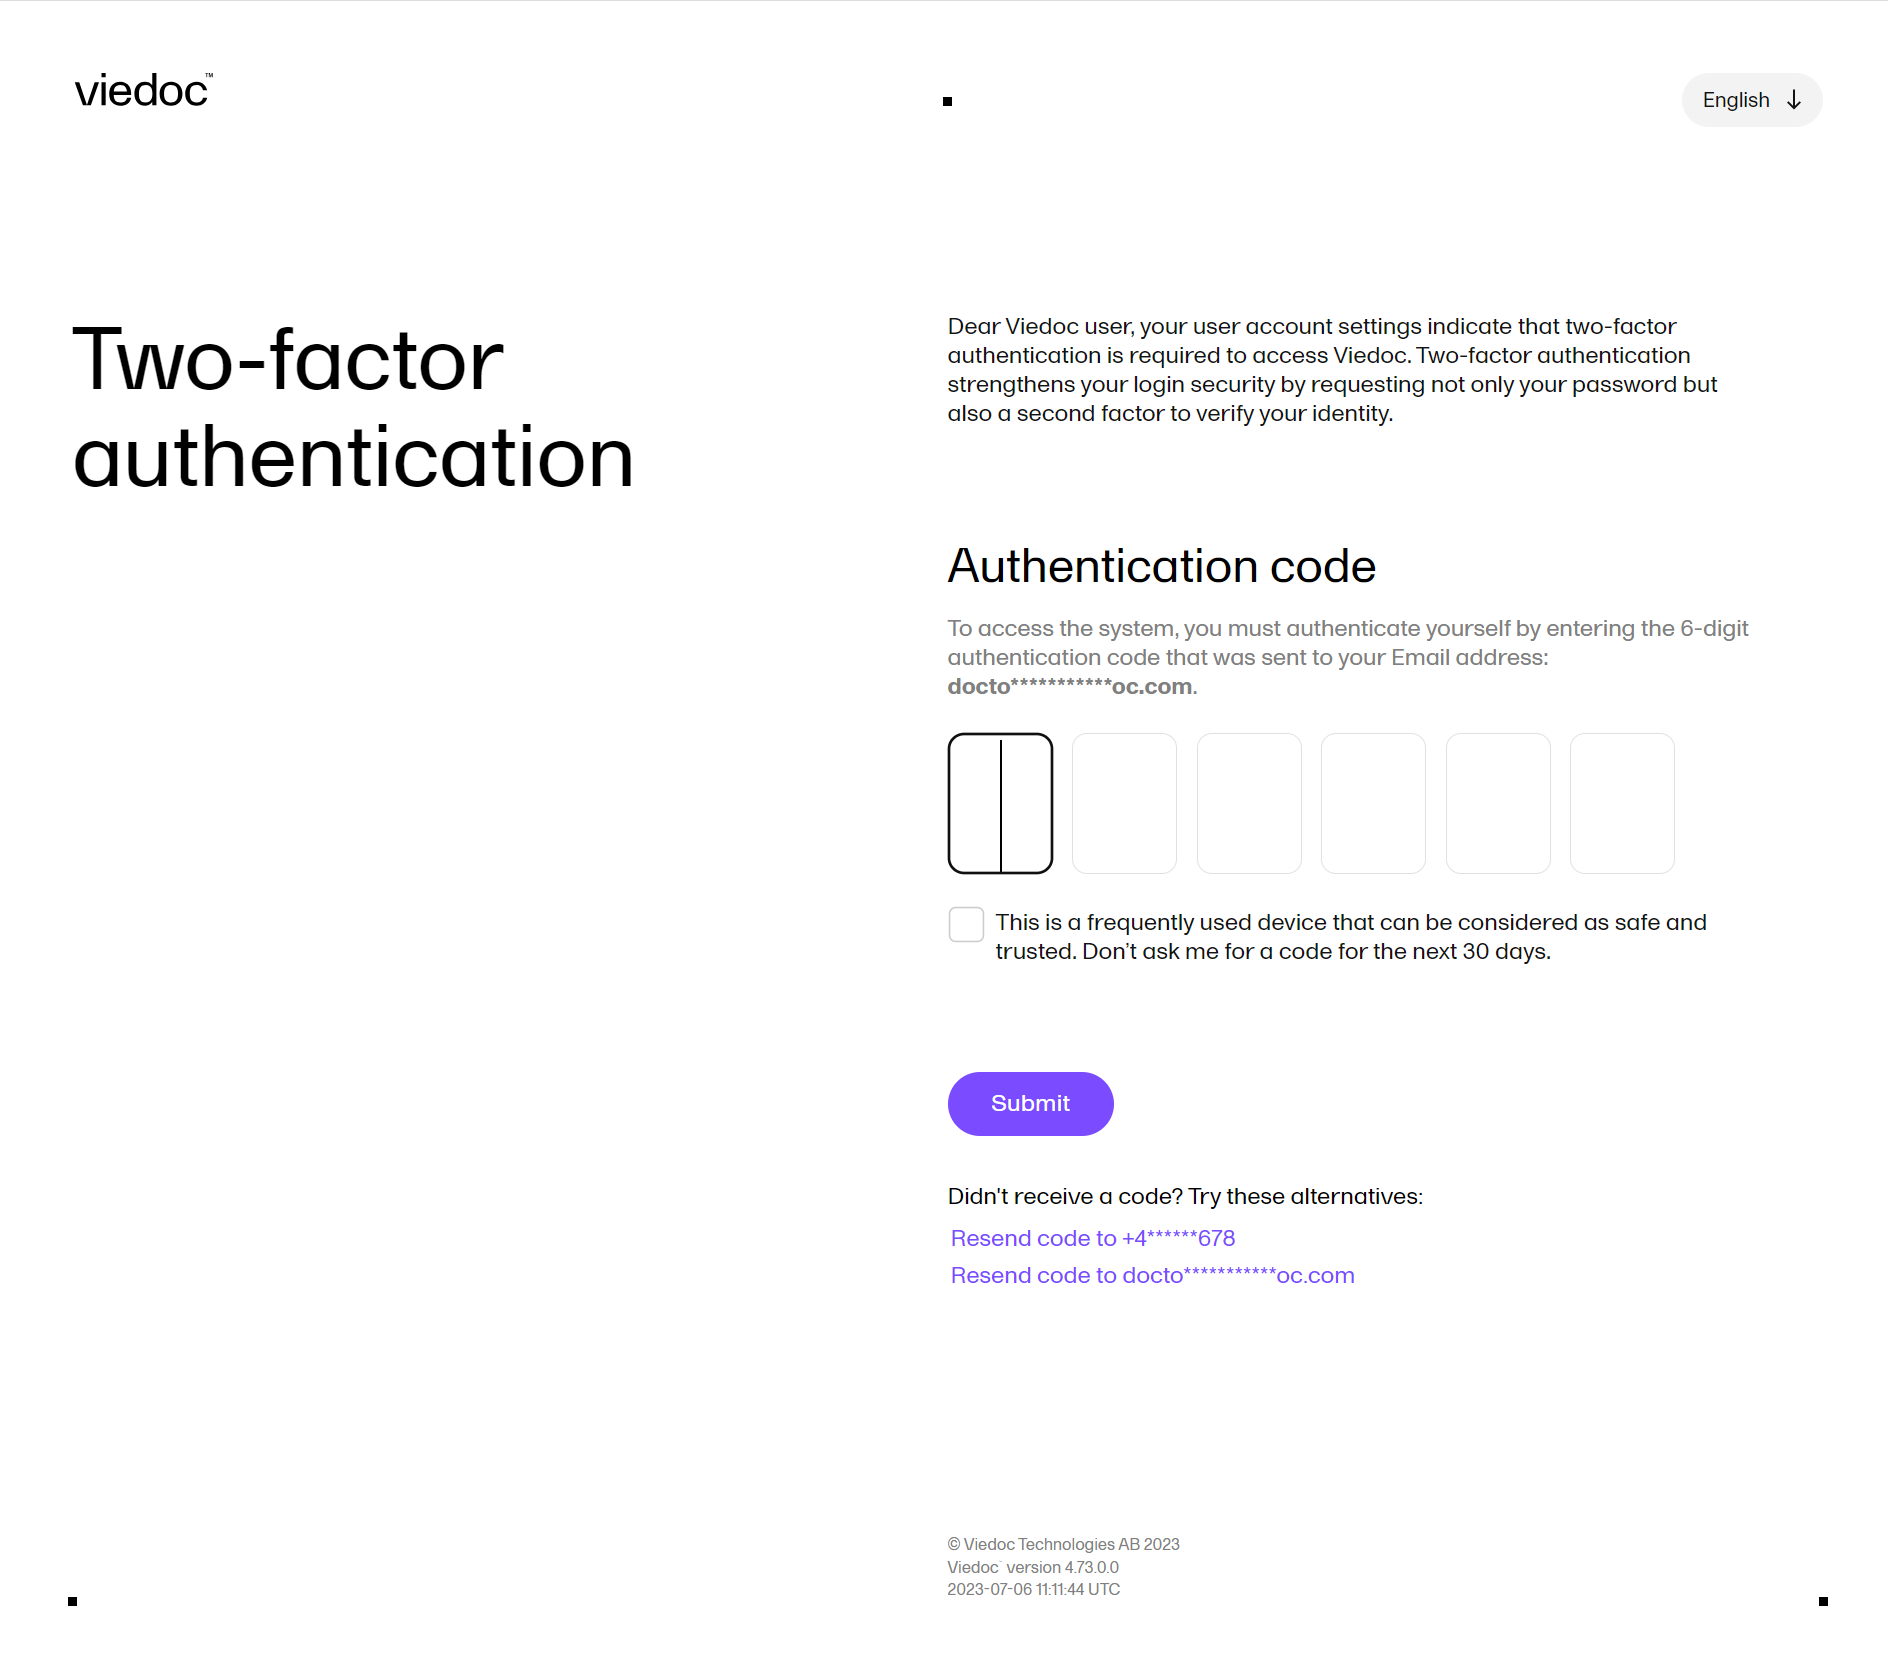
Note! After three failed attempts to enter the correct code the user account is locked. |
| 3 |
If you did not receive an authentication code, or you want the code to be sent using a different method than the one set up in Security settings, you can select the link next to Didn't receive a code? at the bottom of the page.
Note! A new authentication code can be requested up to 5 times and is reset to 5 requests after a successful user login.
|
| 4 | Optionally, you can select Trust this device for 30 days. If selected, you won't be asked again for the authentication code for the next 30 days when logging in with the same username from the same device using the same browser (unless the browser session is in private mode or the cookies are cleared). The list of trusted devices is shown in the Security settings. After a password recovery, all the trusted devices are removed. |
Notes!
To reset your password:
| 1 |
On the login page, next to Forgot your password?, select Click here. The following dialog is displayed: 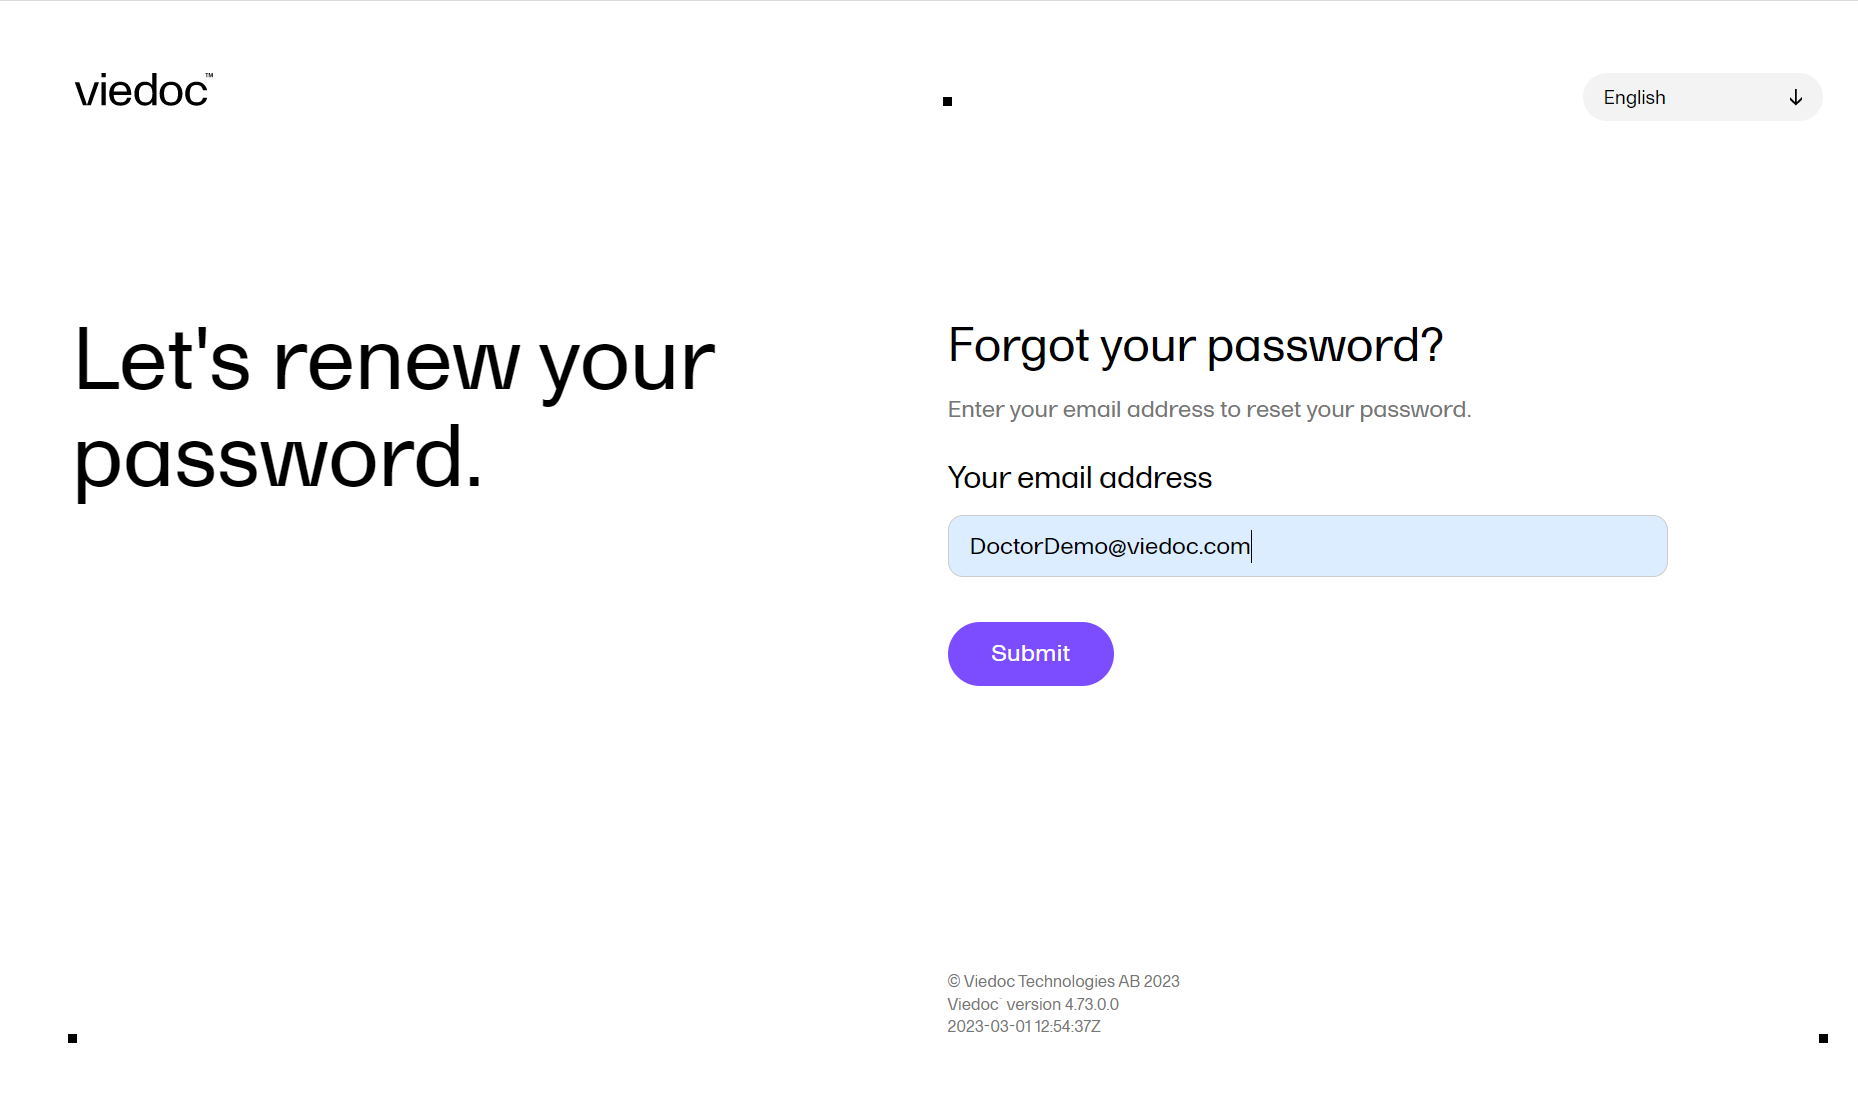
|
| 2 |
Enter your email address and select Submit. The system sends you a password recovery email and a Password retrieval request confirmation message is shown: 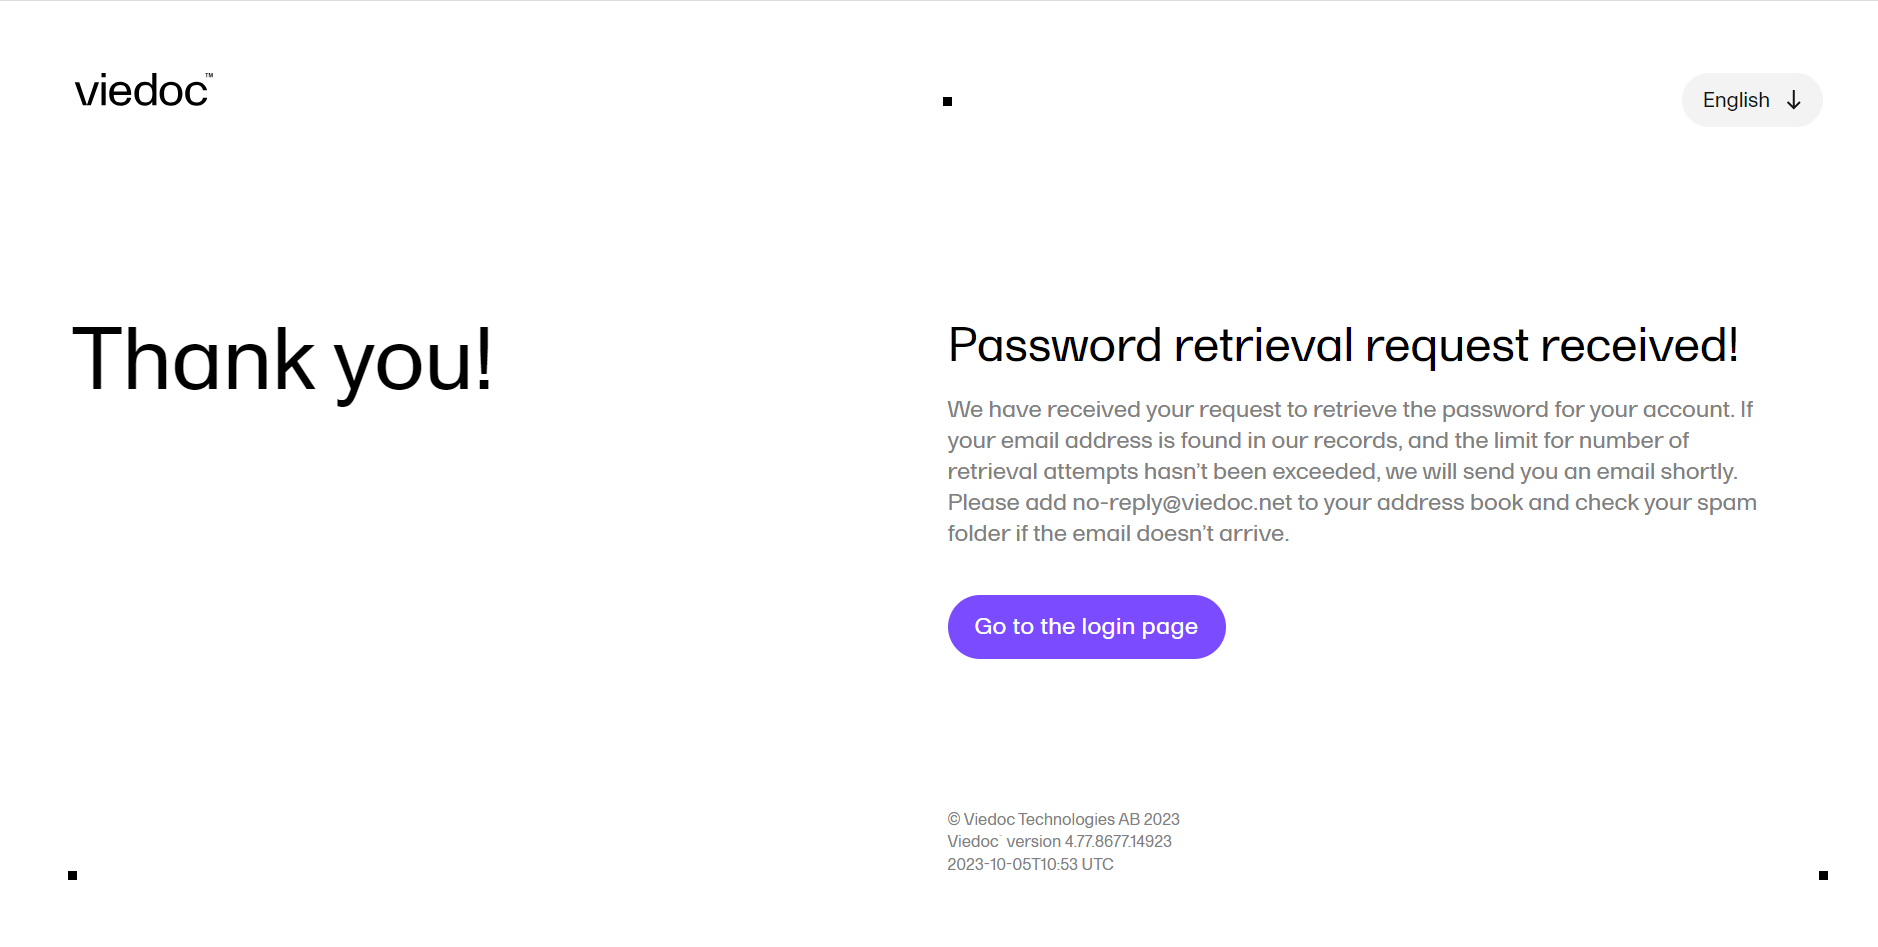
|
| 3 |
Select the link in the password recovery email. This directs you to the Reset your password page. Note! You will first be prompted to enter a security code before you can access Viedoc: 
The authentication code is sent to the phone number you set to receive text messages or to your secondary email address. If neither of these options are selected, you will need to contact your Study Manager to receive a link to reset your password. For more information on setting your phone number and secondary email address, see User settings. |
| 4 |
To reset your password, you need to fill in the fields Enter your new password and Confirm your new password, and then select Submit: 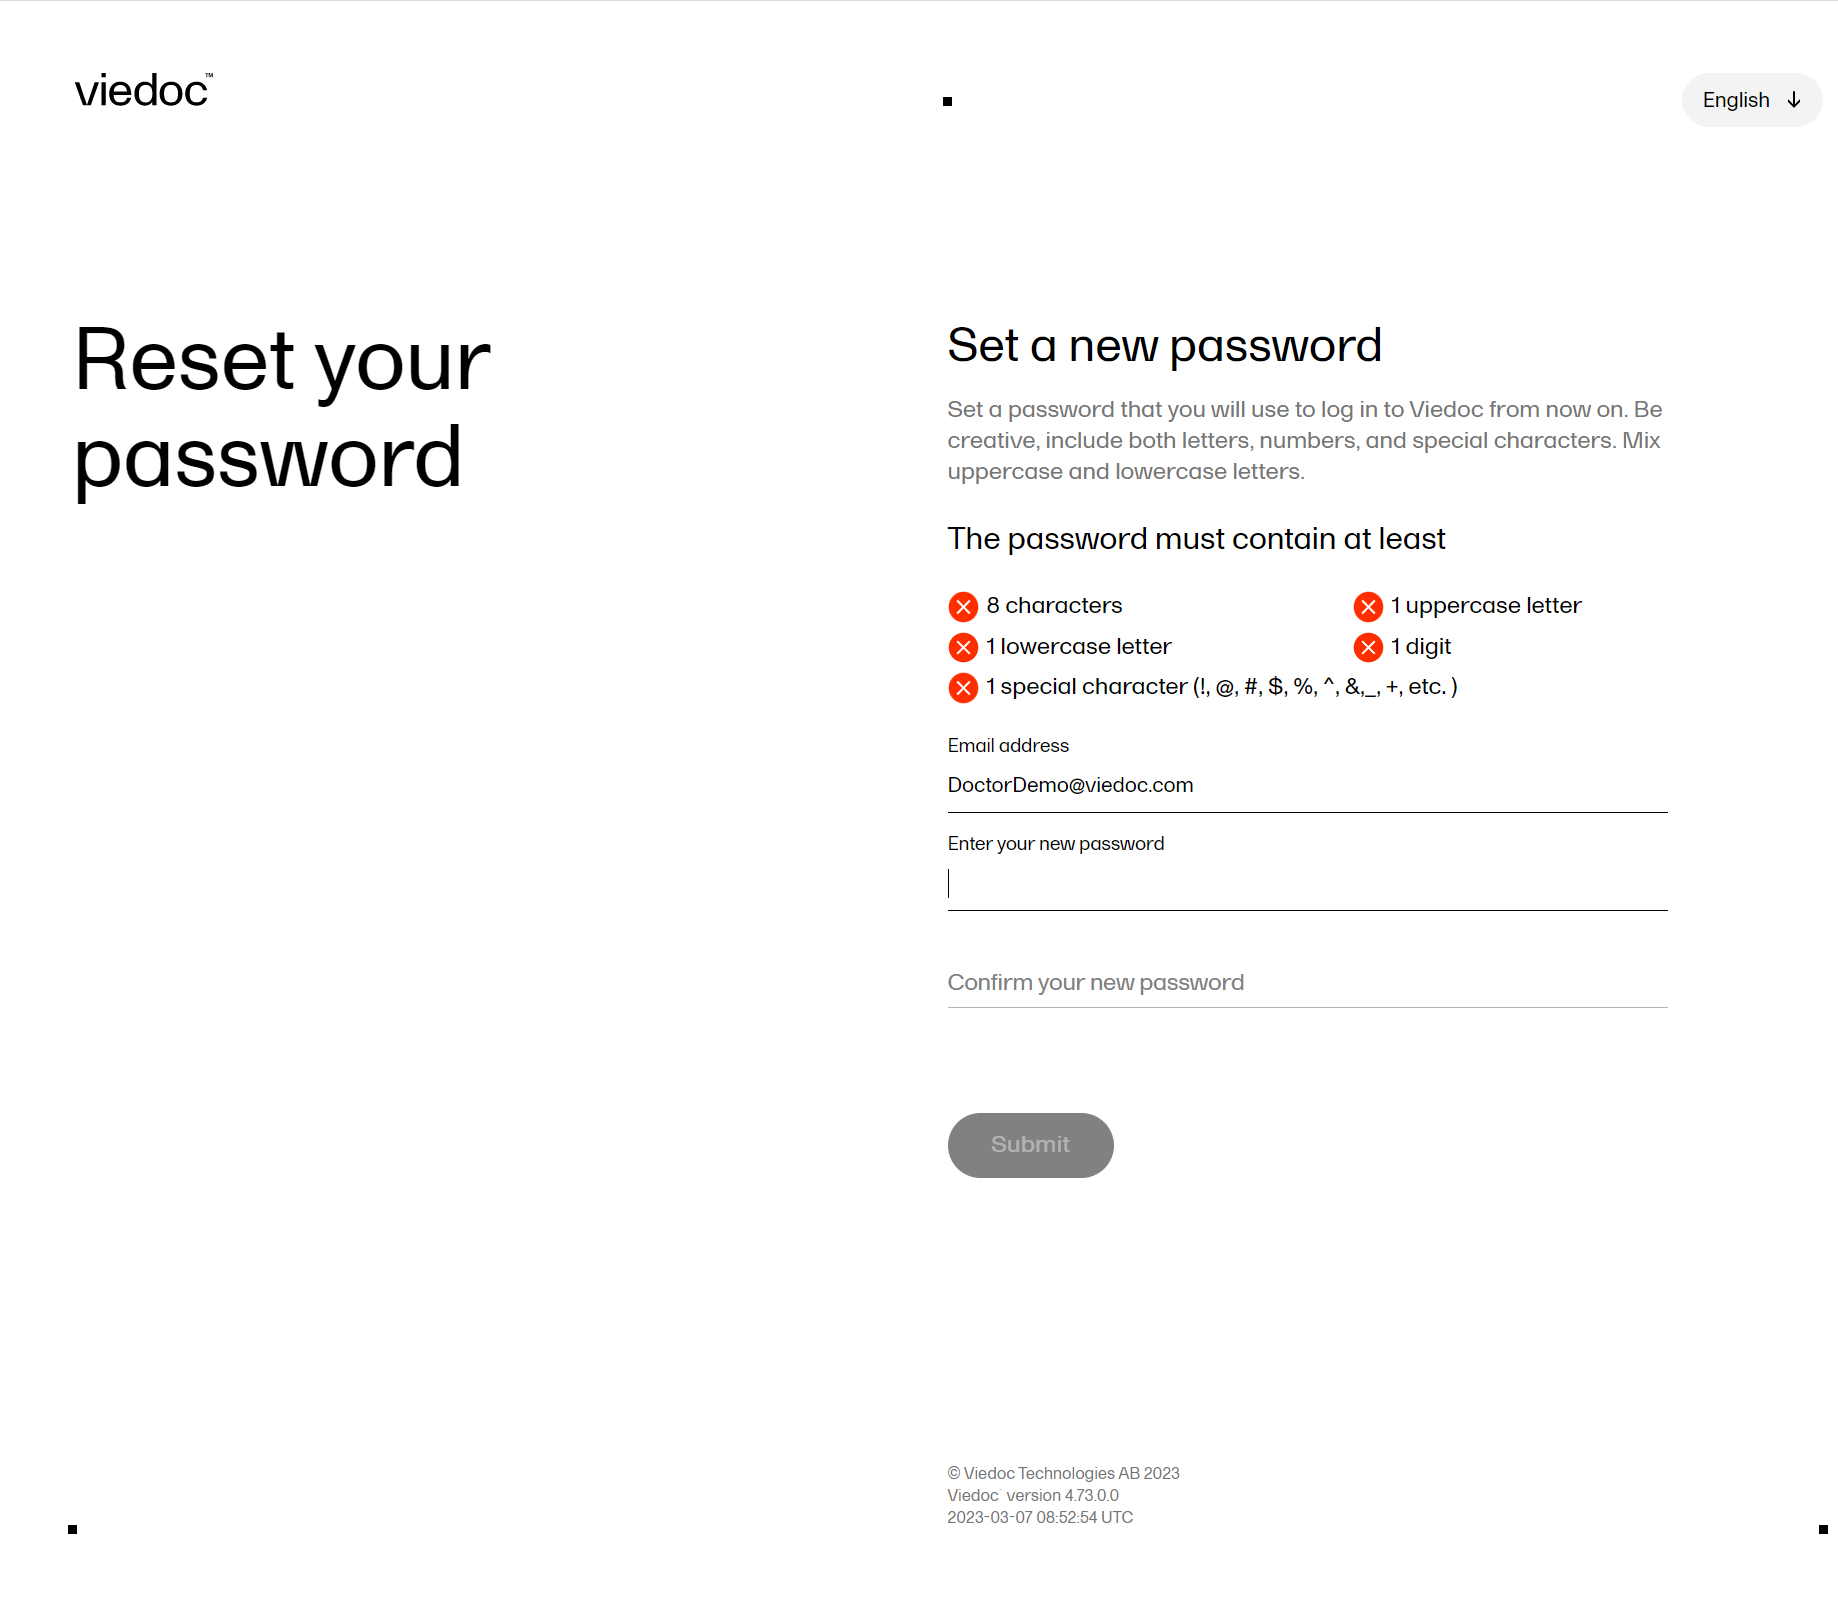

Note!
|
To change your password once you are logged in to Viedoc:
| 1 |
Select the settings button (wheel) in the top right corner of the landing page, and select Change password. The Change password window opens: 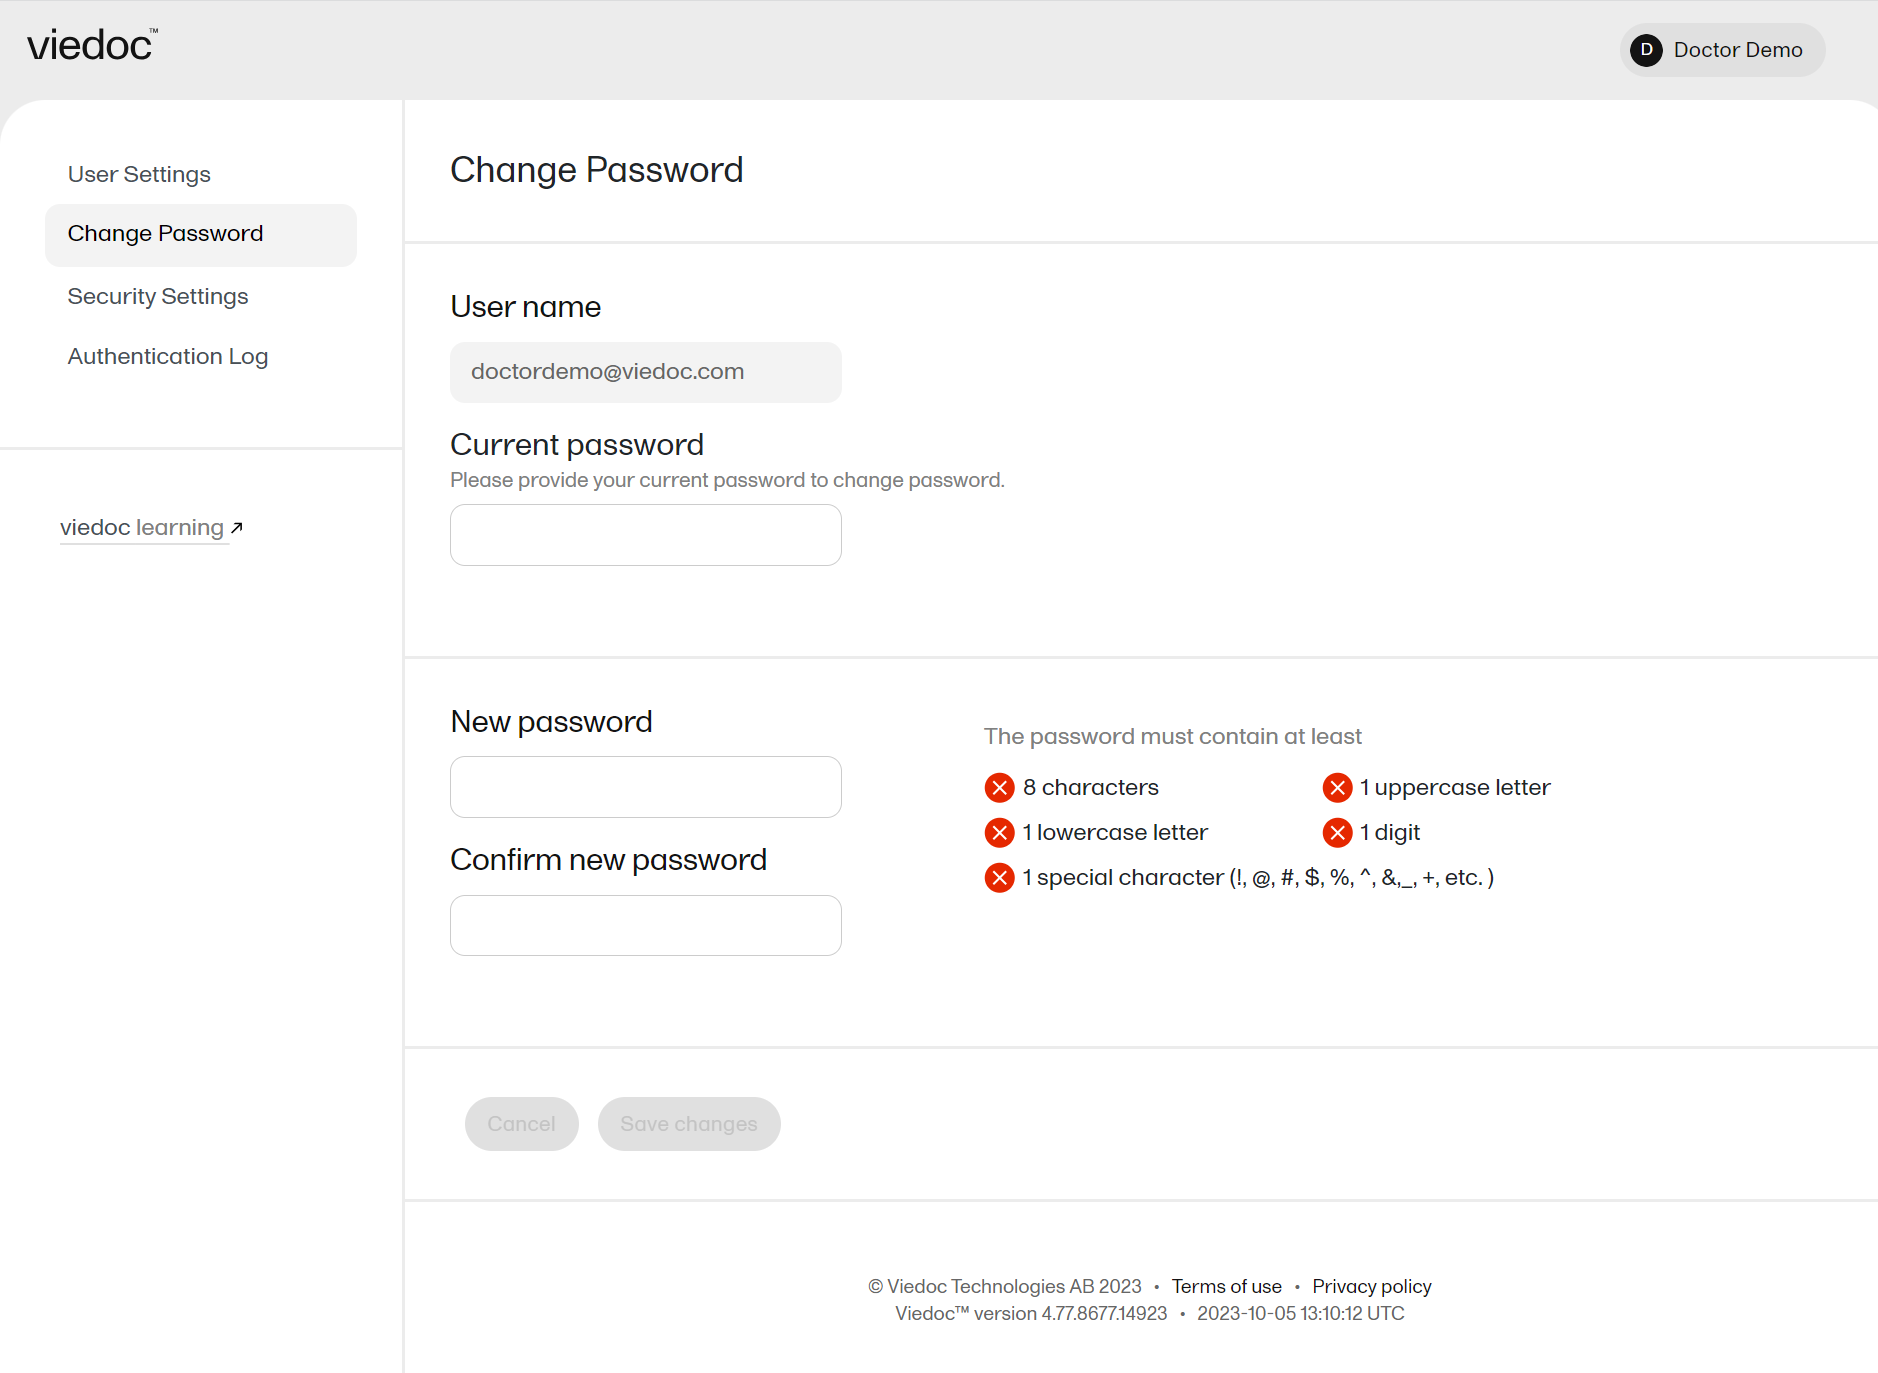
|
| 2 | Enter the Current password. |
| 3 | Enter the new password in the New password and Confirm new password fields. The indicators to the right inform you when you have fulfilled all requirements for a strong password. The new password must be different from the previous 10 passwords you have used. If this requirement is not fulfilled, a message will notify you. |
| 4 | Select Save changes. Note! After entering an incorrect current password three times in a row, your account will be locked. |
The process is similar for the case when your password expires and you are required to change it.
NOTE! If you update the User settings section here, make sure to also update User settings in system lessons>General>Managing your Viedoc account
When you are logged in to Viedoc, you can edit your profile.
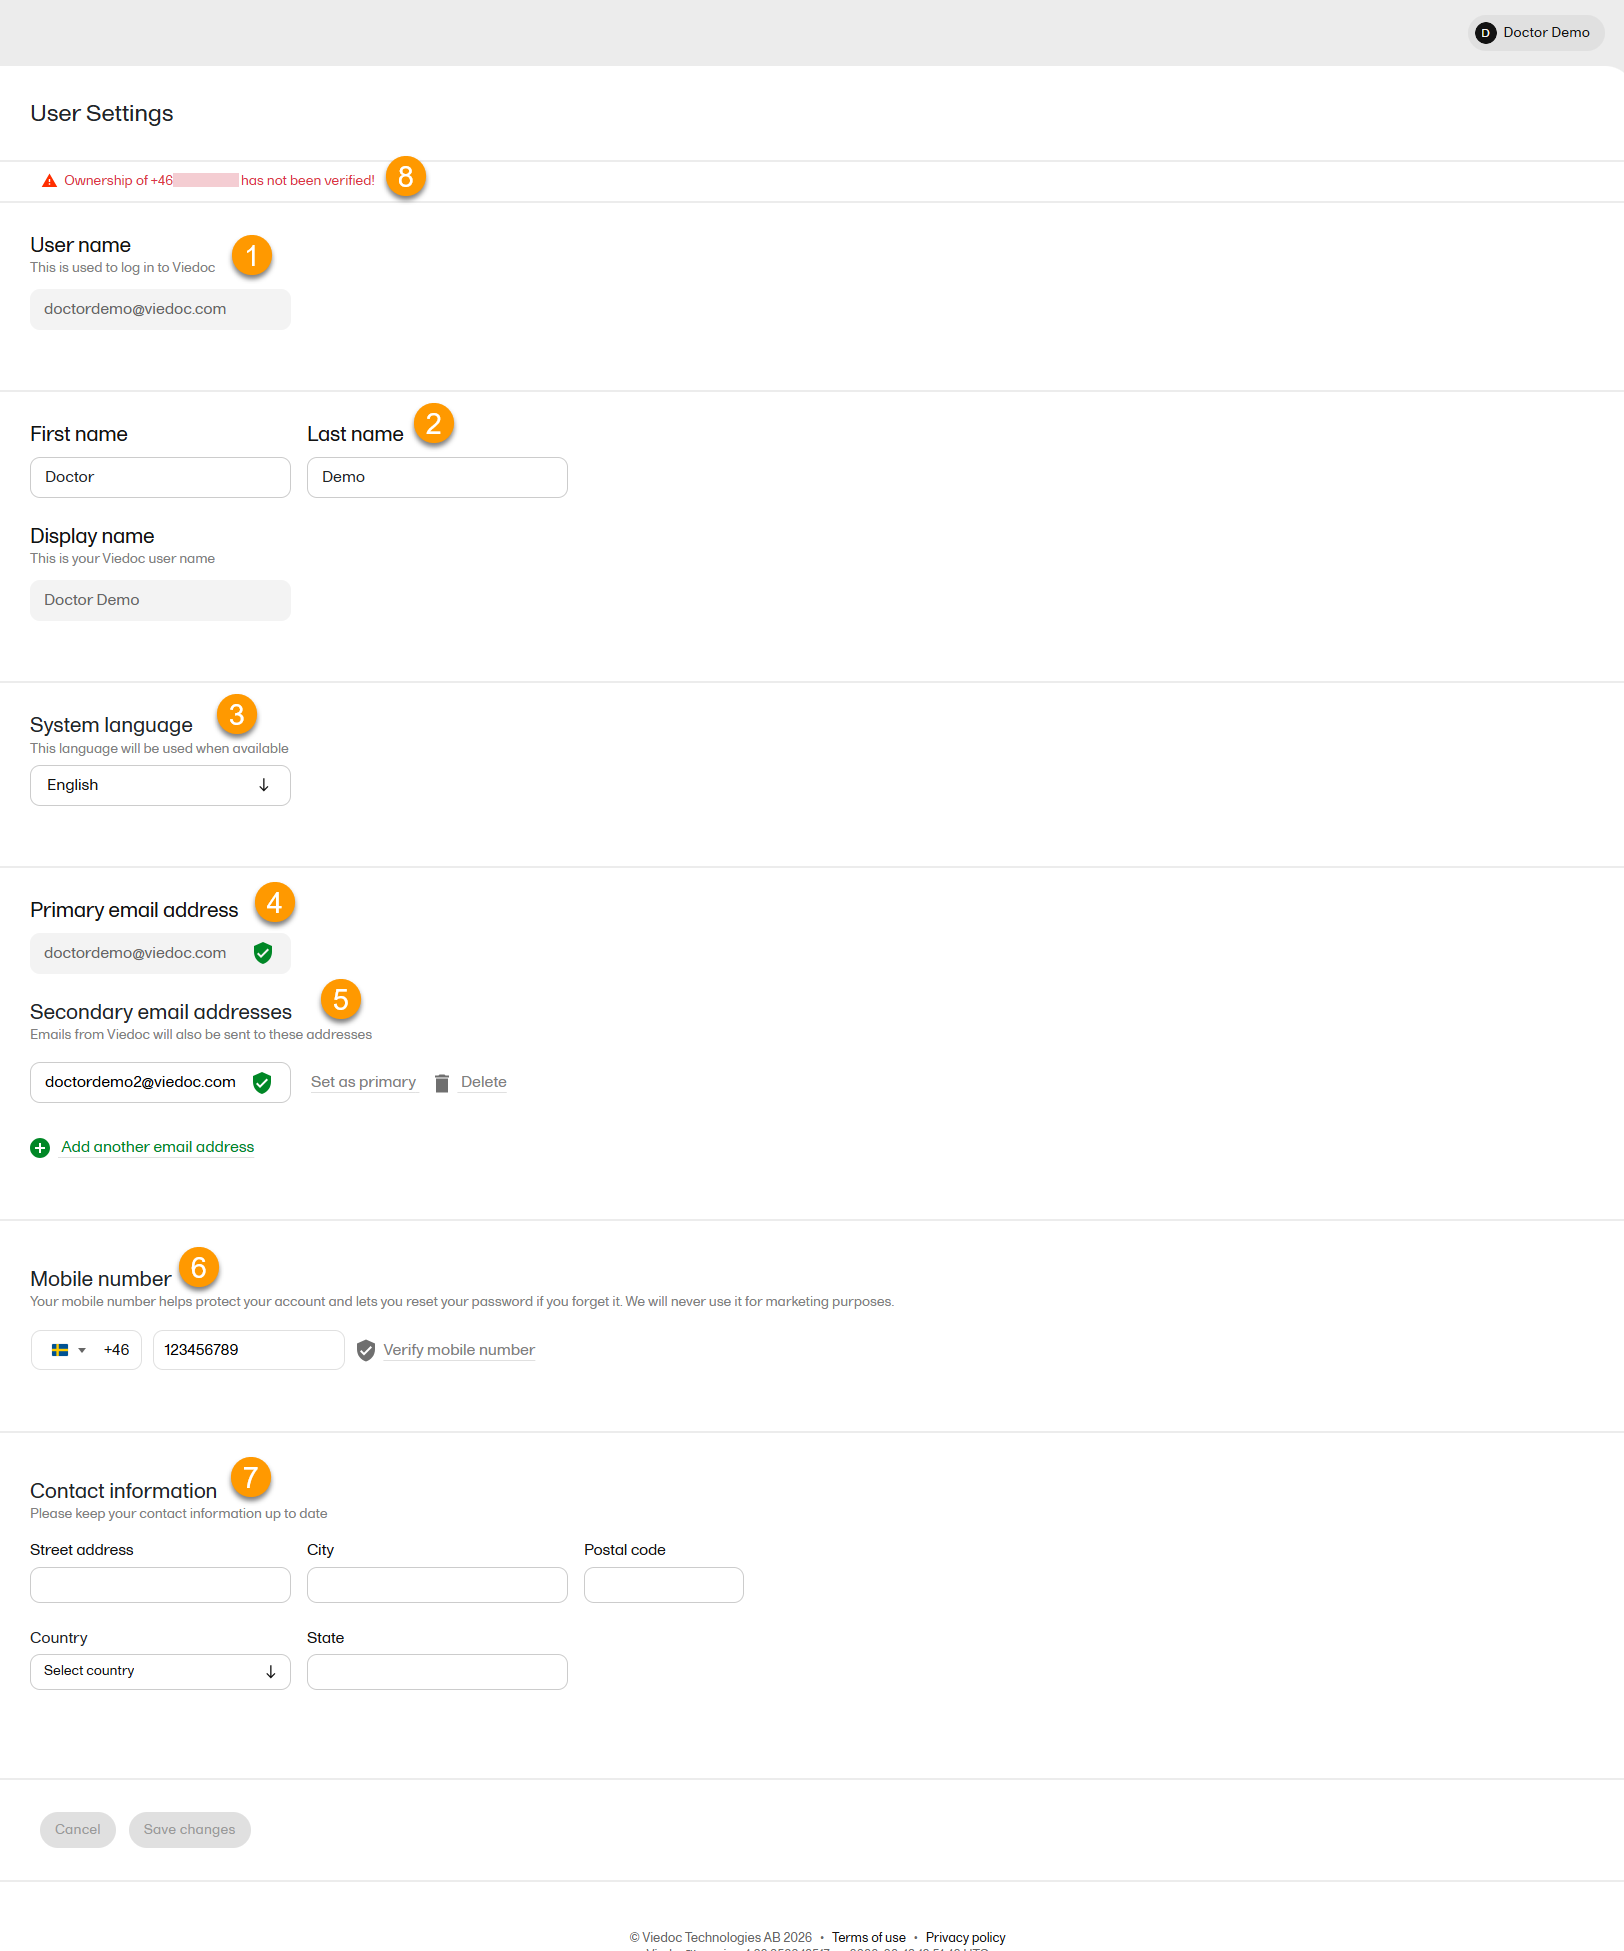
To view or edit your user settings, select the settings button (wheel) in the top right corner of the landing page, and select Edit your profile. The User Settings page opens, where you can configure the following:
1. User name - this is your primary email address used for your Viedoc account. This is the user name you use to log in to Viedoc. See the information below about your primary email address.
2. First name and Last name - fill in these fields that are used for your Display name, used in Viedoc to identify your user.
3. System language - select the language of your choice from the drop-down menu.
4. Primary email address - this is the same as the User name described above. It is the email address used in Viedoc to log in, as well as for Viedoc user account-related operations (account setup, password recovery, study invitations).
By default, this is set to the email address used to initiate the Viedoc user account.
The primary email address must be unique and is mandatory. Therefore, it is not possible to delete the primary email address.
See Changing the primary email address.
5. Secondary email addresses - you can add up to 3 additional email addresses.
Secondary email addresses is used only for:
Delivering second-factor verification codes for self-service password resets initiated by the user.
Sending a notification about changes to your user account when a secondary email address is added or removed.
See Adding a secondary email address and Verifying a secondary email address.
6. Mobile number - Select your country code and enter your mobile number.
You will be asked to Save and verify mobile number. A validation warning (8) will be displayed if the mobile number is not valid.
See Editing your mobile number and Verifying your mobile number.
Important!
|
7. Contact information - fill in the following fields: your street address, city, state, postal code and country.
To add a new (secondary) email address to your account:
| 1 | Select the Add another email address link under the current primary email address. |
| 2 | Enter the email address in the new field under Secondary email addresses. |
| 3 | Select Save changes. A notification email is sent to both the primary email address and to the newly added email address to inform you about the change. At the top of the Edit your profile page, you will see a warning message saying that the newly entered email address is not verified. |
To verify a secondary email address:
| 1 |
Select the Verify email address link next to the newly added email address. A six-digit code will be sent to your new email address and a Verify ownership pop-up is displayed asking you to provide the code in order to verify the new email address. Note! The verification link for the secondary email address is shown only after having saved the changes you may have performed on the other fields on the same page. |
| 2 | Enter the received code and select Confirm. The newly added secondary email address is now verified. |
To change the primary address to one of the existing secondary email addresses:
| 1 | Select Set as primary next to the secondary email address that is to be set as the primary email address. |
| 2 | Select Save changes. A notification email will be sent to both email addresses to inform you about the change. You will use the new primary email address the next time you log in to Viedoc. |
Note! For a secondary email address to be able to be set as primary, it has to be verified first.
To edit your mobile number:
| 1 | Select your country code and enter your mobile number. |
| 2 | Select Save and verify mobile number. A notification email will be sent to your primary email address to inform you about the change. |
To verify your mobile number:
| 1 | Make sure that the mobile number is correctly entered and select Verify mobile number. |
| 2 | A six-digit code will be sent as a text message to your mobile and a Verify mobile number pop-up is displayed. It will ask you to provide the code in order to verify the mobile number. |
| 3 | Enter the code and select Confirm. The mobile number is now verified. |
Select the settings button (wheel) in the top right corner of the window, and select Security settings. A window opens where you can configure the two-factor authentication settings and view your trusted devices:
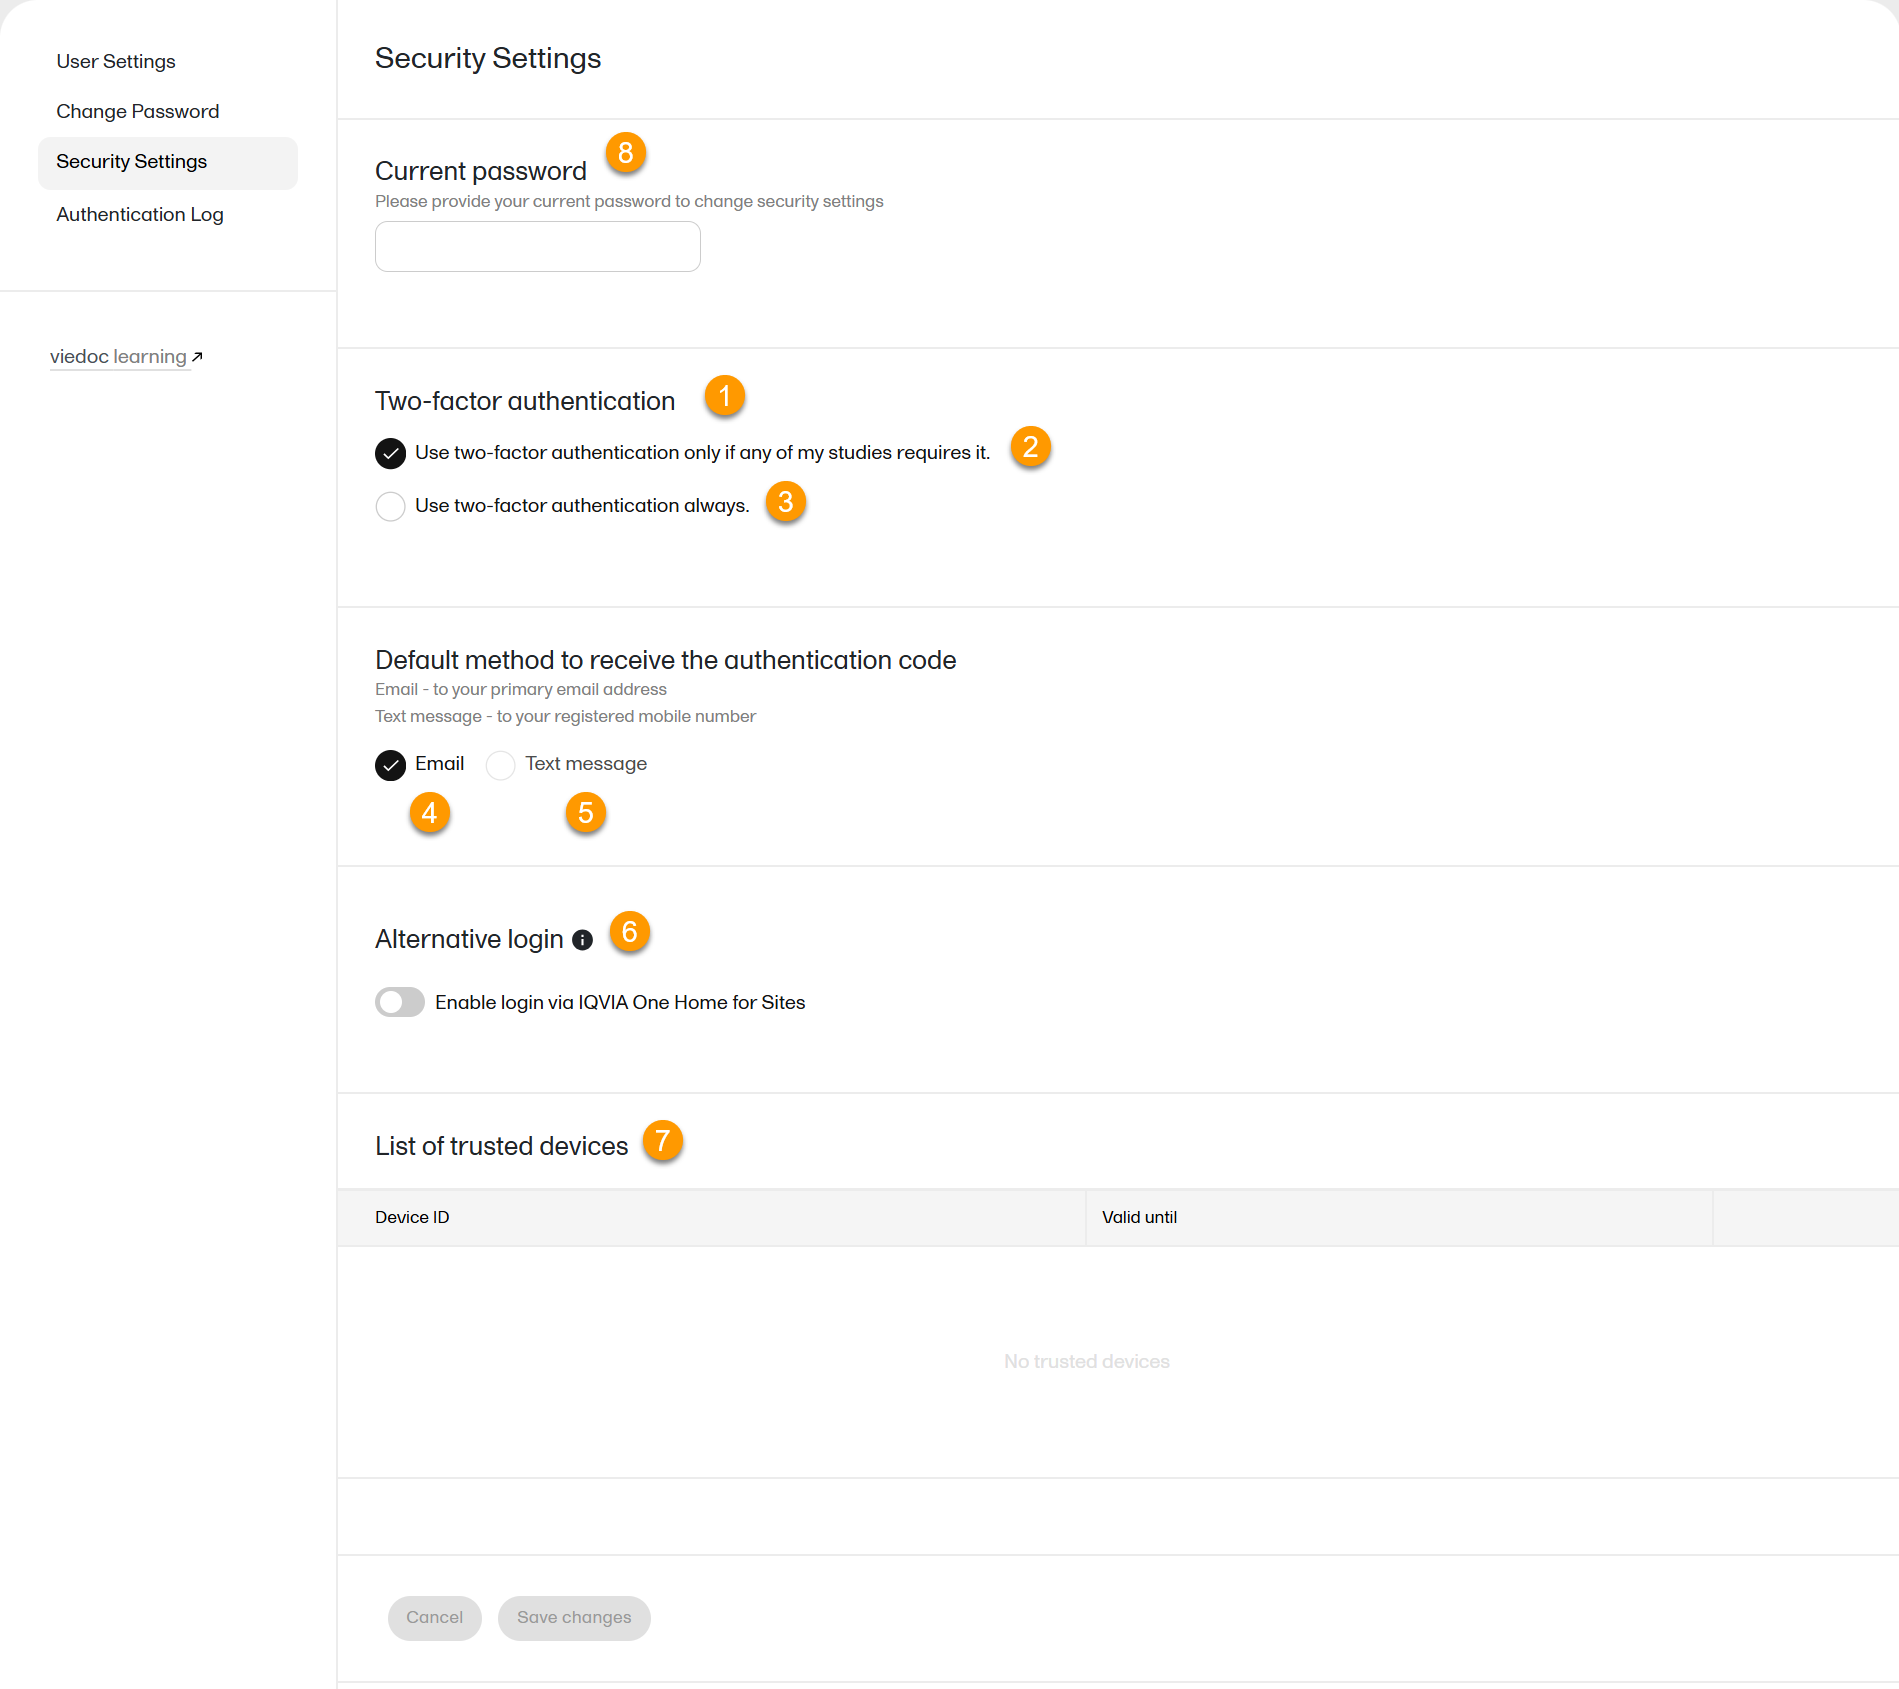
Here you can configure the following:
1. Two-factor authentication - Using two-factor authentication is an extra security measure that would require an extra confirmation step at login, in addition to the user name and the password. For more information, see Logging in to Viedoc.
6. Alternative login - select Enable login via IQVIA One Home for Sites to be able to log in to Viedoc directly from IQVIA One Home for Sites. This option is shown if it is configured for your instance. If the option is selected, you will still be able to log in with your user name and password. Note! The alternative login does not work if single-sign on is configured for the domain of your email address.
7. List of trusted devices - the list of devices you have marked as trusted at log-in time (for more information see Logging in to Viedoc) . To remove a trusted device from the list, select the delete button next to the respective entry and select Save changes. Note! These are used for sending the authentication code only to log in to Viedoc and are not used for resetting the password.
8, 9. Enter your password in the Current password (8) field and select Save changes (9) to apply the changes you made.
To view the Authentication log:
| 1 |
Select Authentication Log on the left-hand side of the page. A list is displayed, providing information on the latest login sessions up to 20 login sessions: 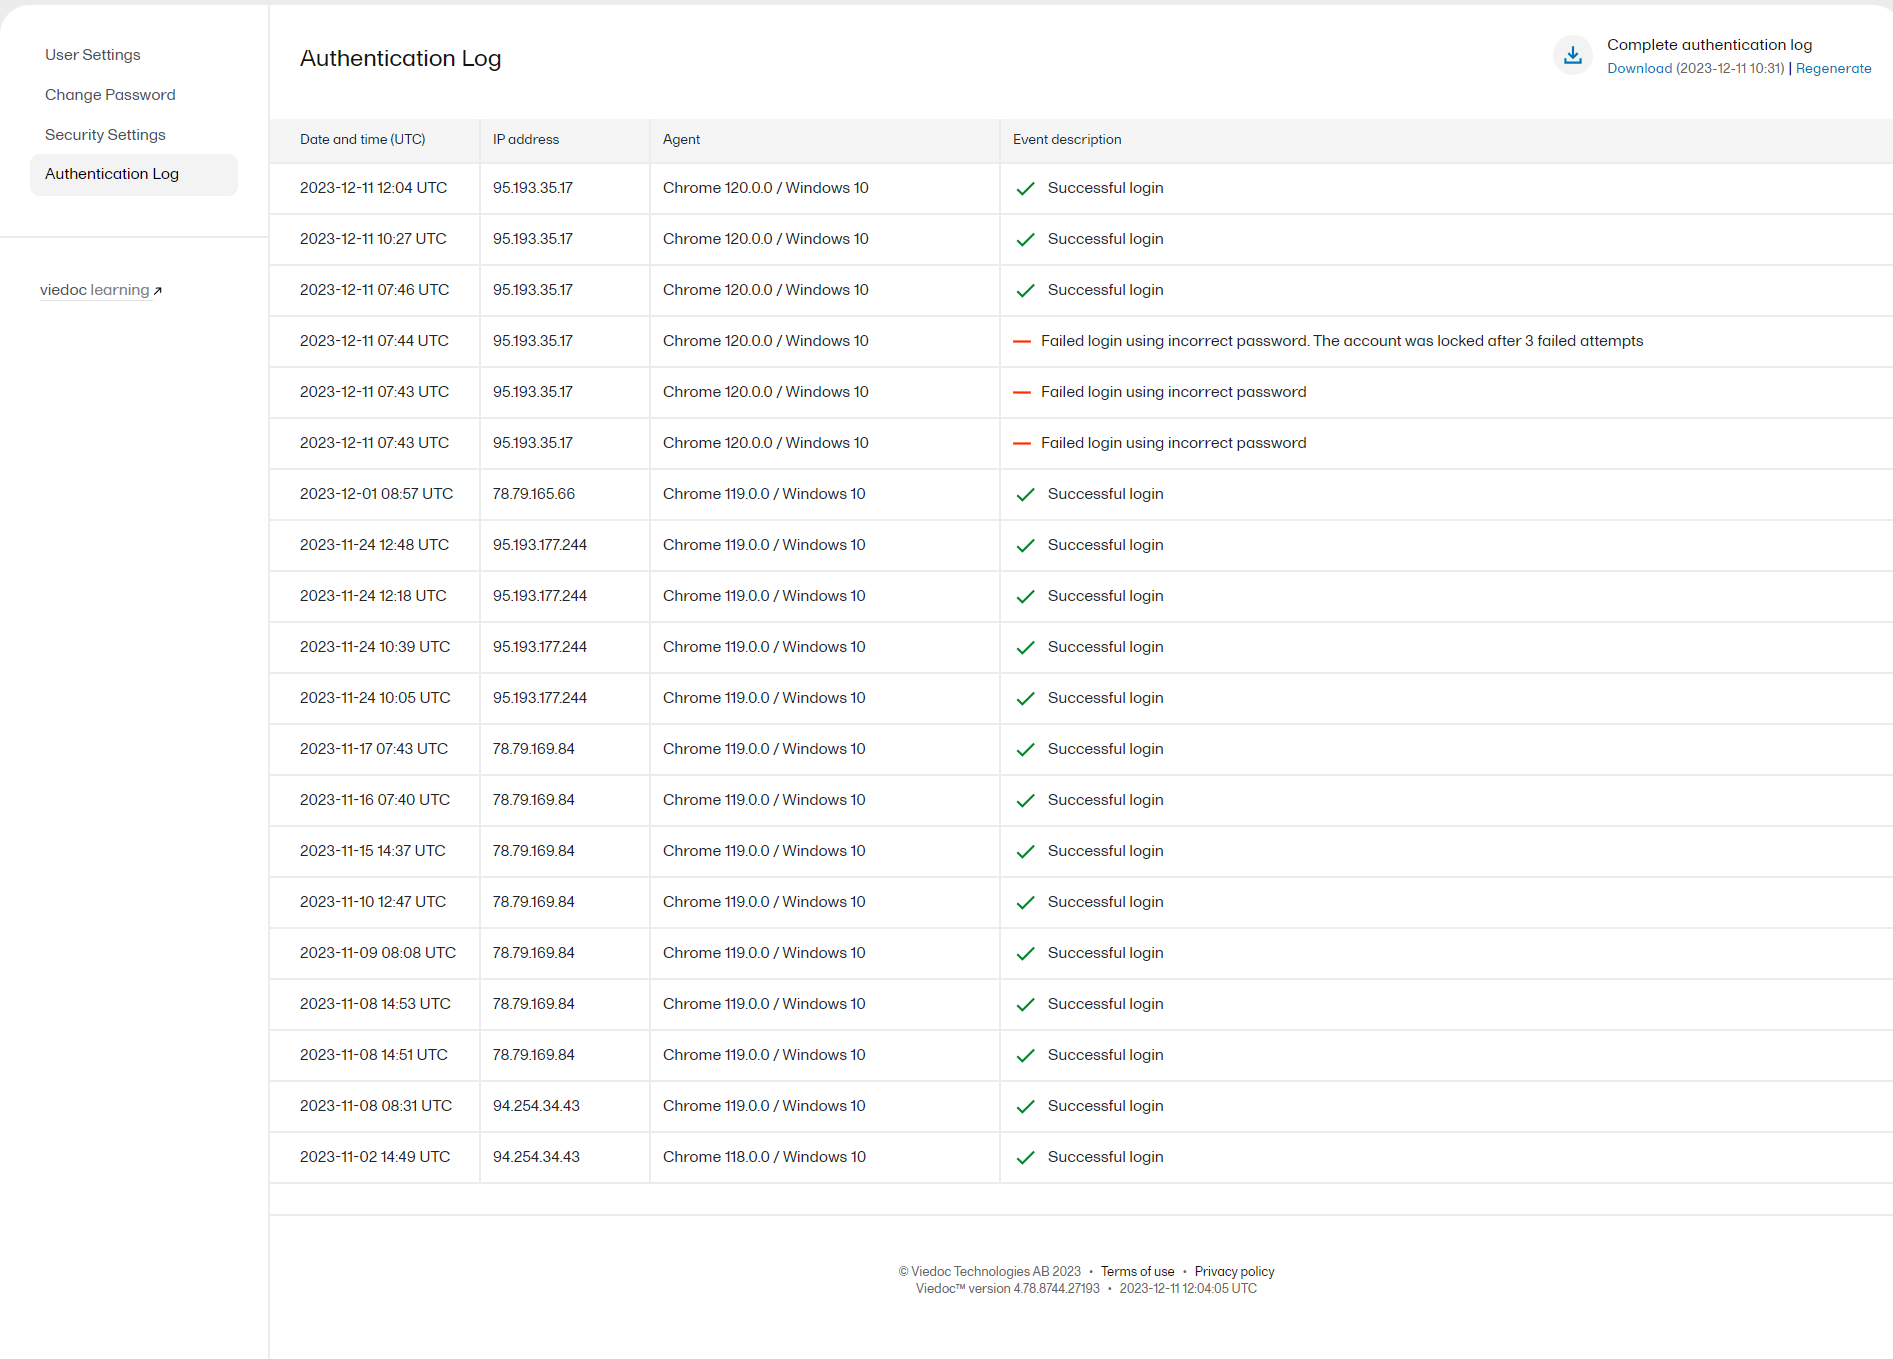
The list is ordered by date and time in descending order. A successful action, for example a login, is shown with a green check mark in the Event description column. A red check mark is shown for an unsuccessful/failed action, and the text next to it explains the result and the reason for the result.
|
||||||||||||||||||||||||||||||||||||||||||
| 2 |
Select Complete authentication log in the top right corner of the displayed authentication log list to generate an Excel file with the complete login history. After generating the authentication log for the first time, you can either regenerate or download the latest previously generated file. The latest file to be generated is datetime stamped according to UTC (Coordinated Universal Time). 
|
||||||||||||||||||||||||||||||||||||||||||
| The following authentication log messages are displayed for unsuccessful login attempts: | |||||||||||||||||||||||||||||||||||||||||||
|
|||||||||||||||||||||||||||||||||||||||||||