Initiating a design
Configuration workflow for the first study design version
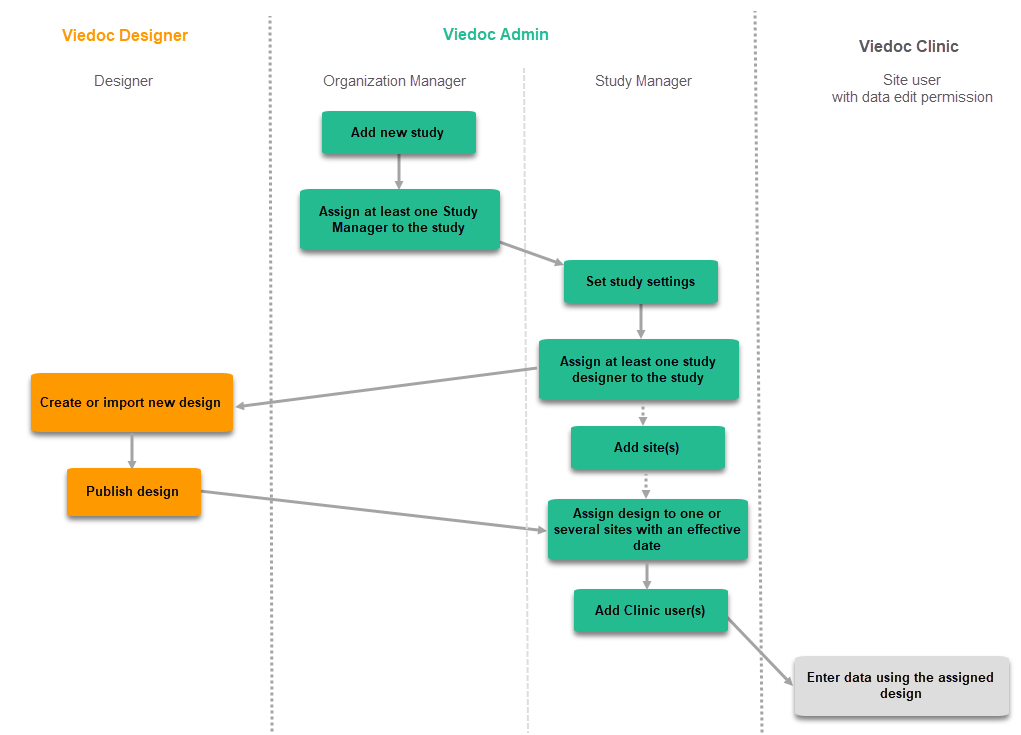
The following steps have to be performed in Viedoc when creating and configuring the study for the first time:
- In Viedoc Admin, the Organization Administrator creates the new study and appoints a Study Manager.
- In Viedoc Admin, the Study Manager sets the non-version-controlled common settings and appoints a Study Designer.
- In Viedoc Designer, the Study Designer creates the first version of the version-controlled settings and makes it available to the Study Manager by publishing the design to Viedoc Admin.
- In Viedoc Admin, the Study Manager creates site(s) and assigns the first version to the site(s).
- The site user can start entering data in Viedoc Clinic, using the assigned design.
Initiating a study design
A notification email is sent out to you when you have been assigned a new design project. When logging in to Viedoc and opening Viedoc Designer, you will find the project in the list of projects. If you have many projects you can use the Search by study name text field in the top left corner to find it. For details, see Overview of Viedoc Designer.
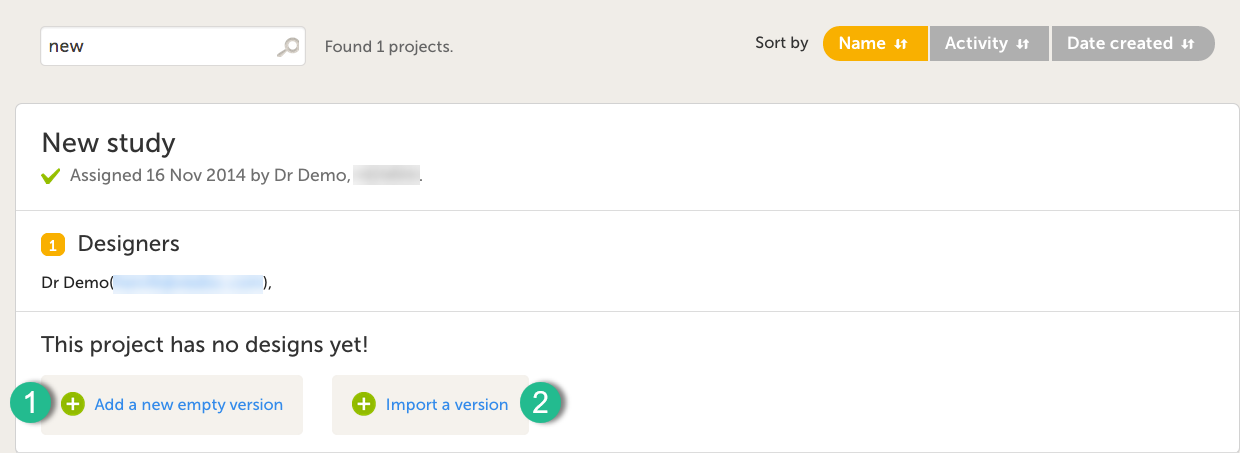
It is possible to initiate a design in two different ways:
1. By creating a new design from scratch - using the Add a new empty version option.
2. By importing an existing design - using the Import a version option.
Add a new empty version
| 1 |
Click on Add new empty version. The New study design pop-up opens: |
| 2 |
Set the general information regarding the design:
Of all the above, only the Study description will be shown in Viedoc Clinic when the user selects the respective study. All the other details are for internal use only, that is, they will be shown only in Viedoc Admin and/or Viedoc Designer. Note! All these fields can be changed in a new version or revision of the study design. |
| 3 |
Click Save changes. You will be directed to the design overview page: For further details, see Overview of study design. |
Import a version
The format supported for importing a design is Clinical Data Interchange Standards Consortium (CDISC) Operational Data Model (ODM) with or without CDISC Study/Trial Design Model and Viedoc extensions – which means that it is possible to import study designs from manually created configurations, or from configurations generated in other systems, as long as they are CDISC compliant.
| 1 |
Click Import a version. The Import design pop-up opens: 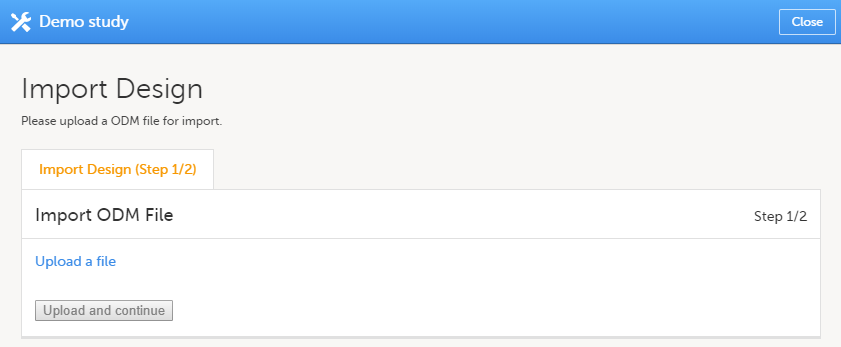
|
| 2 | Click the Upload a file link and select the file to be imported. |
| 3 |
Click Upload and continue: 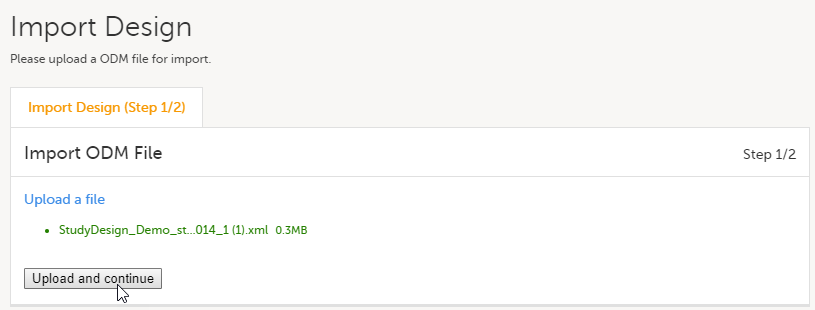
|
| 4 |
Select a design version to import - if there are more design versions in the uploaded file, choose here which one to import. Select language to import - if there are more languages available in the uploaded file, the main design language (usually English) should be chosen. |
| 5 | Click Import. You will be directed to the design overview page. For further details, see Overview of study design. |
Related topics
- Viedoc study configuration management
- Duplicating a design
- Adding a new study in Viedoc Admin
- Assigning a study design in Viedoc Admin