Initiating a design
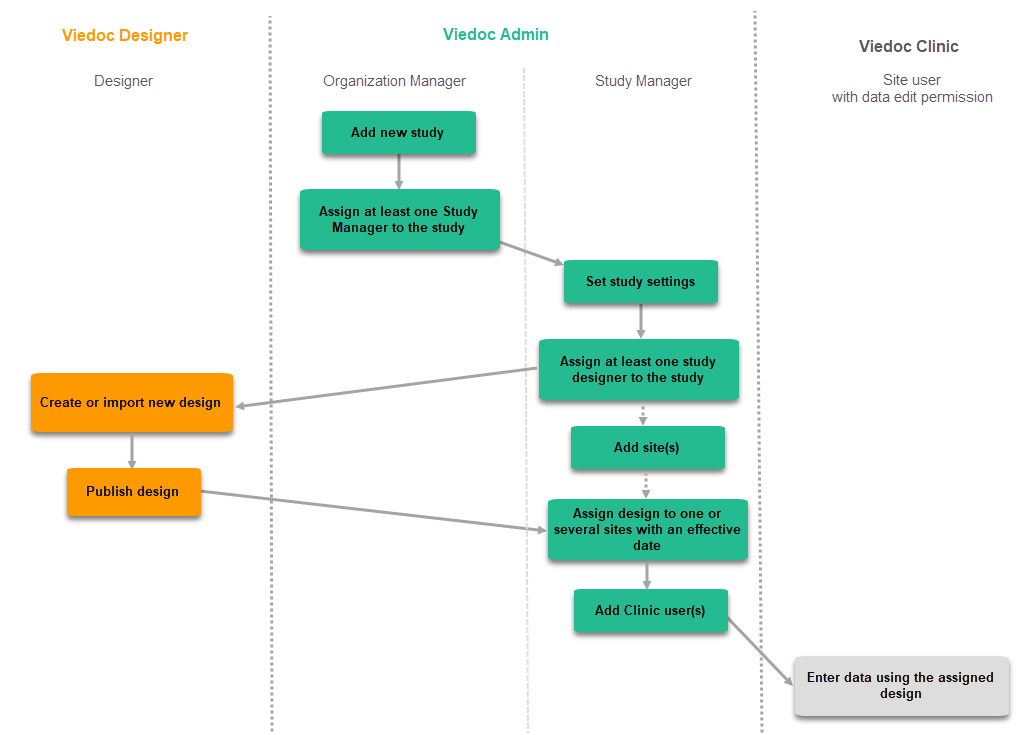
Configuration workflow for the first study design version
When creating and configuring a PMS study in Viedoc for the first time, you must perform the following steps:
1. In Viedoc Admin, the Organization Administrator creates a new PMS study and invites a Study Manager.
2. In Viedoc Admin, the Study Manager sets the non-version-controlled common settings and invites a Study Designer. For more information, see Managing users (for Org Admin)
3. In Viedoc Designer, the Study Designer creates the first version of the version-controlled settings in the study design and makes the study design available to the Study Manager by publishing the design to Viedoc Admin.
4. In Viedoc Admin, the Study Manager creates the site(s) and assigns the first design version to the site(s)
5.The Clinic side user can start entering data in Viedoc Clinic using the assigned design.

Building a PMS study
To build a new PMS study, you must first add a PMS study to the Viedoc platform and then invite a Study Designer who will build the study in Viedoc Designer.
The following sections describe the steps needed when adding a PMS study. For more information on setting up a study, see Viedoc Admin User Guide, Adding a new study.
Adding a new PMS study
Note! This step is performed by the Organization Administrator
To add a new study:
| 1 |
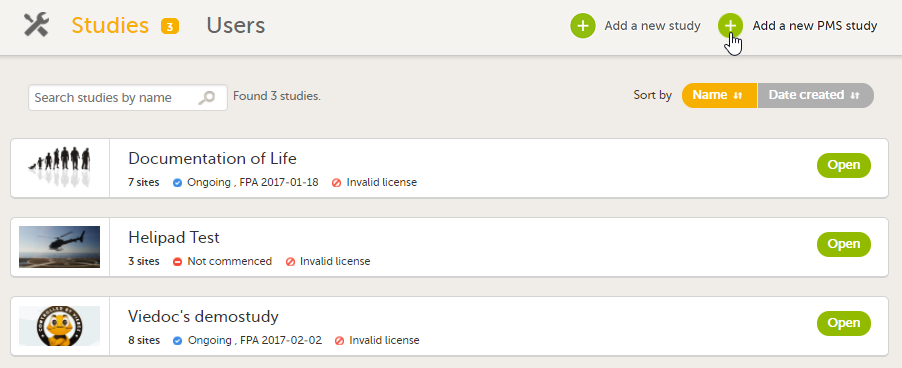
Open Viedoc Admin and select Show studies for the organization to which you would like to add a study. The study overview page opens. 
|
| 2 |
Select Add a new PMS study 
|
| 3 |
In the Study name field, enter the name of the Study, and in the Study Manager field, enter the Study Manager's email address. 
|
| 4 | Select Add PMS study. The study will appear in the list of studies on the study overview page. An e-mail is sent to the Study Manager with an invitation to the newly created study. |
