Data Browser
Overview
In the Data Browser page, you can browse all your forms and see data from all subjects in a table. Here you can sort, search, filter, cross-check, and download data, as described below.
Note! The forms and fields visible in the Data browser are determined by the visibility settings for your user role.
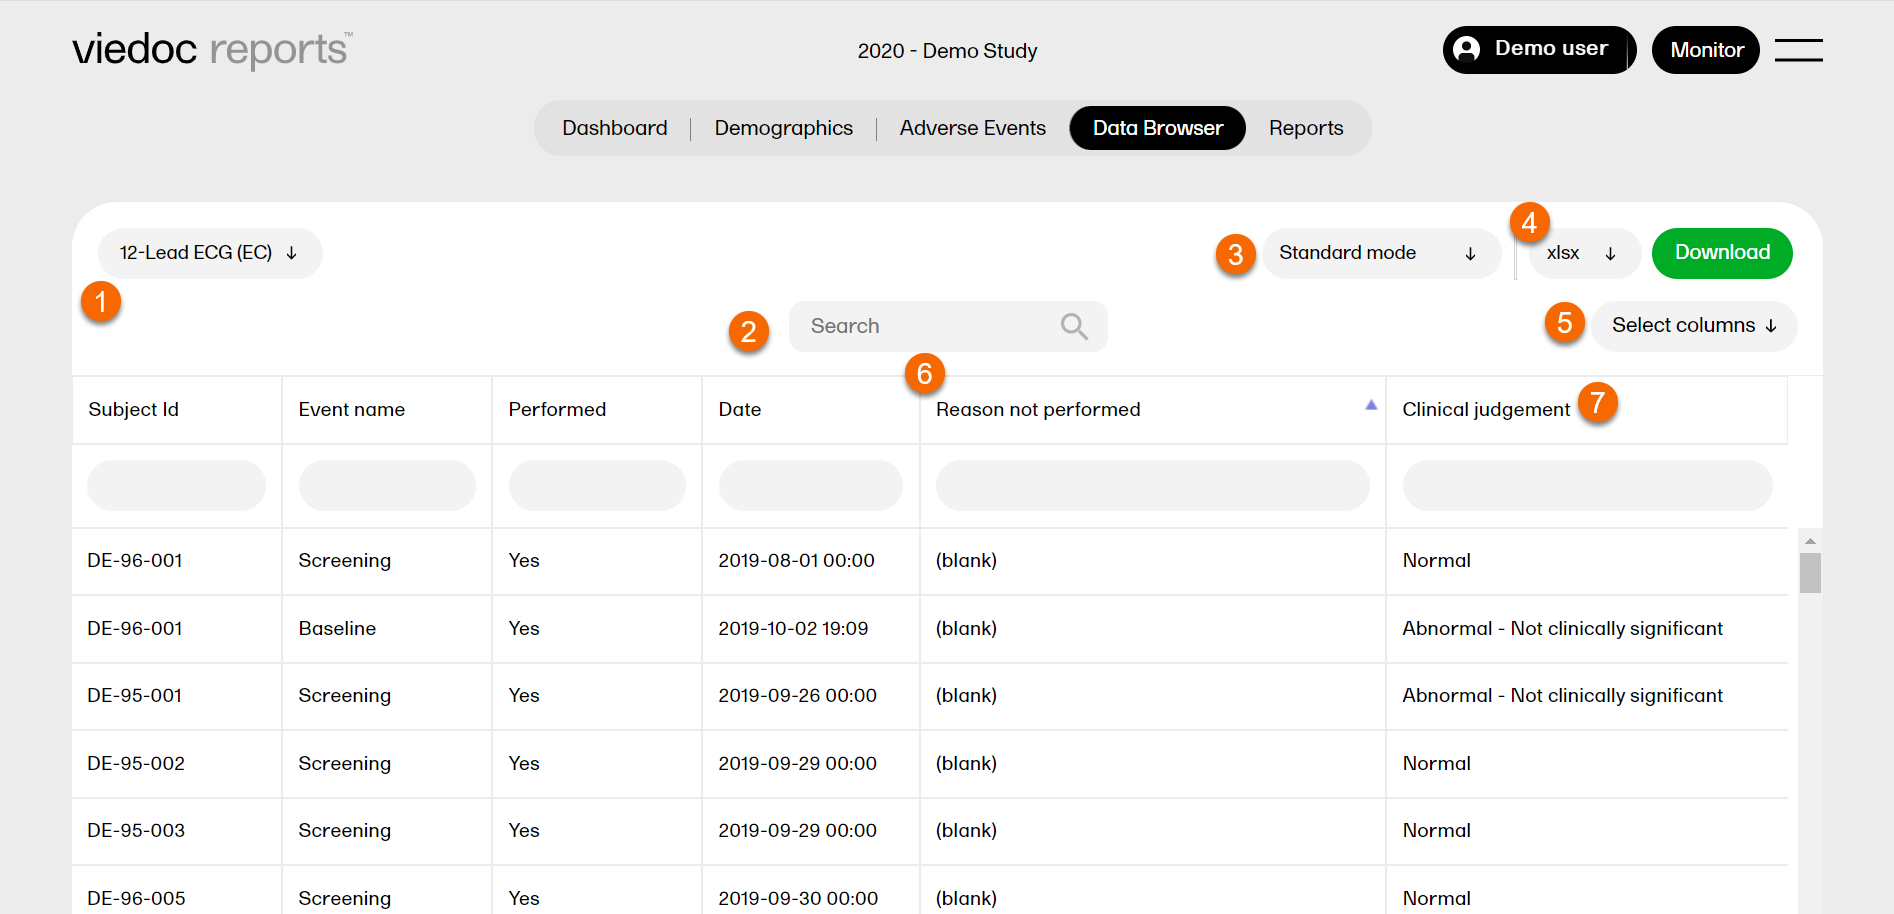
1. Select a form in the dropdown list.
2. Search the entire table for matches containing the word.
3. Select Standard mode or Cross-check mode. For more information, see Comparing two tables.
4. Select a format to download: xlsx / csv / xpt and click Download. For more information, see Downloading browser data.
5. Click Select columns and add or remove columns from the dropdown list. Click anywhere to return.
6. Click a column header to sort the data in ascending order. Click again to sort in descending order.
7. Click any field and select a form item to filter your data on that item. Click the x symbol to reset the filter.
Downloading browser data
You can download the data in the following formats:
- XLSX
- CSV
- XPT
- XPTV8
- RDS
Note!
- Any sorting done in the browser will not be reflected in the downloaded file.
- Downloading a file is only available for users with export permission set for their role.
File name
The structure of the file name is as follows:
[STUDYNAME_FORMNAME (FORMID)_DATE/TIMESTAMP.FORMAT]
[DATE/TIMESTAMP] is in the following structure:
[YYYYMMDDHHMMSS], which is the date and time at which the data was downloaded from Viedoc (through the daily data sync).
Example of a file name: "DemoStudy2020_Demographics(DM)_20200903220345.xlsx"
Downloading case report form data
There are two ways of downloading the Case Report Form (CRF) data on the Data Browser page. You can either download the data from the selected CRF or download the data from all CRFs simultaneously.
To download data from a selected CRF:
| 1. |
Select the specific form you want to download from the dropdown menu which displays all the forms used in the study. In the example below, the Adverse Event (AE) form is selected. 
|
| 2. |
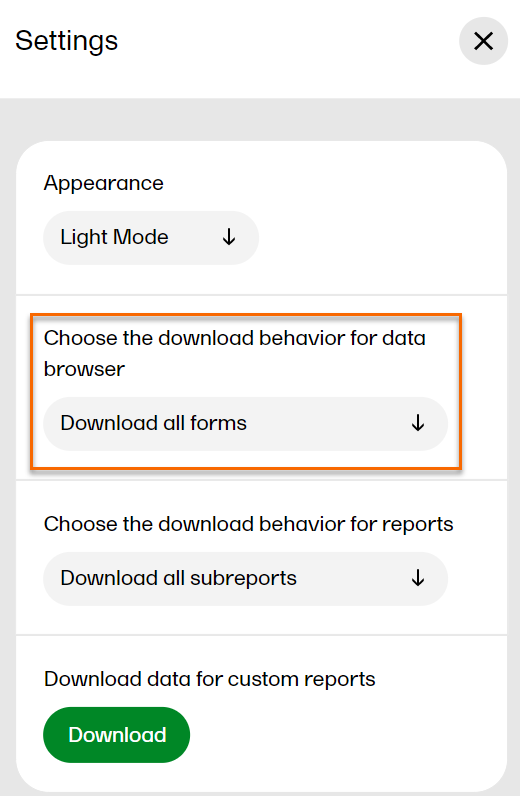
In Settings, select Download selected form in the dropdown menu. 
|
| 3. |
1. Select a format to download. 2. Click Download. 
In this example, a file is generated with all registered Adverse Events in the selected file format. Example of a file name: Demo Study_Adverse Event (AE)_202203211243523 |
To download the data from all CRFs simultaneously:
| 1. |
|
| 2. |
1. Select a format to download. 2. Click Download. Note! When the formats xlsx/csv/xpt/xptv8 are selected, a zip file is created. The structure of the file name is as follows: [STUDYNAME_ALL_FORMS_DATE/TIMESTAMP.zip]
Example of a file name: Demo Study_12-Lead ECG (EC)_20220322002931.xlsx
Example of a file name: Demo Study_12-Lead ECG (EC)_20220328230332.rds |
Note! When Download all forms is selected, all the columns of the CRF are downloaded irrespective of the columns chosen in Select columns. When downloading all the CRF data, there is no difference in the downloaded file when selecting Standard mode or Cross-check mode.
Cross-check mode
If Cross-check mode is enabled at the time of the export, a zip file is created with two files, one for each table.
The structure of the file name is as follows:
[STUDYNAME_Cross-check mode_DATE/TIMESTAMP.zip]. The two files match the file name defined for "Standard mode"
Example of a file name: "DemoStudy2020_Cross-check mode_20200903220345.xlsx"
Comparing two tables
You can compare two tables by selecting cross-check mode. This gives you an additional table showing up beneath the first one.
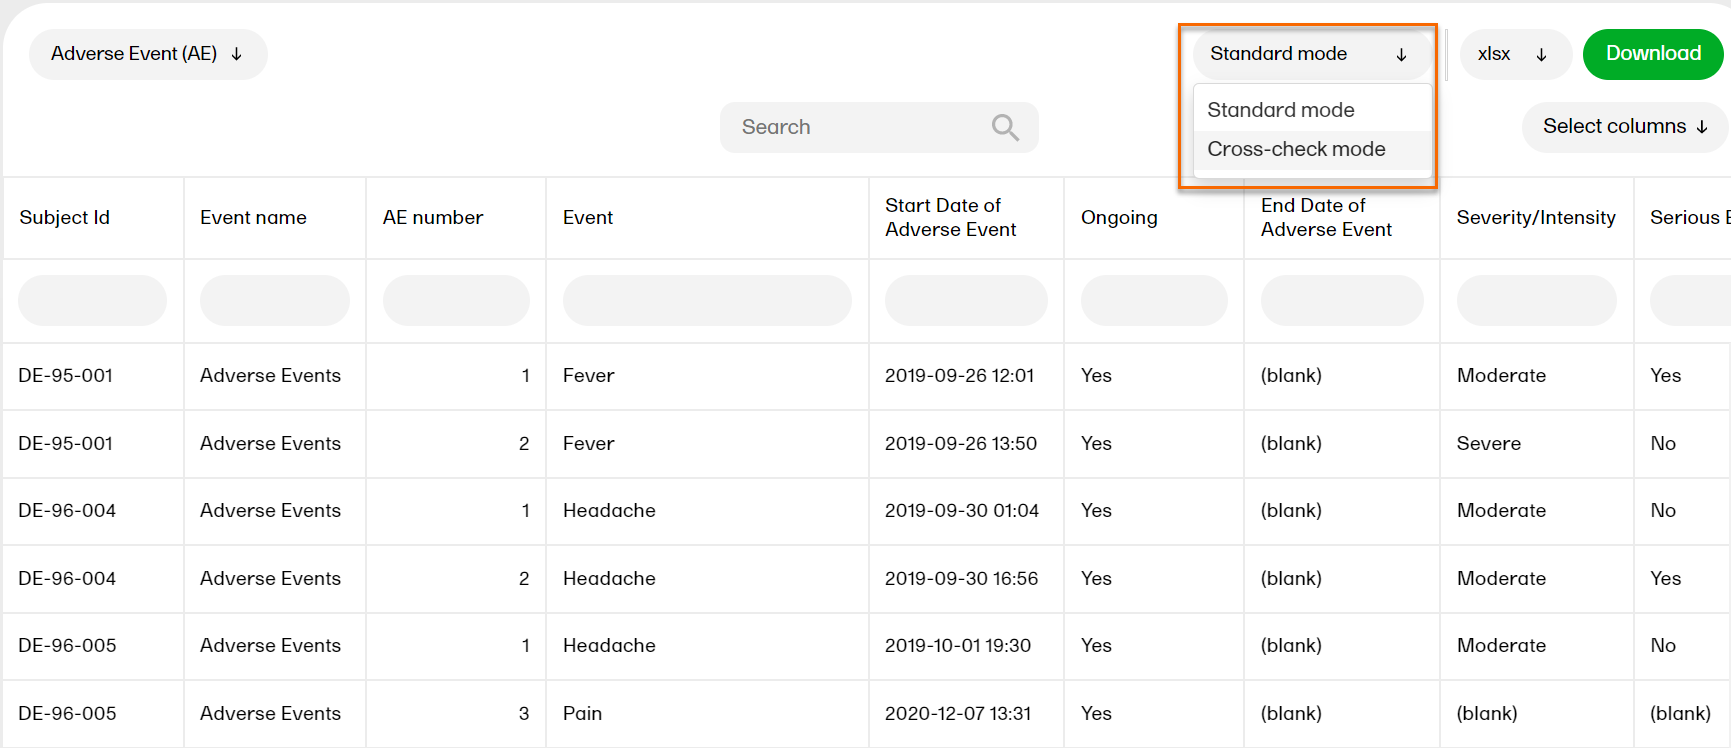
A second tab appears:

...and a second table appears below the first one:
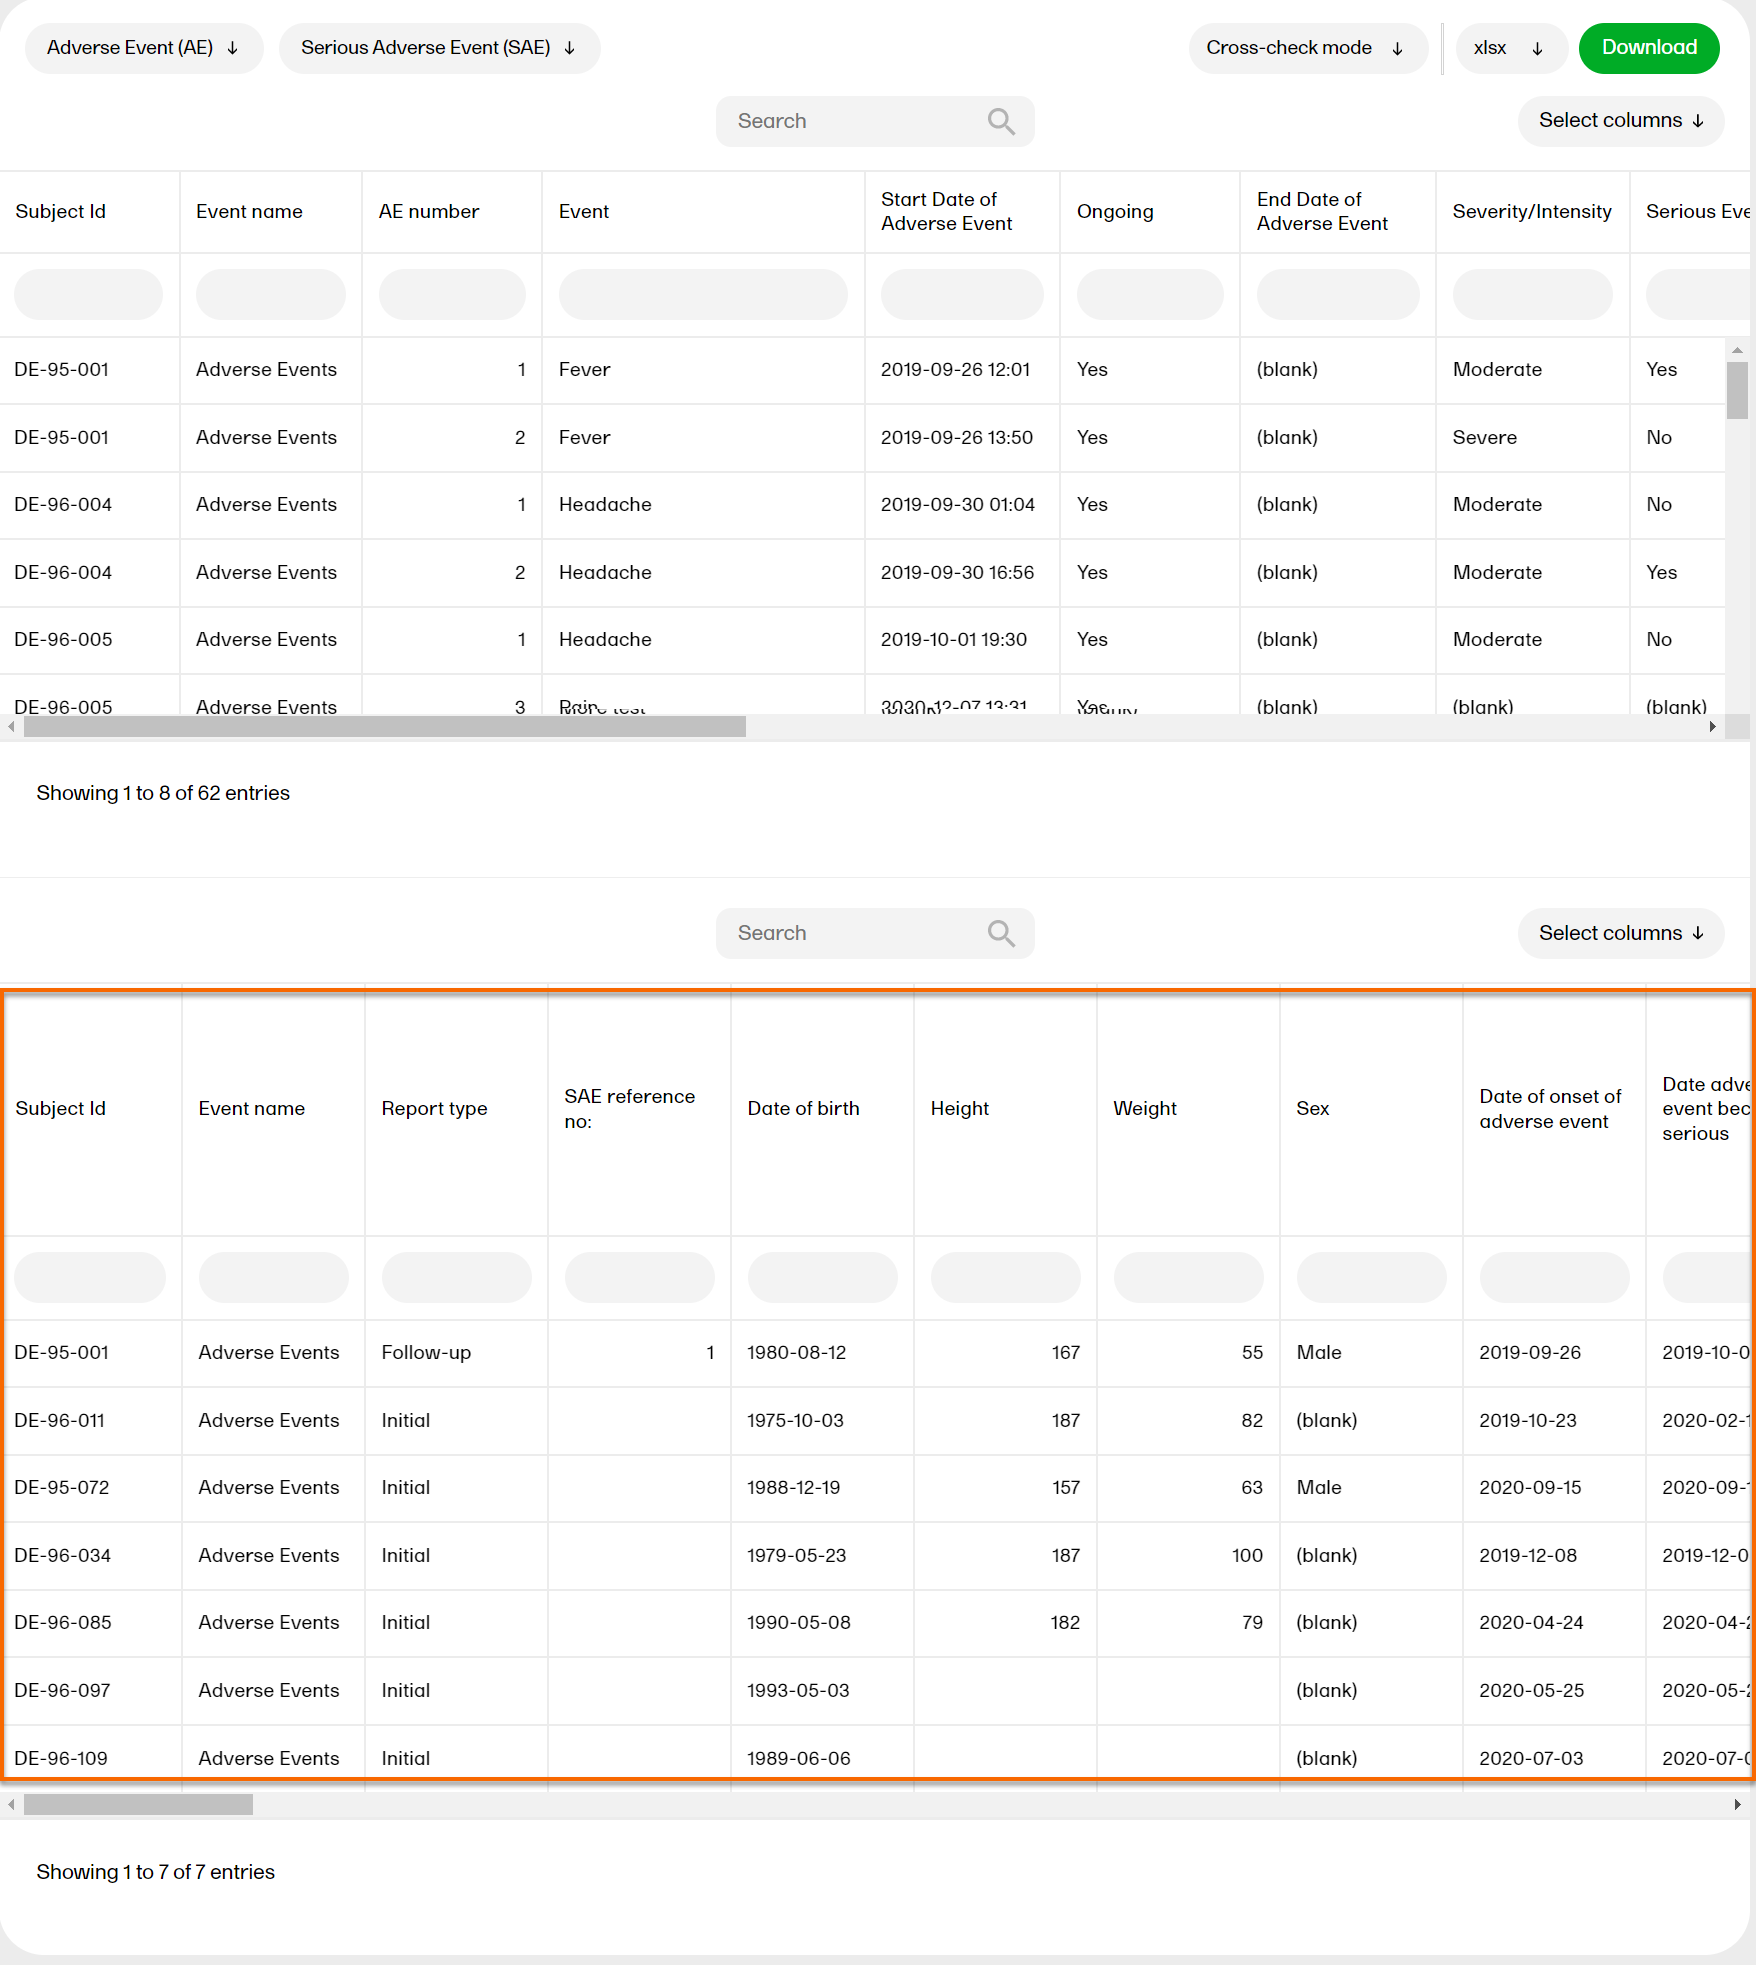
Now you can browse both tables in the same view and compare them.
To close the second table, select Standard mode.
Note! Filters and exports are made individually for each table. The export is added to a zip file, see Downloading browser date for more information.