Managing documents
Launching Viedoc TMF
To launch Viedoc TMF, select the eTMF icon on the Viedoc landing page.

Note! The eTMF launch icon is only available in production mode.
Uploading documents to Viedoc TMF requires write permission for the artifact on the TMF level that the document is linked to. For more information about eTMF permissions, see Introduction to Viedoc eTMF.
Uploading a document
To upload a document:
| 1 |
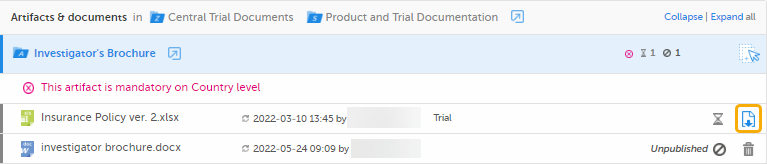
In the Artifacts & documents area, select the upload button for the artifact: 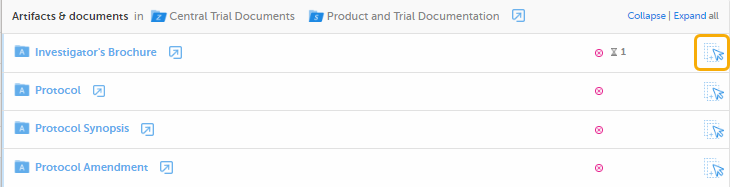
Note! If you do not know which zone, section, or artifact to place the document in, you can use the drop zones. For more information, see Working with drop zones. |
| 2 |
Browse to the file(s) that you want to upload and select Open. Notes!
|
| 3 | Alternatively, drag the file from your file explorer and drop it in the eTMF artifact. It is possible to upload multiple files at the same time. |
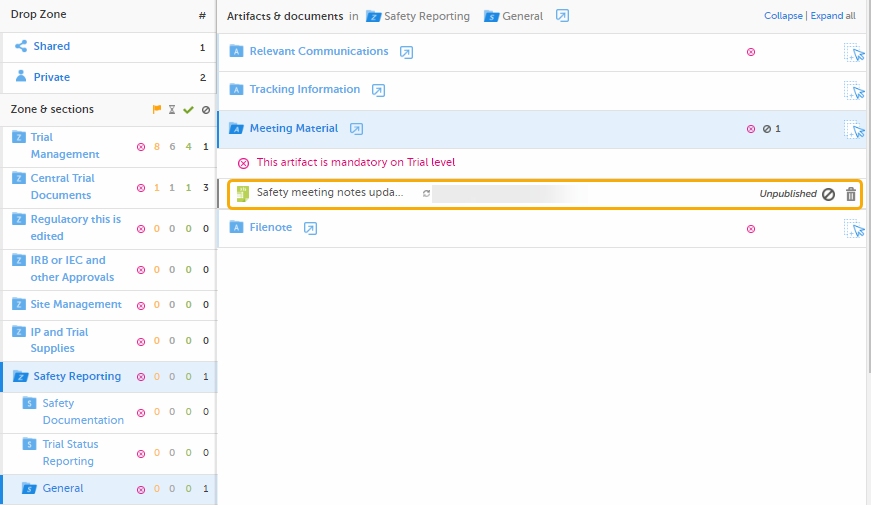
| 4 |
When the file has been successfully scanned for viruses, it is uploaded in an Unpublished status. 
Notes!
|
Note! It is not possible to upload files from inside a zipped folder.
Working with drop zones
Note! Much of the info about the drop zones is available also in the lesson eTMF>Configuring eTMF settings.
Drop zones are folders outside the eTMF structure where you can upload files to manage them later. Files can only be moved from the drop zones to the structure and not the other way around.
- The Shared drop zone: Files that are uploaded to the shared drop zone can be accessed and managed by the user who uploaded them, as well as the users who have the Manage drop zone permission.
- The Private drop zone: Files that are uploaded to the private drop zone can only be accessed and managed by the user who uploaded them.
Anyone with access to the study eTMF can upload files to the drop zones. However, moving files from the drop zones to the structure is similar to uploading documents to artifacts within the structure. Both require that the user has write permission to the artifact in question.
Uploading a file
To upload a file to a drop zone:
| 1 |
Navigate to the desired drop zone, select the Upload button. 
|
| 2 | Browse to the file(s) that you want to upload, select them, and then select Open. |
| 3 |
Alternatively, to upload file(s), drag them from your file explorer and then drop them in the selected drop zone. 
|
Deleting a file
To delete a file from a drop zone:
| 1 |
Select the trash can button on the level of the file that you want to delete. 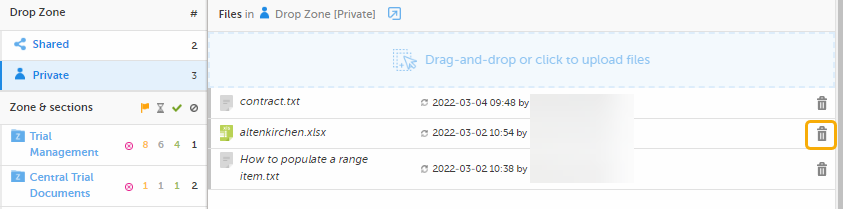
|
| 2 |
Alternatively, open the file by selecting it, and then select the trash can button in the dialog. 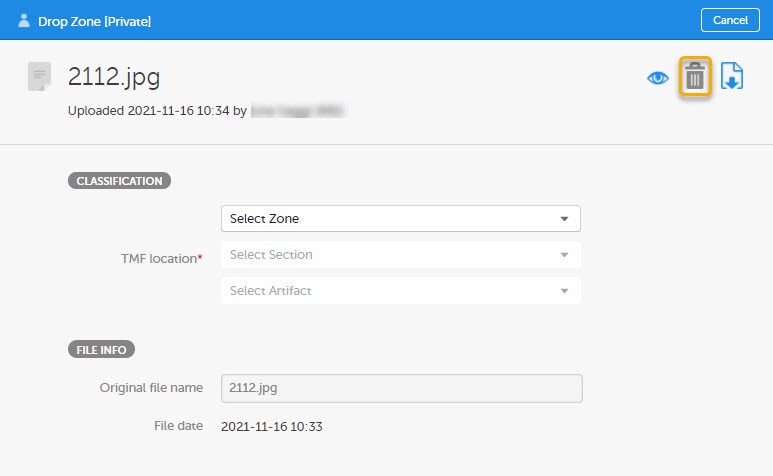
|
| 3 |
Confirm the deletion. 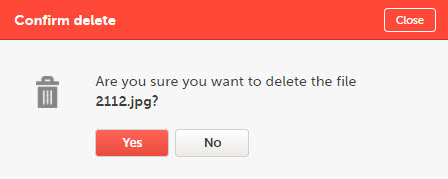
|
Downloading a file
To download a file from a drop zone:
| 1 |
Open the file dialog by selecting the desired file. 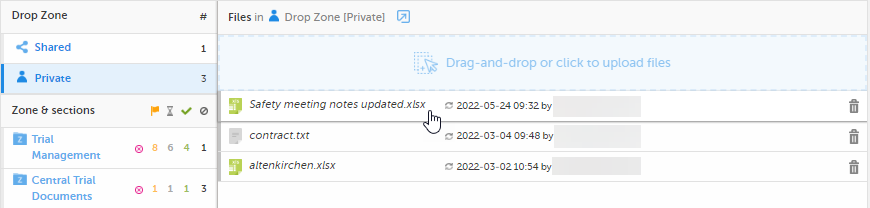
|
| 2 |
Select the download button in the file dialog. 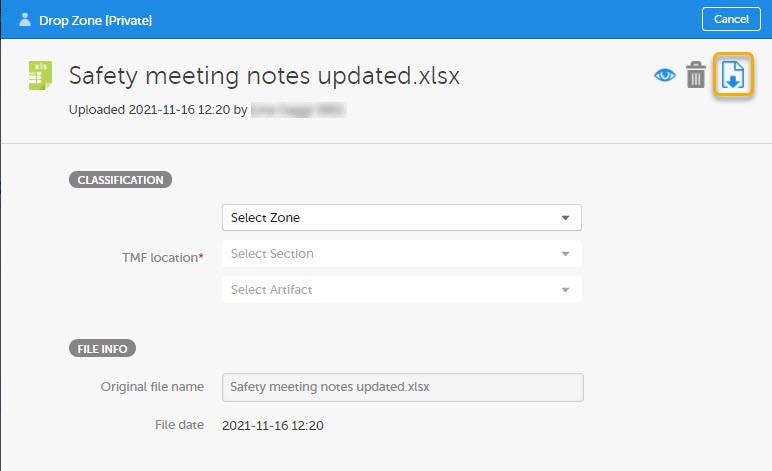
|
Moving a file
To move a file from a drop zone to the structure:
| 1 |
Open the file dialog by selecting the relevant file.
|
| 2 | Select the TMF location (Zone, Section, and Artifact) where you want to move the file.
|
| 3 |
The properties of that artifact will then be populated in the dialog. You can either enter values for the metadata properties or leave them empty. Select Save as unpublished to create a new unpublished document in the selected location with the file that was moved from the drop zone. 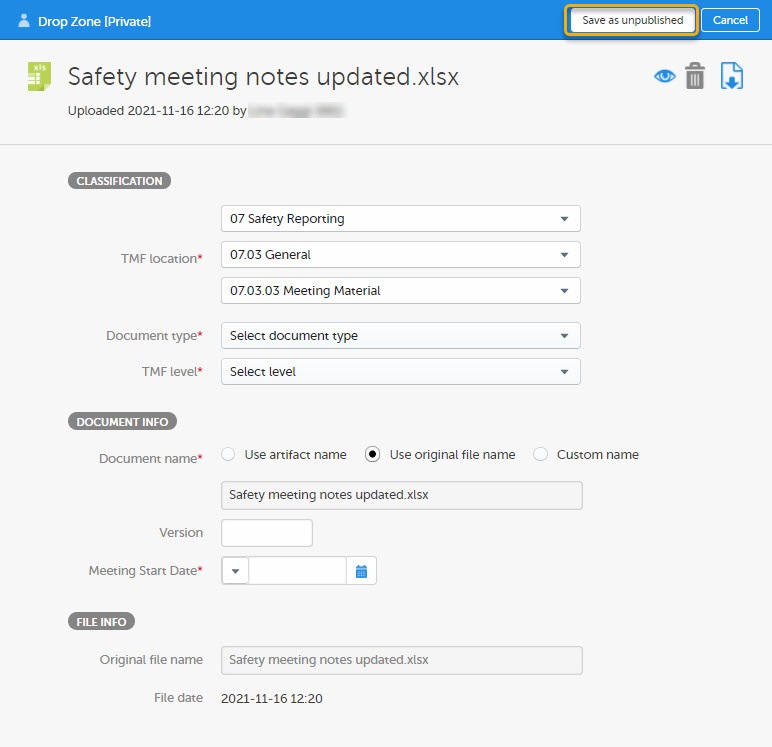
|
| 4 |
Alternatively, fill in all the mandatory fields and select Publish. A new document with the status Awaiting review will be created at the selected location with the file that was moved from the drop zone. 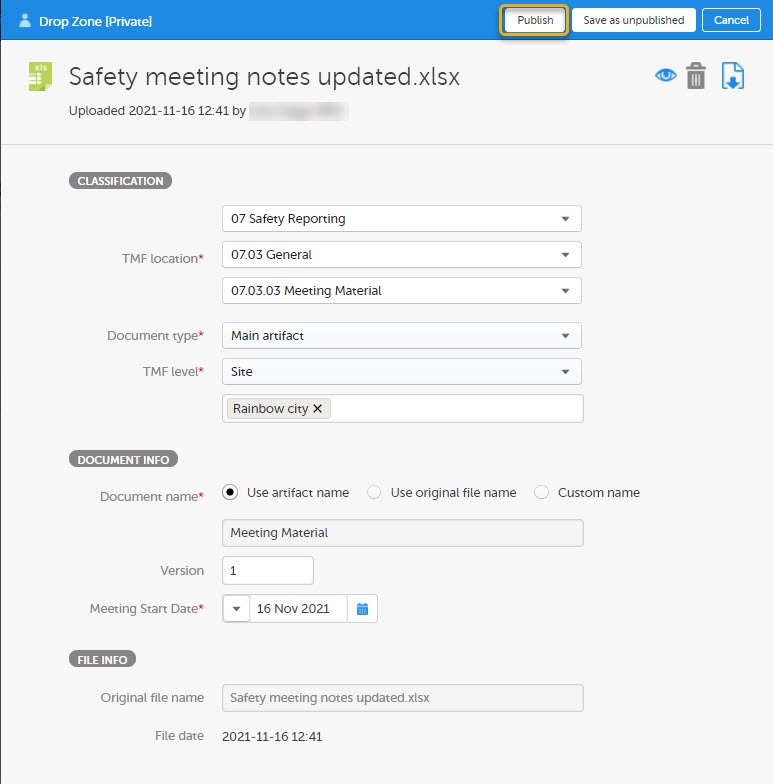

|

Searching for documents
To search for documents in Viedoc TMF:
| 1 |
Enter text to search for in the Search field. The text can be a document name or a file name, or a sub-string thereof. It can also be a text or a sub-string of a text in the file contents. 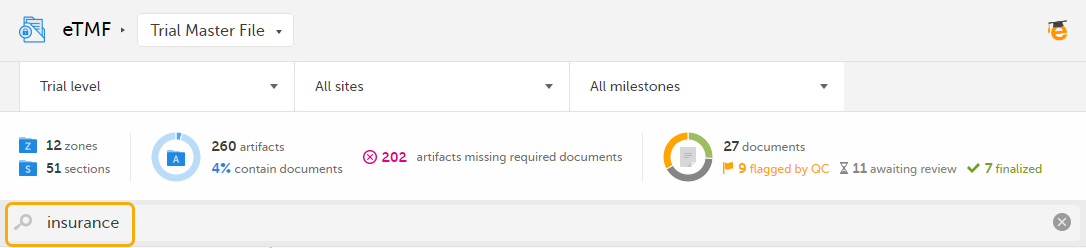
|
| 2 |
Press Return (or Enter) or select the magnifying glass. |
| 3 |
The search results are displayed on the Details page, sorted by relevance. For more information, see The Details page. 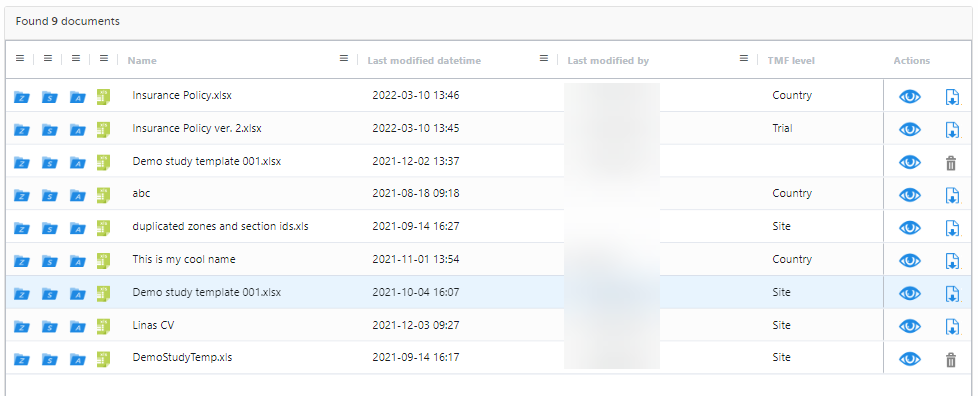
Tip! If you hover over a zone, section, or artifact icon, its name and artifact number will be displayed. |
| 4 |
To return to the structure view, select the Structure page button. 
|
Using milestones to filter documents
Milestones and milestone groups are tools in the eTMF for sorting and filtering documents. Milestones are assigned at the artifact level in TMF Admin, and all documents added to an artifact will be linked to the same milestone. An artifact can also have different milestones for each TMF level it is applicable to (trial, site, and/or country).
Milestones can be defined in any way that is appropriate for your study. In the Viedoc eTMF template there are 12 milestones that are divided into four milestone groups (start up phase, conduct, close out and other). Assigning these to artifacts allows documents to be linked to a specific timeline in the study or other categories.
Milestones may be used when searching for or filtering documents in the details page (see next section below) and also when filtering audit trail reports or EMS repositories. Note! If no milestones are assigned to an artifact, documents in this artifact will not be included in the audit trail report or the EMS repository when the milestones filter is applied. To extract these documents, a separate report can be generated with the milestone filter removed. For more information see the TMF archive lesson.
The Details page
To open the Details page, press Return (or Enter) or select the magnifying glass in the search field. You can also open it by selecting the Details page button in any location in the user view:

The Details page provides an overview of the documents that you have access to together with their metadata in a table or grid. The Details page lets you:
- Choose the metadata to display in the columns
- Sort and filter by the visible columns
- Take actions on the documents from the Actions column (that is always pinned to the right), or by clicking anywhere on a row to open the Document properties dialog for a specific document
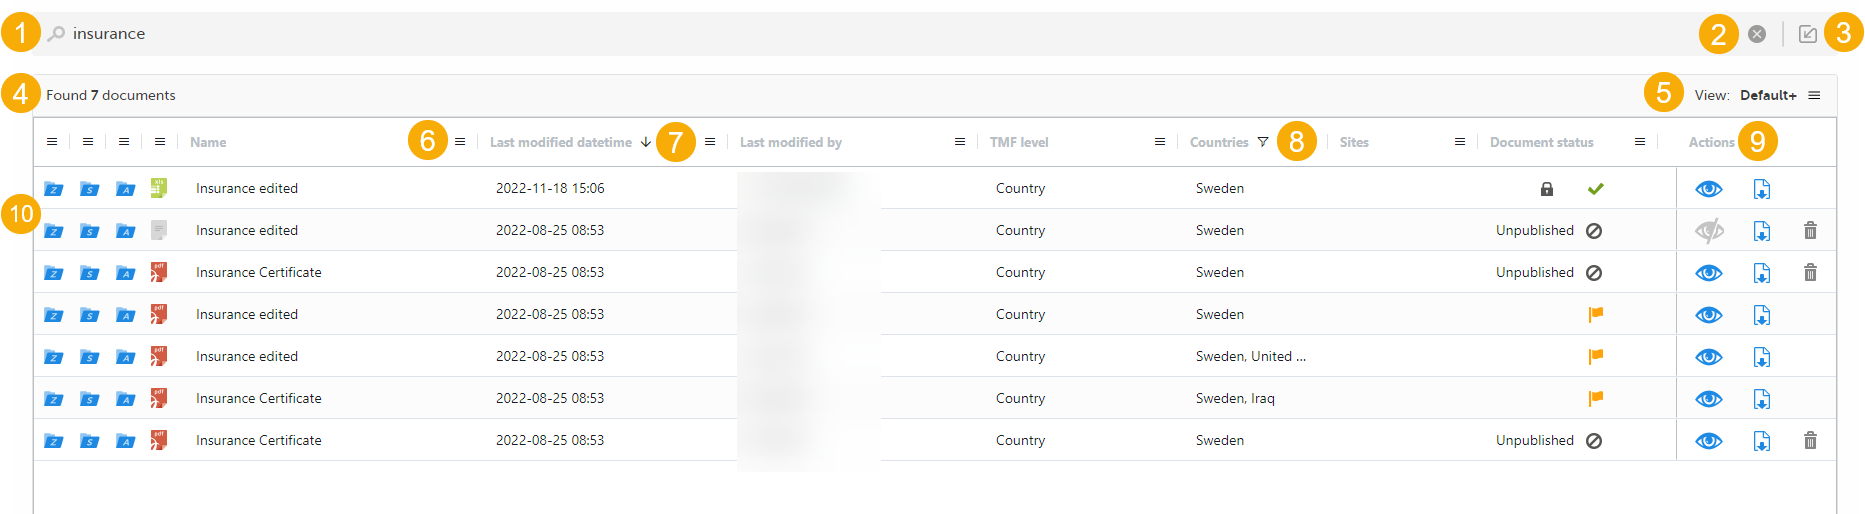
1. The search field
2. Select to delete the entered search string.
3. Select to return to the structure view.
4. The number of search results.
5. The View menu. For more information, see The View menu.
6. The column menu. For more information, see the following sub-sections.
7. An arrow indicates that the search results are sorted by the column contents. For more information, see the following sub-sections
8. A funnel icon indicates that the search results are filtered. For more information, see the following sub-sections
9. The actions that you can perform on the documents. The possible actions are Preview, Download, and Delete. The actions available for you depend on your permissions.
10. Icons showing the status of the zones, sections, and artifacts. The fourth column from the left contains icons for the filetypes.
These are the icons that can occur:
| Icon | Description |
|---|---|
| A zone that is expanded in the tree view | |
| A deleted zone that is expanded in the tree view | |
| A zone that is collapsed in the tree view | |
| A deleted zone that is collapsed in the tree view | |
| A section that is expanded in the tree view | |
| A deleted section that is expanded in the tree view | |
| A section that is collapsed in the tree view | |
| A deleted section that is collapsed in the tree view | |
| An artifact that is expanded in the tree view | |
| A deleted artifact that is expanded in the tree view | |
| An artifact that is collapsed in the tree view | |
| A deleted artifact that is collapsed in the tree view | |
 |
The private drop zone, when enabled |
 |
The private drop zone, when disabled |
 |
The shared drop zone, when enabled |
 |
The shared drop zone, when disabled |
| A file | |
| A deleted file |
The View menu
The View menu lets you save and display a customized view of the Details page. This can be useful if you have filtered, sorted, or sized the columns and want to be able to re-use your viewing preferences.
These are the available menu options:
| Menu option | Description |
|---|---|
| Default |
Displays the default view, as provided by the system. When you perform a search on the Structure page, this view is displayed. When you perform a search on the Details page, and you haven't made or saved any customization, this view is displayed. |
| Default+ |
Indicates that changes have been made to the default view, but the changes have not been saved as a customization. To save the changes, select Save as customized. |
| Customized |
Displays the saved customized view. This option is not available if you haven't saved a customization. Tip! This view is retained between login sessions. |
| Customized+ | Indicates that changes have been made to the customized view, but the changes have not been saved as a customization. To save the changes, select Save as customized. |
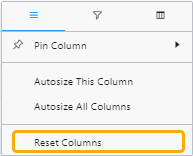
| Reset columns | Resets the view to the latest used of the default or the customized views. |
| Save as customized |
Saves the current view as a user-specific customization. Each user can save their own tailored viewing preferences. This option is not available when the eTMF is locked. |
Note! If you perform any further search on the Details page, the system displays the latest used view.
Sorting the column contents
To sort the data by column contents in ascending order, select the column header. Select it again to sort in descending order. Selecting for a third time removes the column sort order.
To rearrange the order of the columns on the page, simply select a column header and drag the column sideways. To reset the order of the columns to the initial state, select Reset Columns on the column menu, available from the column header.
Pinning a column to the left or the right
To pin a column to the left or the right:
| 1 |
Select the menu button in the column header to open the column menu. 
|
| 2 |
In the leftmost group, select Pin Column and then Pin Left or Pin Right. 
Tips!
|
Autosizing columns
To adjust the width of columns to the width of the text in them:
| 1 |
Select the menu button in the column header to open the column menu.
|
| 2 |
Select the leftmost button in the header, then select Autosize This Column or Autosize All Columns. 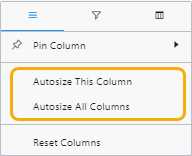
|
Tip! To reset all autosizing, select Reset Columns.
Filtering out data
To filter out data to be displayed on the Details page:
| 1 |
Select the menu button in the column header to open the column menu.
|
| 2 |
Select the filter button. 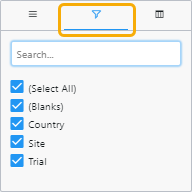
|
| 3 | Select the column contents that you want to filter out, and deselect the ones that you don't want to filter out. |
| 4 | Use the search field to search for column contents to filter by. |
| 5 | When a filter has been applied to a column, a filter icon is visible in the column header. |
Tip! To reset all filtering, open the column menu, select the filter button and select (Select All).
Selecting which columns to display
To select which columns to display on the Details page:
| 1 |
Select the button in the column header to open the column menu.
|
| 2 |
Select to open the column selector. 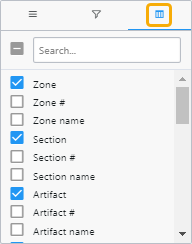
|
| 3 | Select the columns that you want to display. |
| 4 | Use the search field to search for columns. |
Tip! To reset to the initial state, select Reset Columns.
Copying data
To copy the data in a table cell on the Details page, right-click in the cell and select one of these:
- Copy - copies the contents of the table cell to your clipboard
- Copy with Headers - copies the contents of the table cell and the column header to your clipboard
Exporting data
To export the data that is displayed on the Details page:
| 1 | Right-click anywhere in the table and select Export and then CSV Export or Excel Export. |
| 2 | A file of the selected type is then available for download from your browser. |
The columns on the Details page
These are the columns that are available to show or hide on the Details page:
| Column | Description |
|---|---|
| Zone | This column shows the zone or drop zone icon. When you hover over the icon, a tooltip shows the zone number and the zone name. For drop zones, the tooltip shows the drop zone name. |
| Zone # | The zone number. |
| Zone name | The name of the zone as set in the structure. |
| Section | This column shows the section icon. When you hover over the icon, a tooltip shows the section number and the section name. |
| Section # | The section number |
| Section name | The name of the section as set in the structure. |
| Artifact | This column shows the artifact icon. When you hover over the icon, a tooltip shows the artifact number and the artifact name. |
| Artifact # | The artifact number |
| Artifact name | The name of the artifact as set in the structure. |
| Filetype | The filetype icon. When you hover over the icon a tooltip text shows the filetype. |
| Filetype name | The filetype name in text, for example pdf or xlsx. |
| Name |
This column shows:
|
| Display label | This label represents how the document is displayed on the Trial Master File view. |
| Document name | The name of the document as set by the user in the corresponding Document properties window. |
| Download label | The name of the latest version of the document when downloaded. |
| Archive label | The name of the document in the archive. |
| Dating convention | The dating convention label that is applicable to the document. |
| Dating convention value | The date value of the dating convention metadata in the format YYYY-mm-DD. |
| Last modified datetime | The date and time when the document was last modified, in the format YYYY-mm-DD HH:MM. |
| Last modified by | The user name of the user who last modified the document |
| Last reviewed datetime | The date and time when the document moved to the status Flagged by QC, in the format YYYY-mm-DD HH:MM. |
| Last reviewed by | The user name of the user who last commented on the document. |
| Uploaded to drop zone datetime | The date and time when the file was uploaded to a drop zone, in the format YYYY-mm-DD HH:MM. |
| Uploaded to eTMF datetime | The date and time when the file was moved to the eTMF structure, in the format YYYY-mm-DD HH:MM. |
| TMF level | One of Trial, Country, or Site. |
| Document type |
For main artifacts, the column shows the artifact name. For sub-artifacts, the column shows the sub-artifact name. For other types, the column shows the customized name. |
| Countries | The names of the countries that the document is linked to. |
| Country codes | The country codes of the countries that the document is linked to. |
| Sites | The names of the sites that the document is linked to. |
| Site codes | The site codes of the sites that the document is linked to. |
| Document version | The document version number as set by the user in the Document properties window. |
| Document system version | The system version of the document. |
| Document Id | The document's unique Id within the study eTMF. |
| Original file name | The original name of the file when it was uploaded. |
| File size | The size of the file. |
| File date | The date and time when the latest version of the file was uploaded to the eTMF structure, in the format YYYY-mm-DD HH:MM. |
| Milestone |
The milestone that the artifact is linked to. Milestones are assigned at the artifact level, however, different milestones can be assigned to different levels within the artifact (site, trial, country). The milestone in this column refers to the level that the document is filed in. |
| Milestone group |
The milestone group for the milestone that the artifact is linked to. |
| Document status |
This column shows the document status icon. It can be one of the following:
|
| Actions |
This column is pinned to the right and cannot be removed. It shows the action buttons according to the actions that can be performed on the document according to the user permissions.
|
| ICH code | The code according to the International Council for Harmonisation |
| Unresolved notes count | The number of unresolved notes for a document |
Downloading a document
Downloading a document from Viedoc TMF requires read, review, or write permission for the artifact on the TMF level that the document is linked to. For more information about permissions, see Introduction to Viedoc eTMF.
To download a document:
| 1 |
Open the Document properties dialog by selecting a document in the Artifacts & documents area. 
|
| 2 |
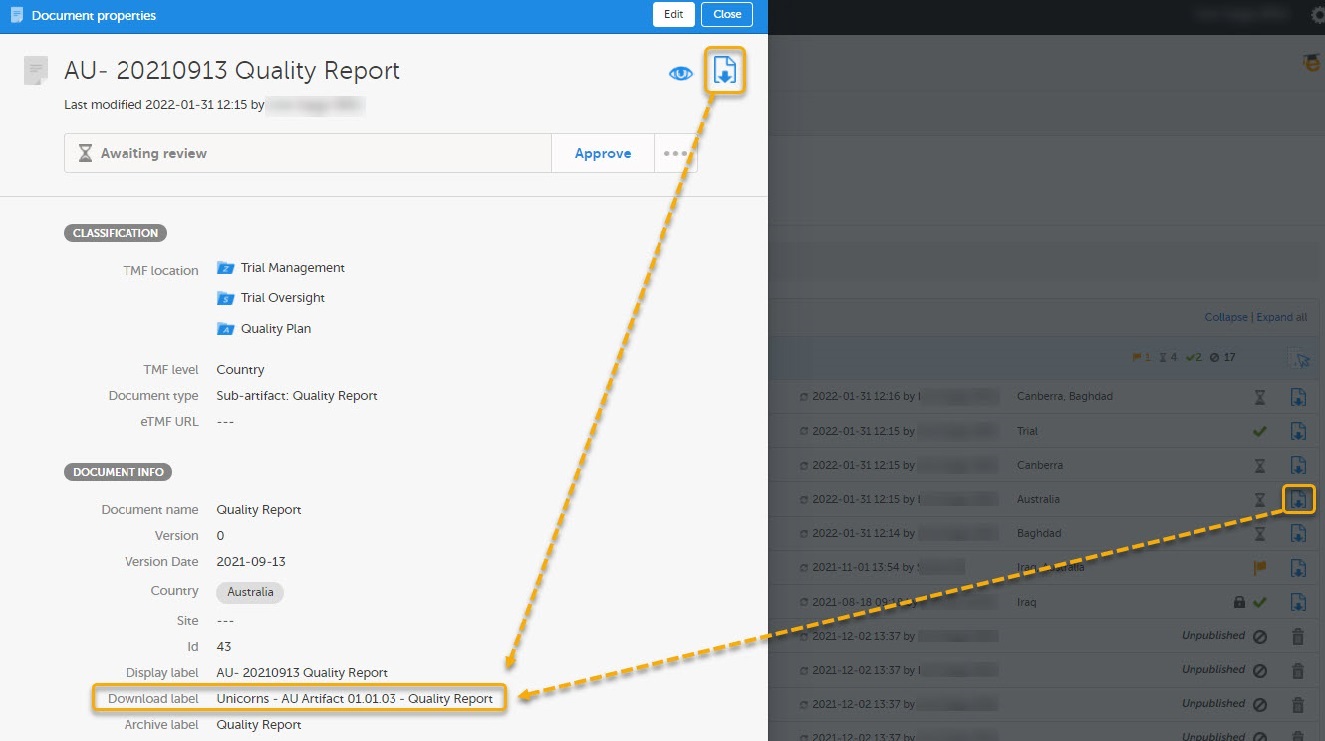
In the Document properties dialog, select the download button. 
|
You can download published documents by selecting the download button in the Artifacts & documents area:
Note! The name of the latest version of the document, when downloaded, will be according to the download label in the Document properties dialog:
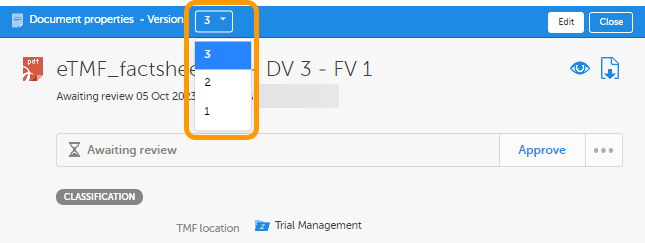
To navigate between versions of a document, use the version menu at the top of the Document properties dialog.
Editing document properties
Editing document properties in Viedoc TMF requires write permission for the artifact on the TMF level that the document is linked to. For more information about permissions, see Introduction to Viedoc eTMF.
Note! it is not possible to edit a finalized document. To make changes, a new document version must be created. For more information, see Creating a new version of a document.
To edit the document properties:
| 1 |
Open the Document properties dialog by selecting a document on the Details page. 
|
| 2 |
Alternatively, open the Document properties dialog by selecting a document in the Artifacts & documents area. 
Note! The upload button on artifact level indicates that you have write permission for the artifact. |
| 3 |
The Document properties dialog is displayed: 
1. Preview button. For more information, see Previewing a document. 2. Delete button 3. Download button 4. The document status, one of Unpublished, Awaiting review, Flagged by QC, and Finalized. 5. The Actions menu. Note that the available menu options depend on the document status and your permissions. 6. Document notes section. 7. CLASSIFICATION
8. DOCUMENT INFO
Note! When using the custom name option, it is not necessary to add the file extension in the custom name, the system will add the file extension automatically. Including the file extension in the name will result in the file extension being displayed twice in the archive export. For example if the custom name you create is "file.pdf" then in the archive it will display as "file.pdf.pdf".
Note! If any of the three labels above is not configured by the eTMF Manager, the fallback is the document name as defined by the user. When the labels are configured to include metadata of the document, changes made to the metadata that affect these labels will be reflected on the labels dynamically in the Document properties dialog. 9. FILE INFO File date is the date and time when the file was uploaded. If the document is in edit mode, you can click the upload button to browse for a new version of the file. If you upload a new file, the document status will be changed to Awaiting review. 10. The HISTORY section is the audit trail for the selected document version. Changes to the document version are logged here together with information about the date and time when it was done and by which user. Note that, in this section, you will not see the name of a site that you do not have access to, but instead the site ID. Note also that document note actions are not included in the history. |
| 4 |
Make your settings, and then select Publish or Save as unpublished. When a document is published, it is available for all eTMF users with at least read permission for that artifact, and the document status is changed to Awaiting review. Note! Before a document can be published, all required fields in the Document properties dialog must be filled in. The required fields are marked with red. |
Creating a new version of a document
To create a new version of a finalized document:
| 1 | Open the Document properties dialog according to the instructions in the section Editing document properties. |
| 2 | At the top of the dialog, select ... to open the Actions menu. |
| 3 | From the menu, select Create new version. |
| 4 |
Select whether you want to copy the file from the previous version or upload a new file. 
|
| 5 | If applicable, edit the metadata of the new document version. |
| 6 |
Select Ready. The new document version is saved in an unpublished status. |
Navigating between document versions
When you open the Document properties dialog, the latest version of the document is displayed by default.
To navigate between document versions, use the version dropdown menu at the top of the Document properties dialog.
Adding notes to a document version
Document notes are a way to communicate with other users about documents without affecting the document status. The notes actions are not recorded in the document history.
These are the permissions needed for adding or resolving notes:
- For a document in the TMF structure, you need WRITE or REVIEW permission for the document.
- For a document in a drop zone, you need to have access to the document.
To add a note to a document:
| 1 | Open the Document properties dialog according to the instructions in the section Editing document properties. |
| 2 |
At the top of the dialog, select 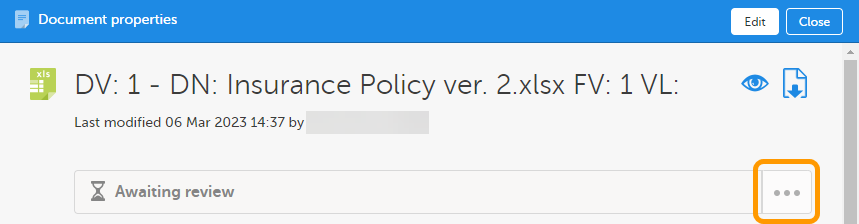
|
| 3 |
Select Add note from the menu. |
| 4 |
Enter your note text and select Save. 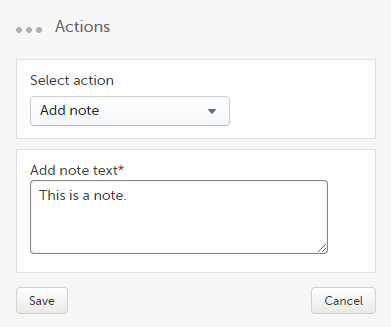
|
| 5 |
The note is then displayed like this: 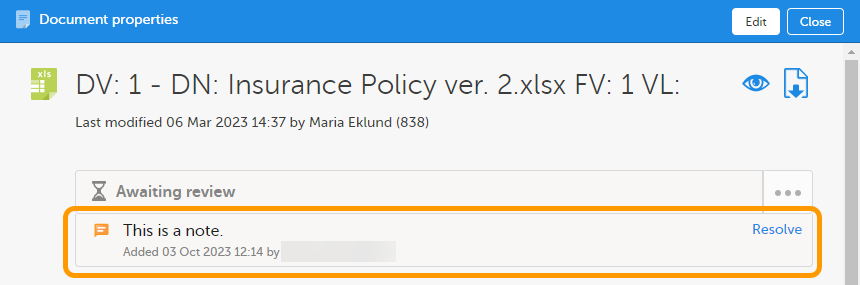
The note is associated with the selected document version. |
Resolving notes
To resolve a note in a document:
| 1 | Open the Document properties dialog according to the instructions in the section Editing document properties. |
| 2 |
Select Resolve for the note that you want to resolve.
The note is then immediately removed. |
Publishing a document
Publishing a document in Viedoc TMF requires write permission for the artifact on the TMF level that the document is linked to. For more information about permissions, see Introduction to Viedoc eTMF.
To publish a document:
| 1 |
Open the Document properties dialog according to the instructions in the section Editing document properties. |
| 2 | Make sure all mandatory fields (marked with red) are filled in. |
| 3 |
Select Publish at the top of the dialog: 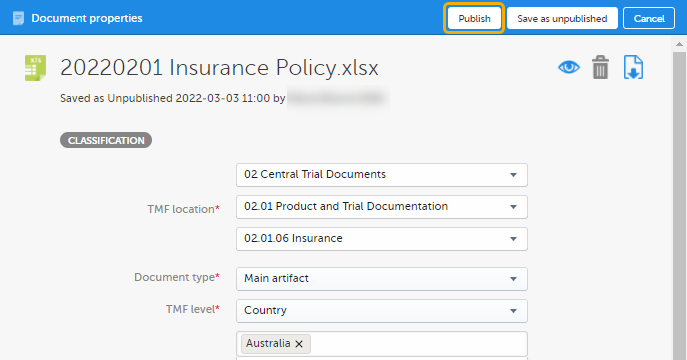
|
| 4 |
When the document is published, it is available for all eTMF users with at least read permissions for that artifact and with access to the TMF level that the document is linked to. The document status is now Awaiting review: 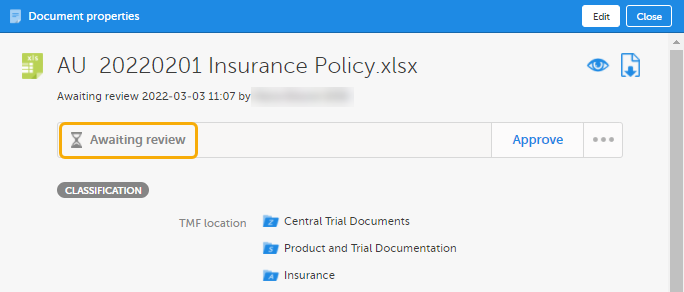
|
Resolving issues for documents that are flagged by QC
In the metrics area at the top of the page, the orange flags indicate if there are any documents that are flagged by QC.

Locating the documents that are flagged by QC
To locate the documents that are flagged by QC:
| 1 |
In the search field, select the Details page button. 
|
| 2 |
On the Details page, locate the column Document status, and select to open the column menu. 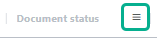
|
| 3 |
Select the filter button, and then deselect all statuses except Flagged by QC. 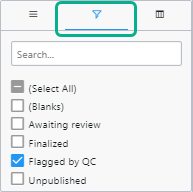
|
| 4 |
The Details page now shows a list of all the documents that are flagged by QC. |
Resolving issues
To resolve issues for documents that are flagged by QC, you need to edit the document metadata.
To edit the document metadata:
| 1 | Open the Document properties dialog according to the instructions in the section Editing document properties. |
| 2 |
If there is a review comment, you can see it at the top of the dialog. 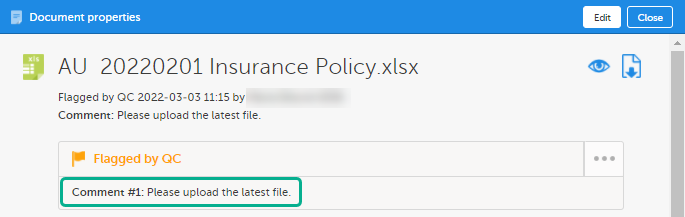
|
| 3 |
Select Edit in the top right corner of the dialog. 
|
| 4 |
In the Document properties dialog, edit the applicable document metadata. To upload another file, select the upload button in the FILE INFO area. 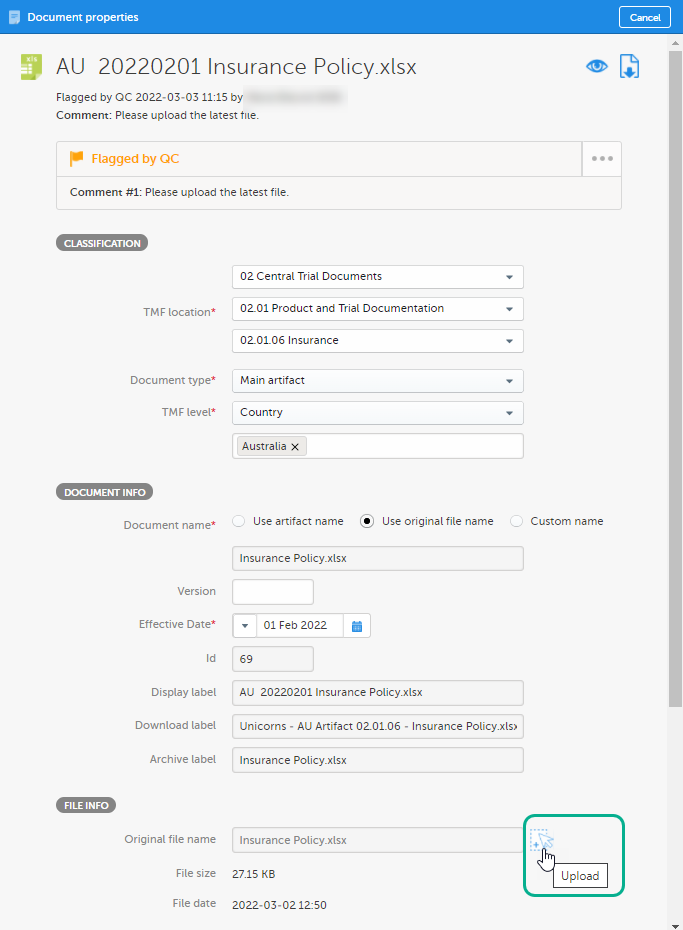
|
| 5 |
When you have made the necessary changes, select Save changes. When the changes have been saved, the document status is changed to Awaiting review. |
Deleting a document
Deleting an unpublished document
Deleting a document in Viedoc TMF requires write permission for the artifact on the TMF level that the document is linked to. For more information about permissions, see Introduction to Viedoc eTMF.
To delete an unpublished document:
| 1 |
Select the delete button in the Artifacts & documents area or in the Document properties dialog. 
|
| 2 |
Select Yes. 
|
Deleting a published document
Deleting a document in Viedoc TMF requires write permission for the respective trial, country, or site. For more information about permissions, see Introduction to Viedoc eTMF.
To delete a published document:
| 1 |
Open the Document properties dialog by selecting a document in the Artifacts & documents area. |
| 2 |
Select to open the Document action dialog. 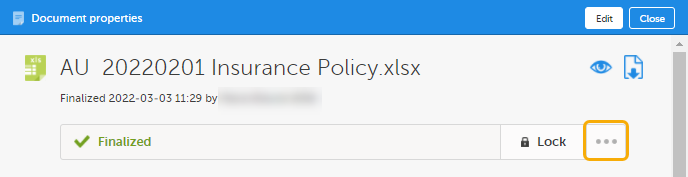
|
| 3 |
In the dropdown menu, select Delete document. Note! If the document has been shared and has at least one active binder, it cannot be deleted. 
|
| 4 | Enter a reason (mandatory). |
| 5 | Select Delete document. |