Managing the study design
This section explains how to assign a design to sites in a study. It is necessary to assign a study design to the sites in the study to start work on the site.
Introduction
Study designs are assigned to a study on a site level. The work on a site can only start when a study design version or revision has been assigned to that site. Without a design, there is no study configuration associated with the site.
When the Study Designer has finished setting up a study design in Viedoc Designer, and has published the study design, it becomes available in Viedoc Admin. At least one site should have been added to the study before a study design can be assigned. The Study Manager can then assign the study design to one or several sites in the study, and select an effective starting time for that design to be applied to the site.
A design can be assigned to all sites at once, or to individual sites in the study. It is therefore possible to assign different study design versions or revisions to different sites in the study. Since study design versions or revisions are assigned to sites with a certain starting date, one site can have a certain study design version or revision assigned to it during a certain period of time, and another version or revision during another period of time.
The Study design field in the Study details pages displays the active designs in the study, and whether there are any new design versions or revisions available.
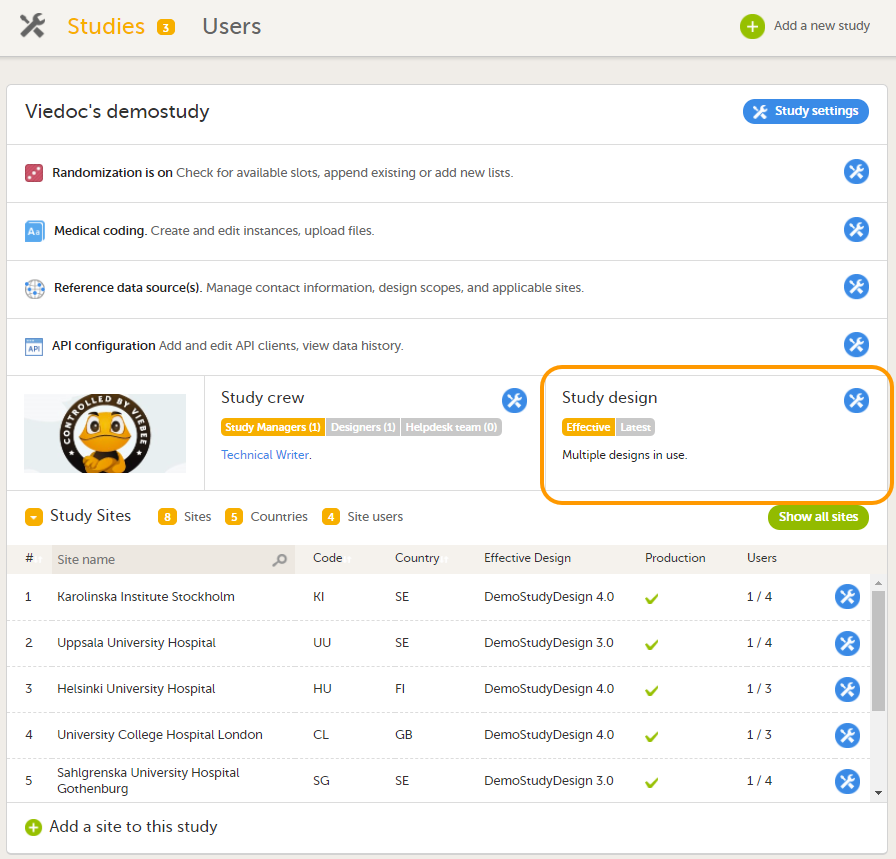
To see the study design or designs that are in use, click Effective.
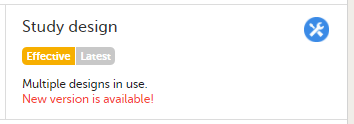
To see whether there is a new design version or revision available, click Latest.
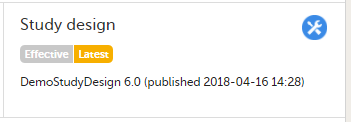
Note! The study design needs to be published in Viedoc Designer, before it is available in Viedoc Admin.
Versions and revisions
The settings in the study design are version-controlled and identified by the version number. Study design version numbers are unique within a study. If there are five study design versions in the study, and a new one is created, the new version will have version number 6. Study design version numbers are accompanied with a revision number. For example, version "1.6" means revision 6 of version 1.
The main reason to assign a new study design version to a site after study start is that protocol amendments require changes to be made to the study design, for example changes to the study that apply from a specific point in time during the course of the study.
If there is a need to correct errors in a study design version that has already been assigned and used for entering data, the study design version has to be revised and the revision has to be applied to the applicable sites.
For more detailed information, see Viedoc study configuration management.
Viewing the effective study designs
To view a list of effective designs for all sites, click the toolbox icon in the Study design field on the study details page. The Design settings pop-up opens:
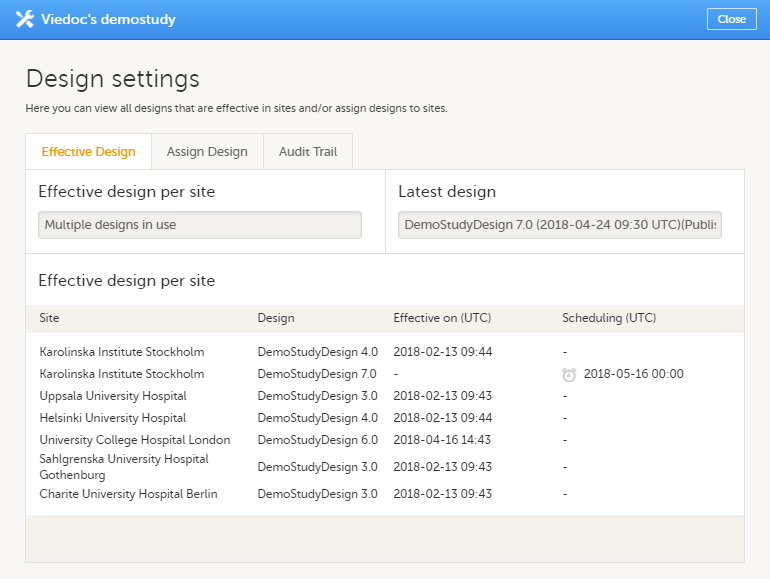
In the Effective design per site list, the current effective designs (design effective on this date) and the designs scheduled to become effective are listed per site. The list also includes information about when that design became effective on the site, and/or when the design is scheduled to become effective on the site. Time is displayed in Coordinated Universal Time (UTC).
Assigning a study design
To assign a design to sites in a study, follow the steps below.
| 1 | Click the toolbox icon in the Study design field on the study details page. The Design settings pop-up opens. |
| 2 |
On the Assign Design tab:
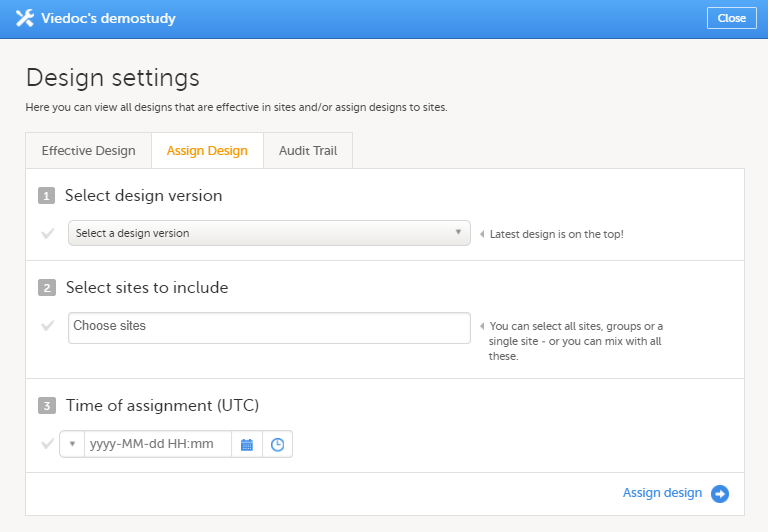
|
| 3 | Click Assign design. |
The design is applied to the site and a confirmation message is briefly shown.
Assigning a new design version
Assigning a new design version is done in exactly the same way as assigning a study design. See Assigning a study design for instructions.
Note! It is a good idea to keep all production sites on the same design version. For more information about the consequences to exports when the design versions do not match, please see Exporting data.
Applying a design revision
Application of a revised study design is used to upgrade forms that are already saved. When a revision of a study design is applied to a site, that revision will (after confirmation by the site) replace the version it is revising.
Note! It is recommended that you use the revision impact analysis before applying any revision. For more information, see Design revision impact analysis.
Note!
- A revision of a version only replaces the version it is revising. If you need to change something that is present in more than one version effective in your study, you need to revise all those versions applicable to the change. See Duplicate a design - versions and revisions.
Note! You can NOT apply an earlier revision if a later revision has already been applied to another site. This applies to both demo sites and production sites. For example, if version 1.2 has already been applied to a site with user acceptance testing (UAT) underway, then version 1.1 cannot be applied to a production site. It is only possible to apply version 1.2.
To apply a design revision to sites in a study, follow the steps below.
| 1 | Click the toolbox icon in the Study design field on the study details page. The Design settings pop-up opens. |
| 2 |
On the Apply Revision tab, select the design revision from the drop-down list and click Continue (Step 1/3). 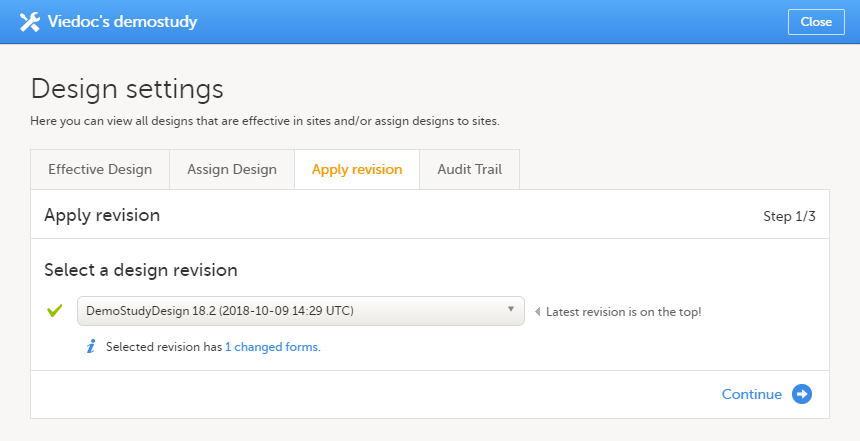
The system provides information about the impact of the revision by showing how many forms have been changed in blue text. |
| 3 |
Select the sites the revision should be applied to. It is possible to select 'All sites', or individual sites. 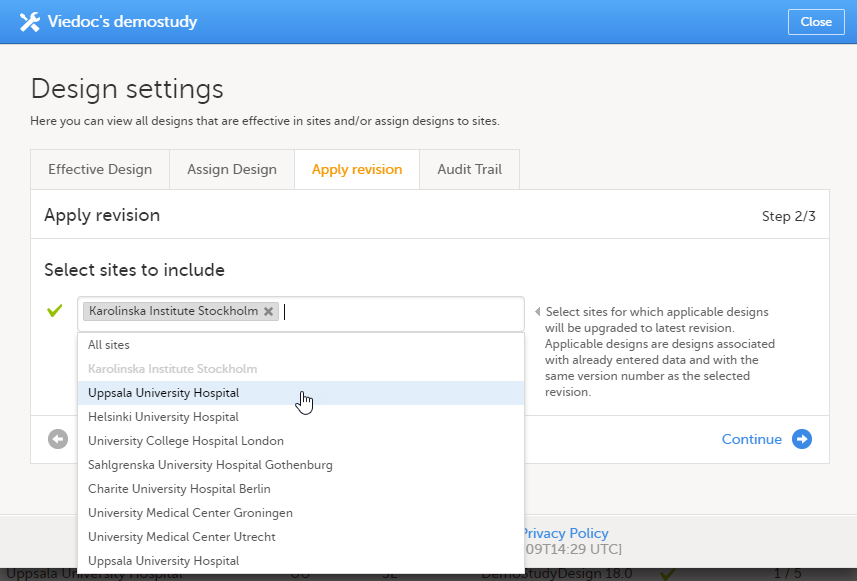
|
| 4 |
Type a message to the Clinic user in the Upgrade message field. This message could be a summary of the changes in the revision. It is displayed in Viedoc Clinic on the Messages page. 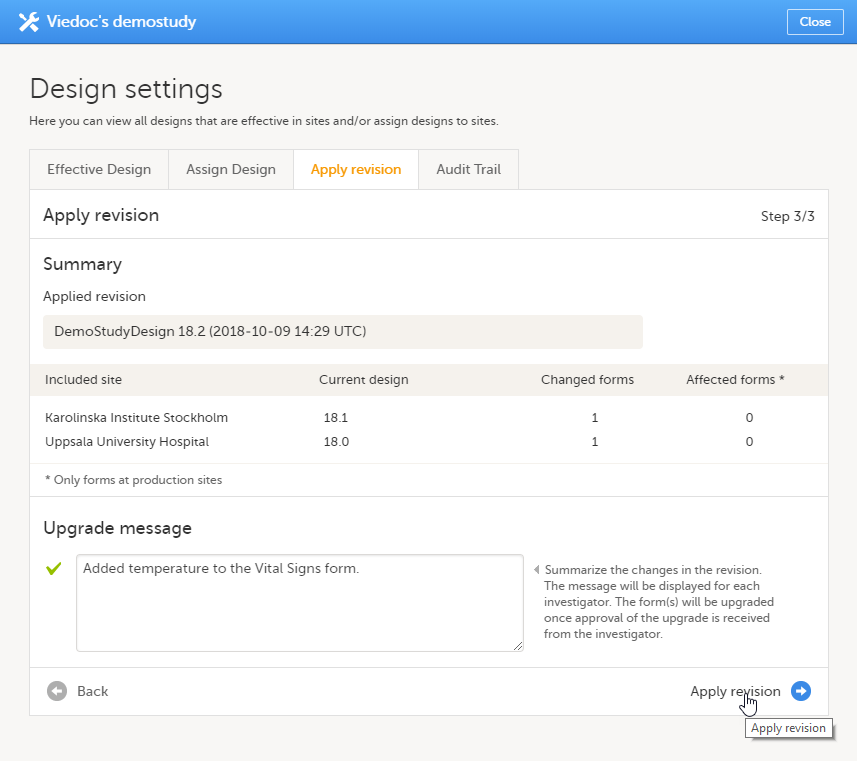
Click Apply revision (Step 3/3). |
After a revision has been applied, the clinic user (with permission to enter data) needs to approve the application in Viedoc Clinic. On the Messages page in Viedoc Clinic, the following message is displayed.
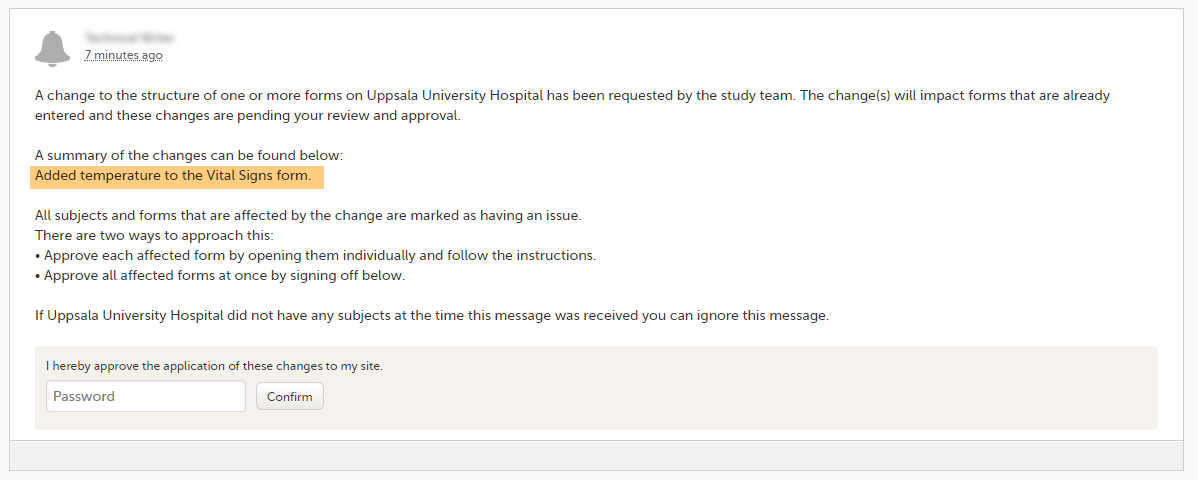 Application of the revision can be done in two ways:
- Approve the changes to all affected forms at once by entering the password en clicking Confirm below the displayed message (batch approval).
- Approve each affected form by opening them individually and follow the instructions. Affected forms are indicated by the red issue icon.
Forms upgraded to a new design revision by the site will lose any existing signature and review flags (clinical review, data review). The Source Data Verification (SDV) flag is lost on item level. If a particular item, that was previously source data verified, is affected by the upgrade, it will no longer be flagged as having been source-data verified. The form-level SDV flag will be lost if any item in the form lost its SDV flag. The form-level SDV flag will also be lost if an item is removed from a form as part of the upgrade.
Viewing the audit trail of study designs
To view a list of effective designs for all sites, click the toolbox icon in the Study design field on the study details page. In the Design settings pop-up, open the Audit Trail tab.
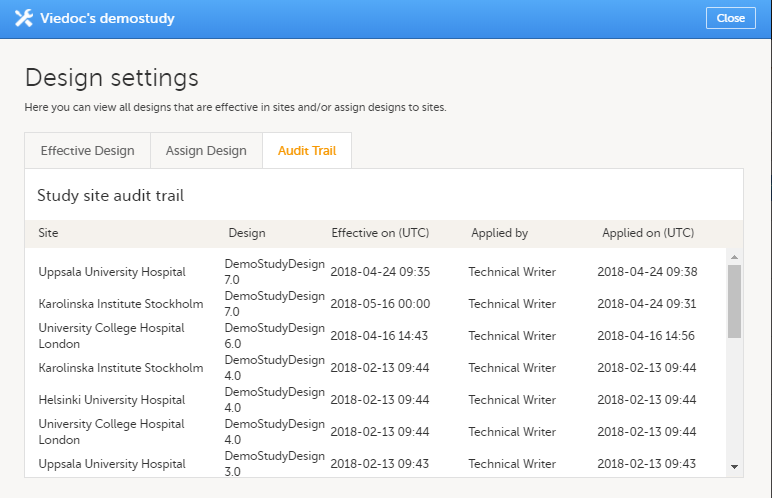
The audit trail lists the sites to which designs are assigned, which design is assign, on what date that design is effective. It also lists who assigned the design to that site and on what date.
