
Signing data
Introduction
The Investigator signs the data. Signing for a subject can be done on an individual form, event, or across a study either using the signing console on the Details page, or if your role has the Batch sign permission, you can sign multiple forms using the Batch view on the Selection page.
Signature definition
This content is shared by the lessons in the following user guides
Admin: "Managing users (for Org Admin)"
Monitors & Project Managers: "Managing users"
Clinic: Signing data
The Study Manager should, in cooperation with the Site Manager(s), ensure that all users of Viedoc are informed, and certify that all electronic signatures created in the system are intended to be the legally binding equivalent of a traditional handwritten signature.
In Viedoc, the purpose/meaning of a signature is always “responsibility” as used in Sec. 11.50 of Food and Drug Administration (FDA) 21 Code of Federal Regulations (CFR) part 11. The signer is thereby acknowledging his/her responsibility for the entered data. Viedoc keeps account of what was signed, who signed it, and when the signature was performed.
Signing console
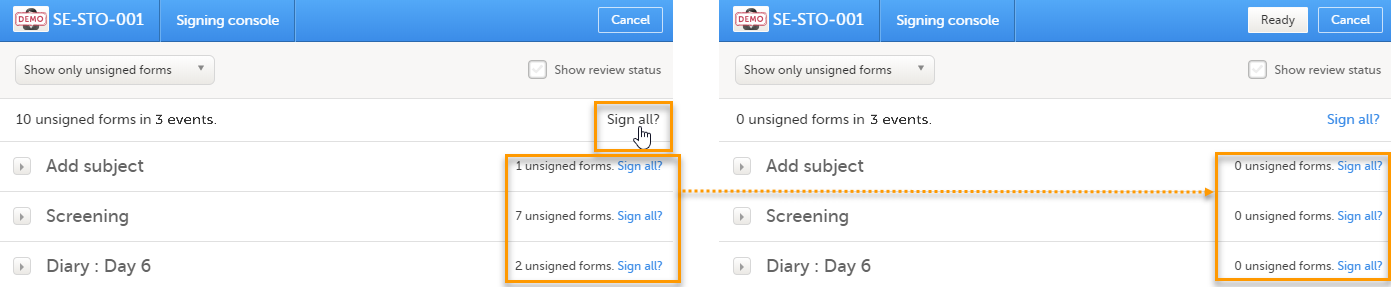
To access the signing console, go to the Details page and select SIGN:
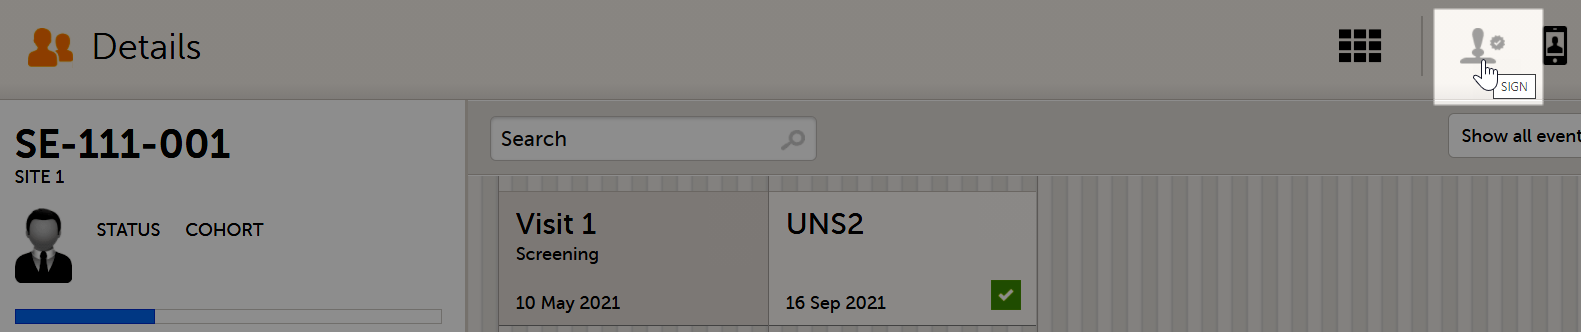
The signing console opens:
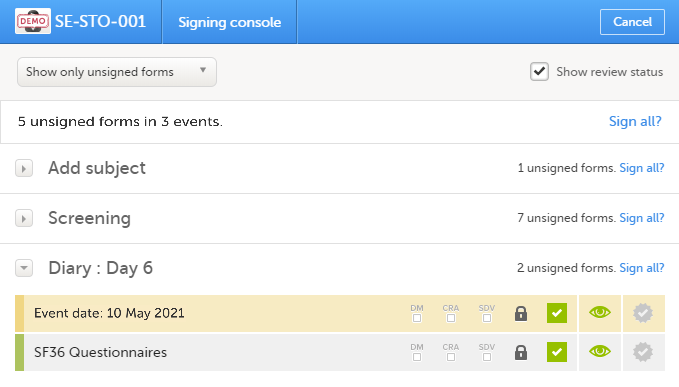
The signing console lists all of the initiated forms with no issues for the selected subject, grouped by event.
You can use the filter in the top of the page to:
- Show all forms
- Show only unsigned forms
The eye icons help you identify which forms you have visited (the most recent version of the form):
- The green eye icon means that you have viewed the last version of the form.
- The grey eye icon means that you have not viewed the latest version of the form.
To review a form, select the form bar. Closing the form takes you back to the signing console.
To view the review status of:
- CRA - reviewed by Clinical Research Associate (CRA) or another role with review permission
- DM - reviewed by Data Manager (DM) or another role with review permission
- SDV - performed Source Data Verification (SDV)
...for each form, check the Show review status checkbox in the top right corner of the page.
To sign the data:
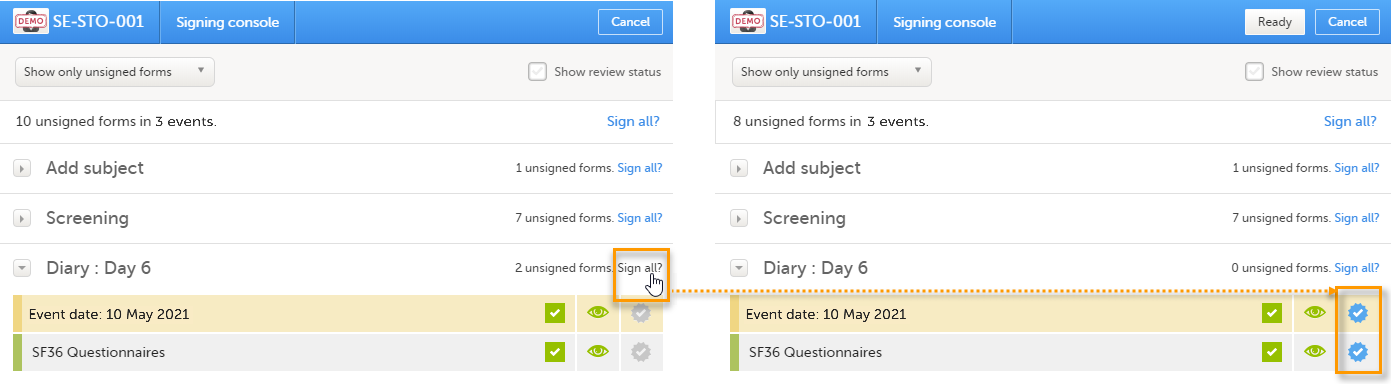
| 1 | Select the form(s) to be signed in one of the following ways:
|
|
| 2 |
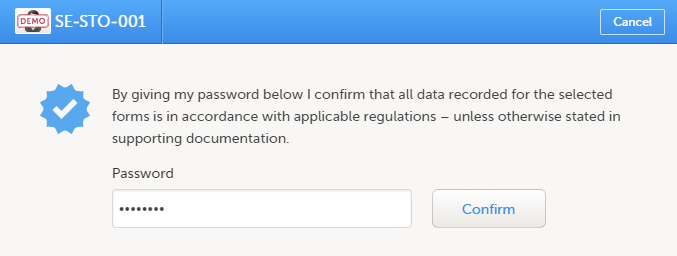
Select Ready on the top bar of the page. A confirmation pop-up appears: |
|
| 3 |
Type in your password and select Confirm.
|
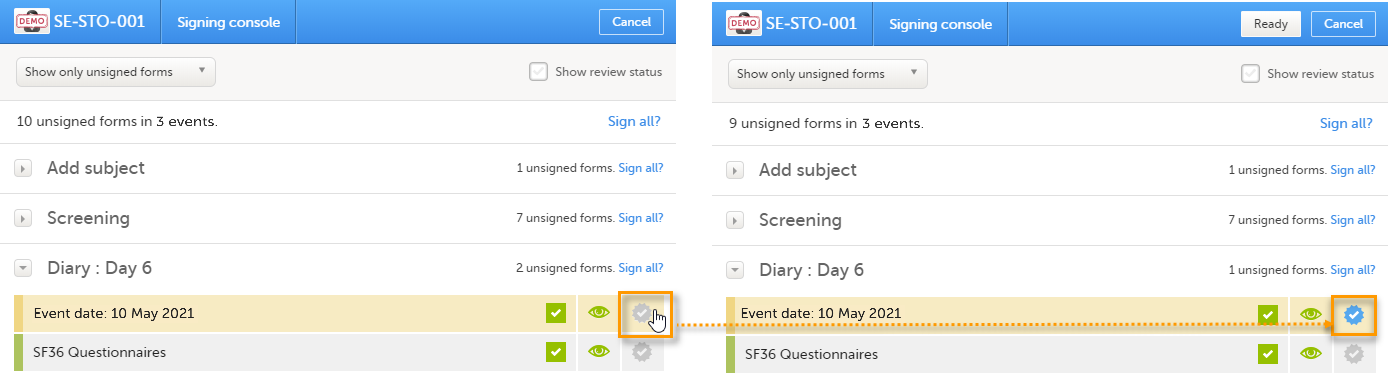
Note! For scheduled and unscheduled events, the event date form ($EVENT) still counts, even when it is excluded when you use automatic event dates.
- In the signing console, the counter (number of forms) for a event includes the
$EVENTform. This cannot be selected to be signed but can be signed if you select Sign all (for subject or event).
If you sign forms on an event individually, you will not be able to sign the $EVENT form. As a result, the sign symbol for the event is not visible, even though it looks as though all forms have been signed.
Batch sign
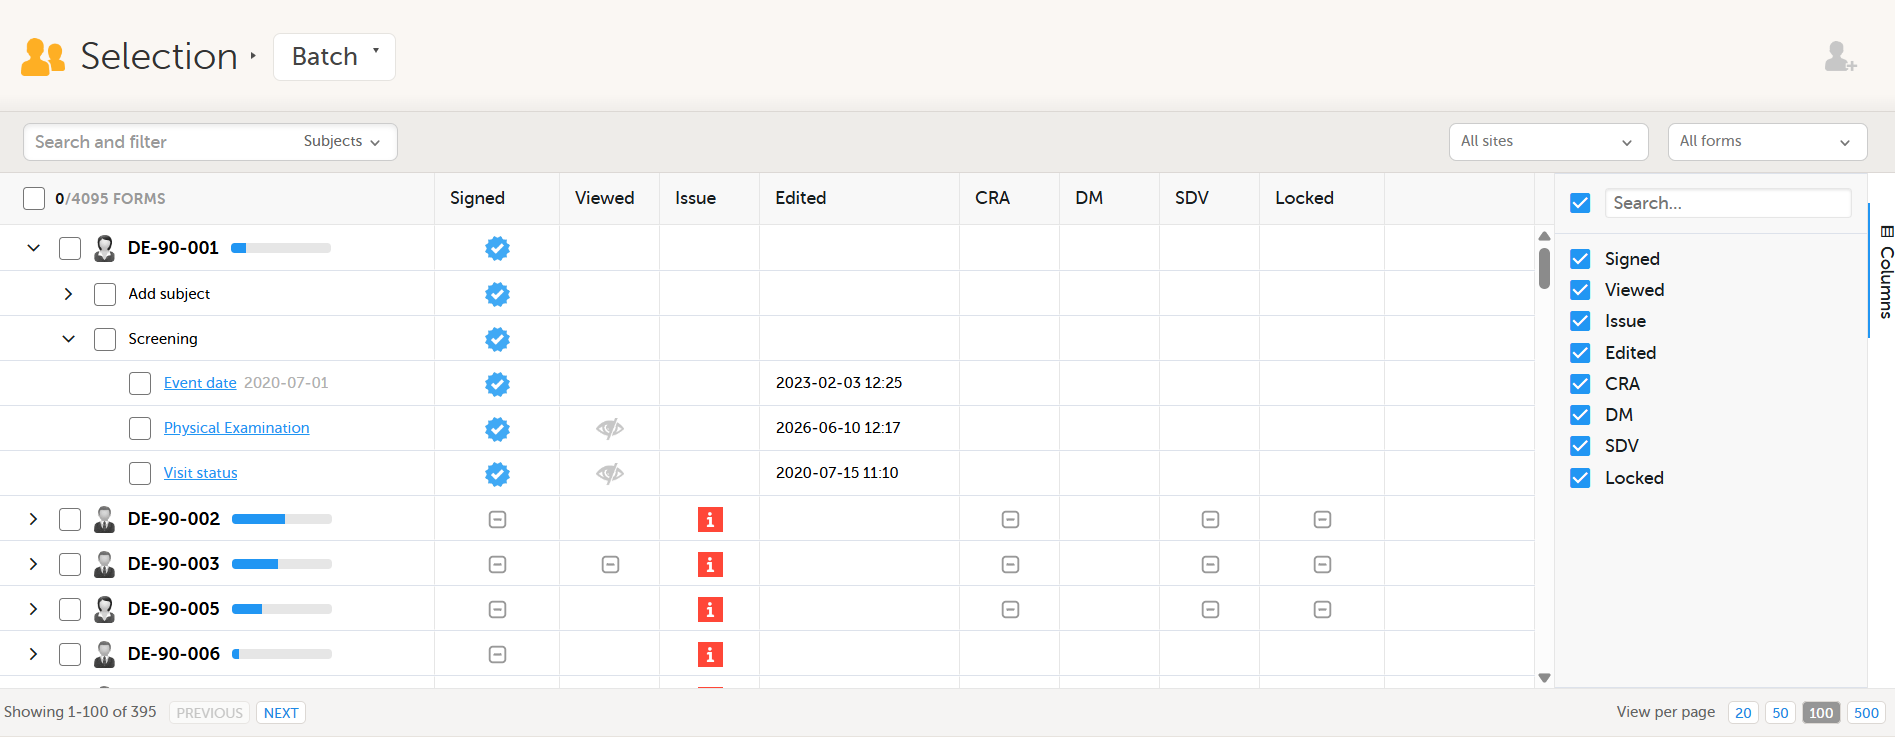
If you have the Batch sign permission configured for your role in Viedoc Designer, when you select Launch for your study, the Batch view opens from the Selection page.
Note! Any user role with access to the study can open the Batch view, even without the Batch sign permission. Without that permission, the view is read-only: selection checkboxes, select all, and Sign are not available, although you can still search, sort, and open a form.
The Batch view shows:
- All subjects for one or more sites, depending on your site access
- Forms grouped by subjects and by subject and event.
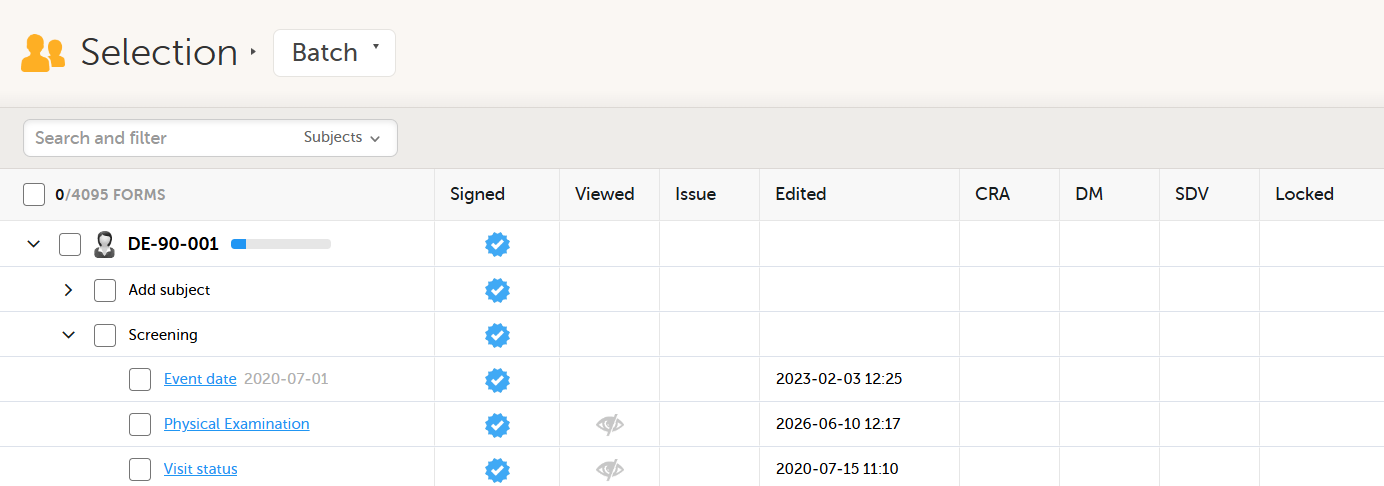
You can also search the Batch view by subject or by form title. Use the dropdown in the search field to select the search type.
Note!
- If the Event date form is hidden in the study design, it is not visible in the Batch view, and is not signed when all forms are signed.
- If the Event date form is shown in the study design, the event date is shown in the Batch view under the Forms column, next to the Event date form name under the subject's event.
- In the Batch view, the Event date form row does not show a Viewed or Not viewed icon. The Event date form is counted as viewed when signing, even if you have not opened it.
For each subject, you can:
- Expand the row to view the forms available for signing
- Open a form from the batch view and then close the form to return to the batch view.
The following columns are available in the batch view, so you can see which forms are ready for signing:
- Subjects and Forms - all forms available for signing listed by the subject's ID.
- Signed - whether the form has been signed.
- Viewed - whether you have viewed the latest version of the form.
- Issue - forms with at least one open query, missing required data, or a pending form upgrade.
- Edited - the date the form was last edited
- Form review status:
CRA - reviewed by Clinical Research Associate (CRA) or another role with review permission
DM - reviewed by Data Manager (DM) or another role with review permission
SDV - performed Source Data Verification (SDV) - Locked - whether the form is locked.
You can choose which columns you want to view by selecting the relevant checkbox in the Columns list.
In Batch view, you can:
- Select all sites or an individual site to sign
- Select all subjects, a group of subjects, or an individual subject
- Expand a subject or a group of subjects to view all forms for the subject
- Select all forms, an individual form, or a subset of the forms to sign
A filter icon is also available on the Signed, Edited, CRA, DM, SDV, and Locked columns, letting you filter the view by that column's value.
To batch sign forms:
| 1 |
Select the forms you want to sign as follows:
You can use the filters at the top of the page to narrow down the list before selecting forms to sign. For more information, see the Batch view on the Selection page. Note! You cannot sign a form that is:
|
| 2 |
The number of forms and subjects currently selected is shown. Select Sign: 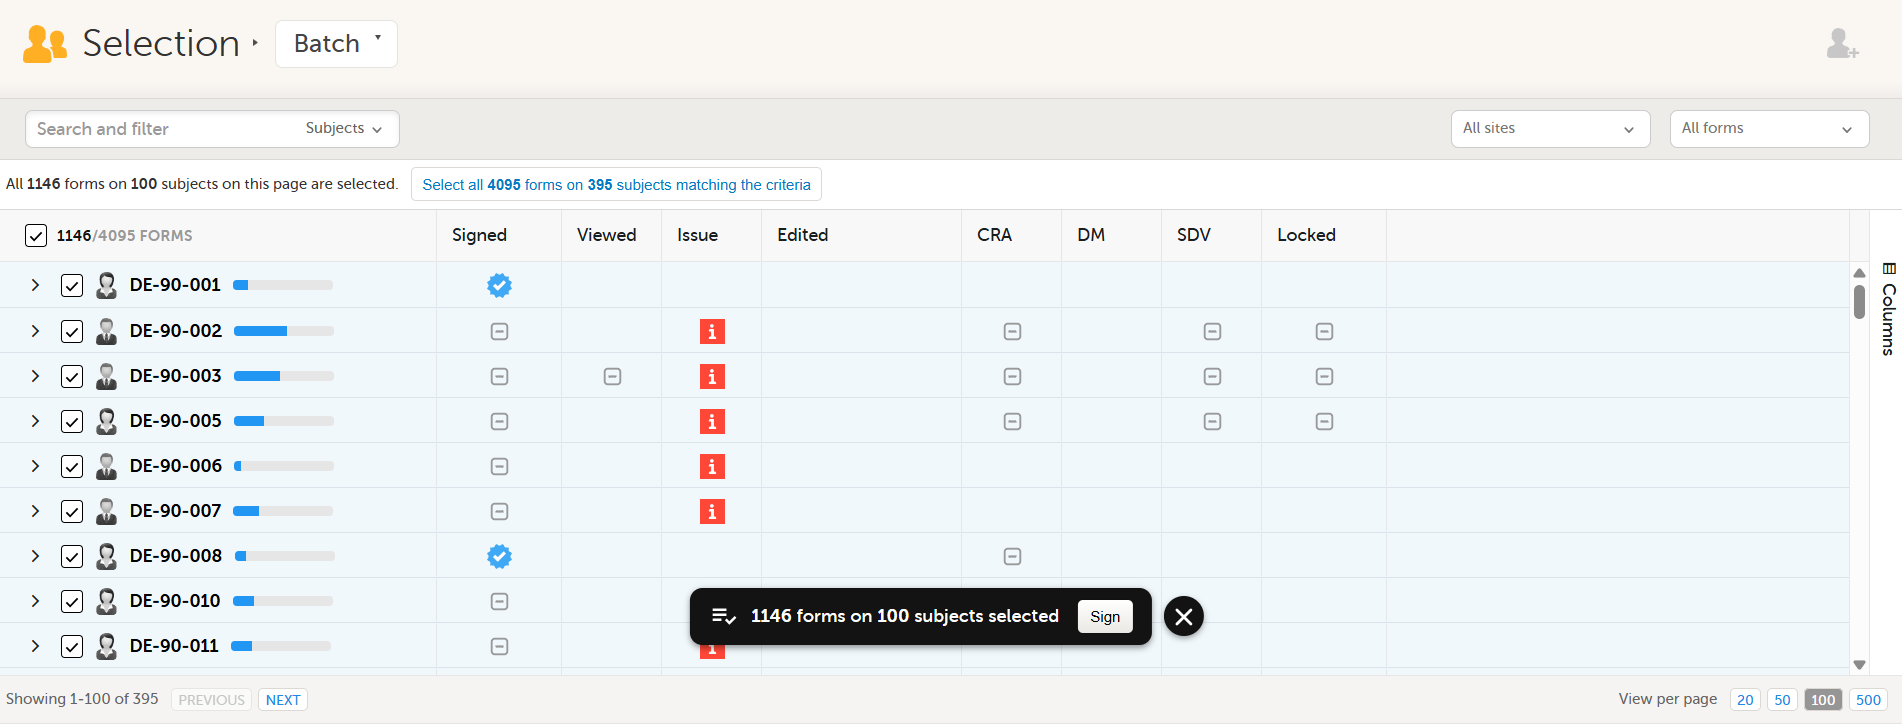
|
| 3 |
The Review and confirm dialog opens, showing the total number of forms, subjects, and sites selected that can be signed and the review status (CRA, DM, SDV) of the selected forms. 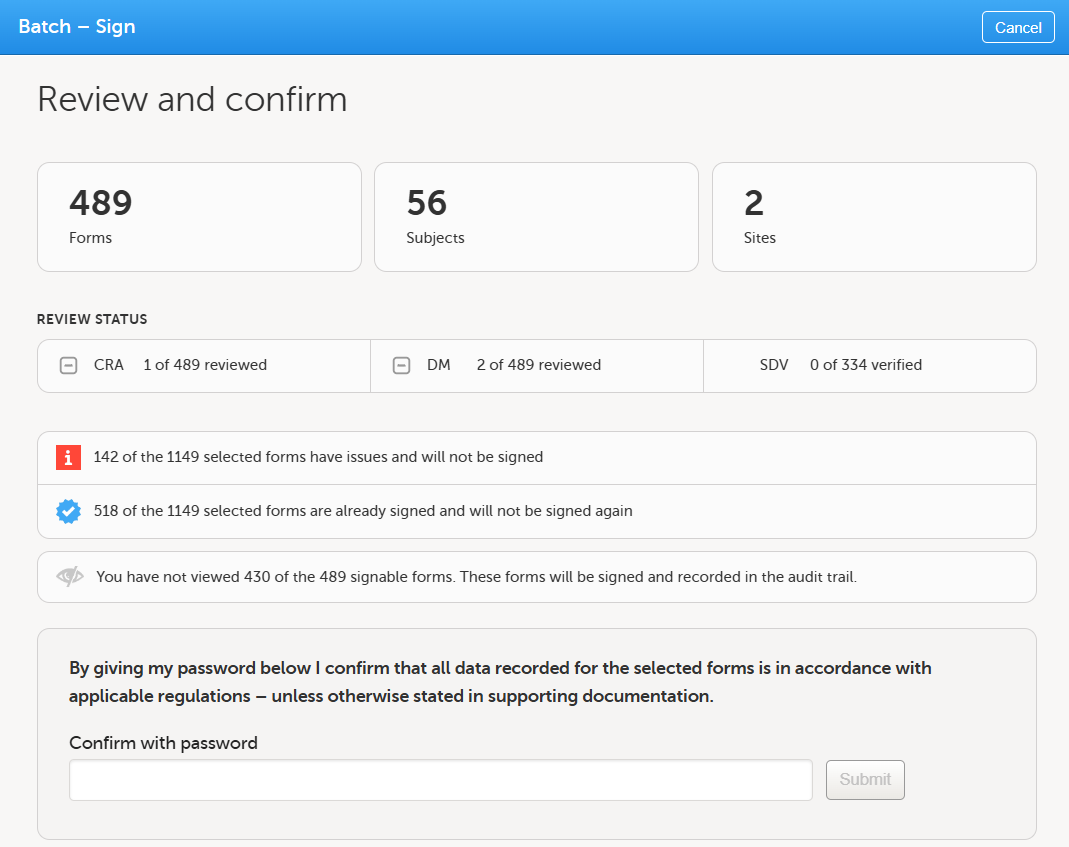
Note!
|
| 4 |
Enter your password in Confirm with password and select Submit. Note!
|
| 5 |
Select Close to return to the Batch view. Note!
|
See also the video tutorial: Sign data.