Admin study settings
Inviting the Designer
This step is performed by the Study Manager.
| 1 | In Viedoc Admin, open the PMS study to which you would like to invite the Designer |
| 2 |
Select the toolbox icon in the Study crew field. The Study crew pop-up opens. 
|
| 3 |
In the Add study users tab, enter the e-mail address of the user you would like to invite. Select Continue. 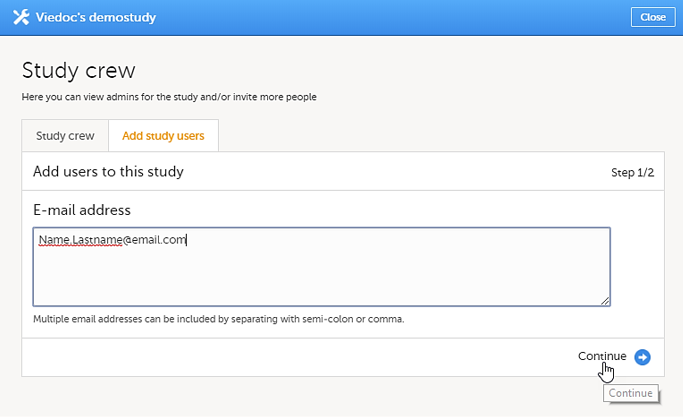
Note! You can invite multiple users at once by adding multiple email addresses in the field. Separate the email addresses with a semi-colon or comma. An invitation email will be sent to the specified e-mail addresses. |
| 4 |
Select Designer from the dropdown menu and then select Send Invite. You can add multiple roles by selecting the + icon. You can remove roles by selecting the - icon. 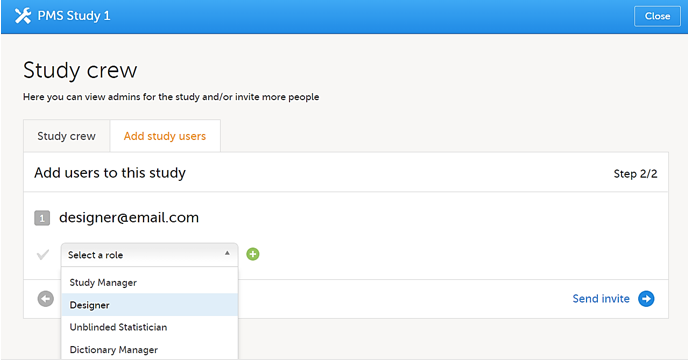
|
Completing the study setup
These steps are performed in Viedoc Admin by the Study Manager.
To complete the study setup:
| 1 | Add the study site(s). |
| 2 | Enter the following study details under Study settings: Sponsor Code, Contract Research Organization (CRO) code, Reference ID, Study Type, Sponsor Type, Study Phase, Therapeutic Area, Expected number of subjects. |
| 3 | When the Designer has published the study design, assign the study design to the sites in the study. |
| 4 | Invite users to the different system roles and clinic roles. |
| 5 | Open the study in Viedoc Clinic and test the study. |
Note! These steps are described in more detail in the eLearning lessons under Study Management.