How to add an image to a form in Viedoc
This section explains how to add an image to a form in Viedoc.
Before anything else, make sure that the image you are using is optimised in terms of pixel size. Apart from setting the desired width and height of the image you should also shrink it to the minimum possible file size by removing all unnecessary information while keeping the required level of image quality. The file format should be either PNG or JPG. Optimising the image can be done by using Photoshop or a similar software. We also recommend using a site like http://optimizilla.com to remove things that Photoshop cannot handle.
| Important! Please observe that you are responsible for any image uploaded on an external site. |
Follow the step-by-step guide below to add your image to a form:
| 1 |
Add a static text field in the form where you would like to place the image. 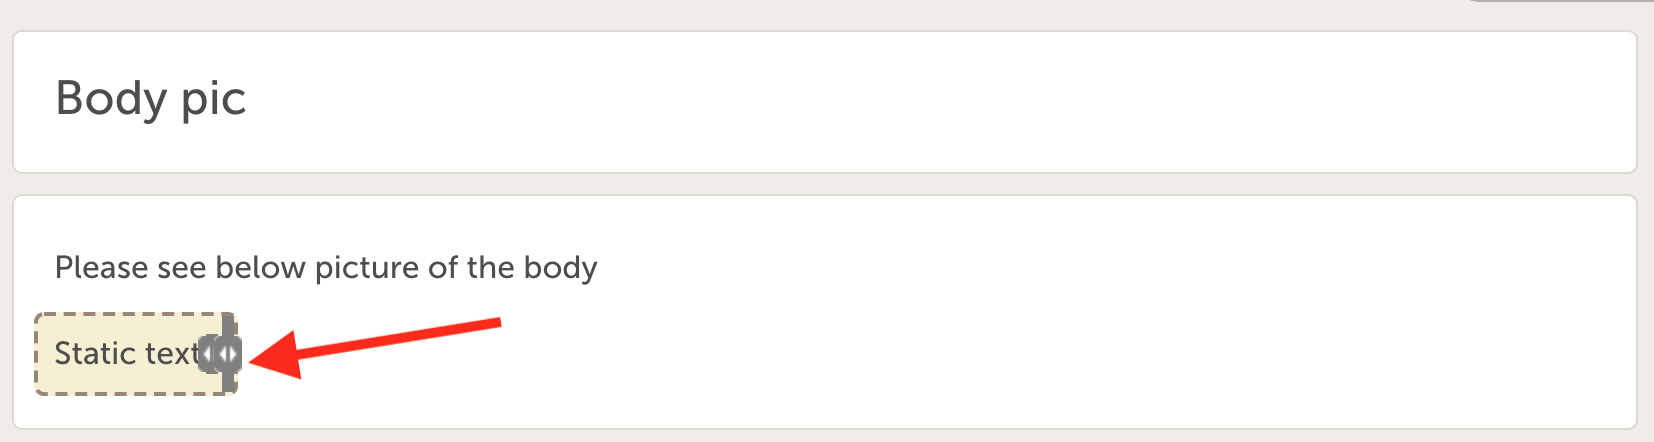
|
| 2 | Export the Operational Data Model (ODM). |
| 3 | Open the ODM in a text editor and search for the variable ID for the static text field added in step 1 above. |
| 4 |
Replace "Static text" in blue below with this code:
The code will make sure the image is not larger than the browser window. 
|
| 5 | Go to http://www.cssportal.com/image-to-data/ and upload the image (works with PNG and JPG images only). Make sure to only upload an image that is optimized in pixel size or the size of your ODM will become too big. |
| 6 |
Copy all the text in the Data URI field (double-click to mark all text). 
|
| 7 |
Paste it to the src parameter. See image: 
|
| 8 | Save the ODM and import this edited design into Viedoc as a new version. The version that was exported can be deleted (to keep the version numbers continuous). |
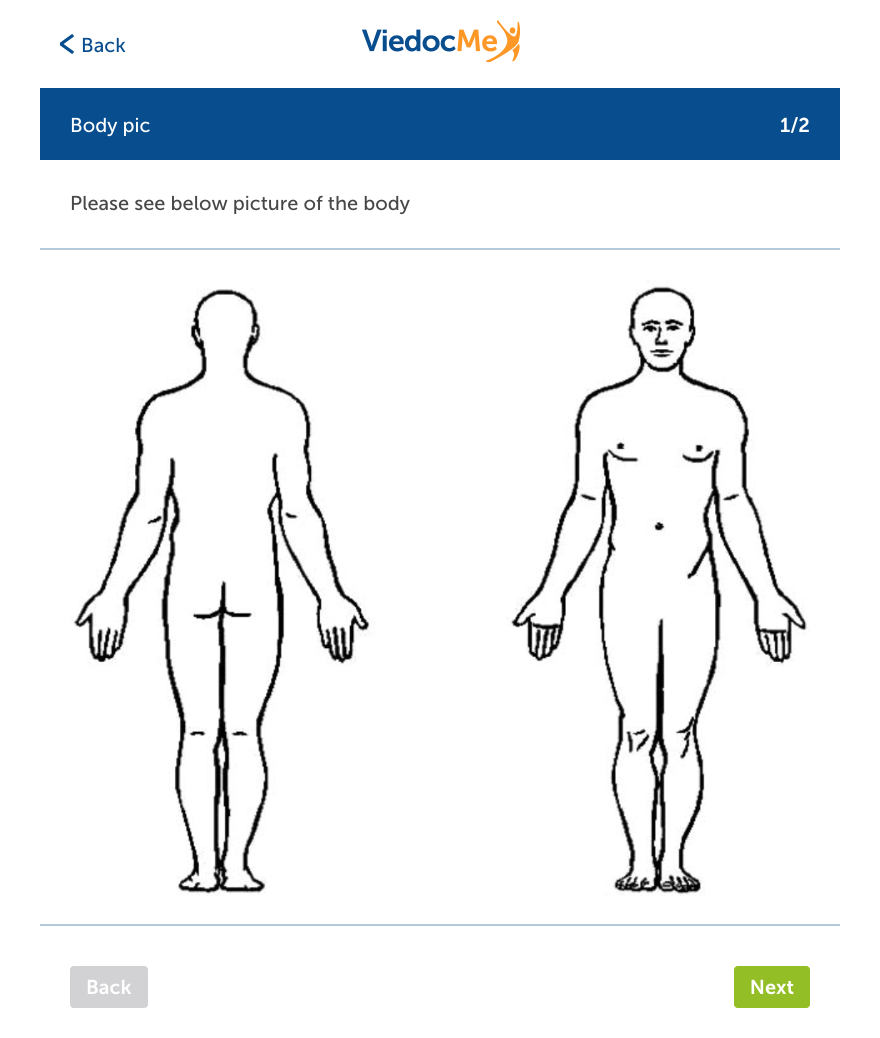
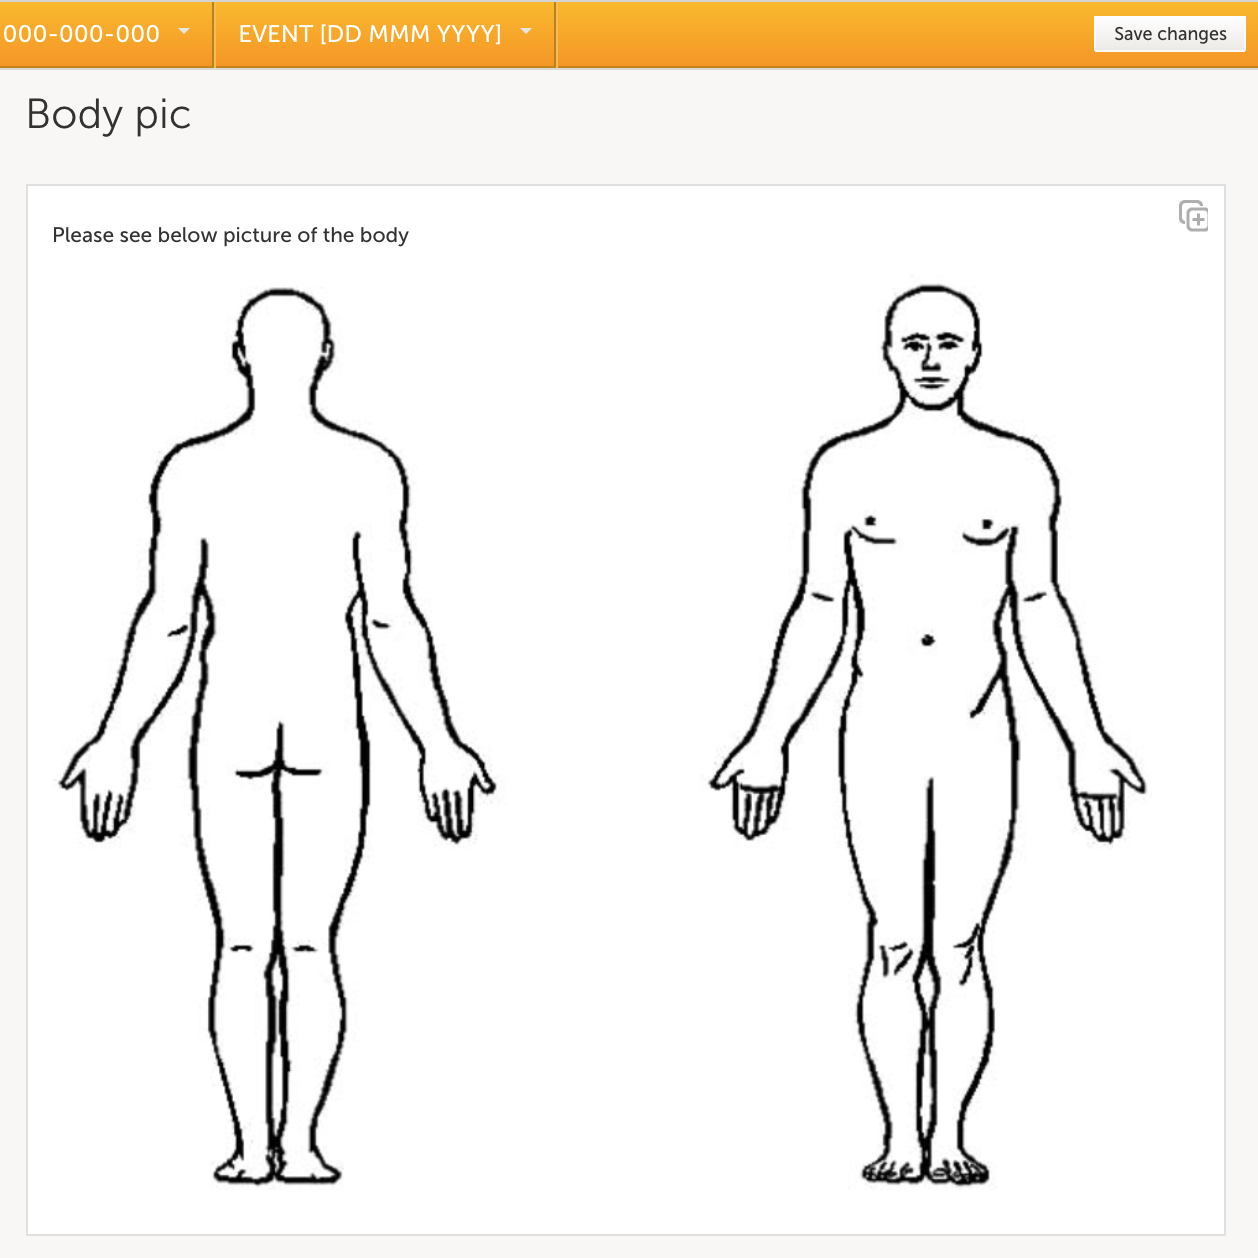
In Viedoc Clinic, the image will be displayed as follows:
In Viedoc Me, the image will be displayed as follows: