Using Viedoc Connect
Introduction
Viedoc Connect enables meetings between Clinic and Viedoc Me users through video calls. The video calls are started from Clinic, and the call is opened in a new tab that is the Viedoc Connect application. Once the call is initiated/ongoing, subjects can join the video call through the Connect module which is available in Viedoc Me.
A video call that has been started is valid/open to join within 60 minutes. Users can also leave and re-join the video call. The users are free to navigate in the Clinic tab to other pages during the call, and the subjects can navigate within Viedoc Me and submit questionnaires during the call.
Viedoc Connect only allows one active video call at a time, meaning that only the latest started video call is shown in Viedoc Connect.
Prerequisites
To use Viedoc Connect:
- the feature must be encluded in the study license
- the feature must be enabled in Viedoc Admin
- the subject must have an open Viedoc Me account
Note! For information about supported versions of iOS and Android, and other system requirements for Viedoc Connect use, please refer to System requirements for the Viedoc system and Supported Browsers & Devices for information about the desktop and mobile browsers and devices supported by the Whereby platform.
Opening Viedoc Connect
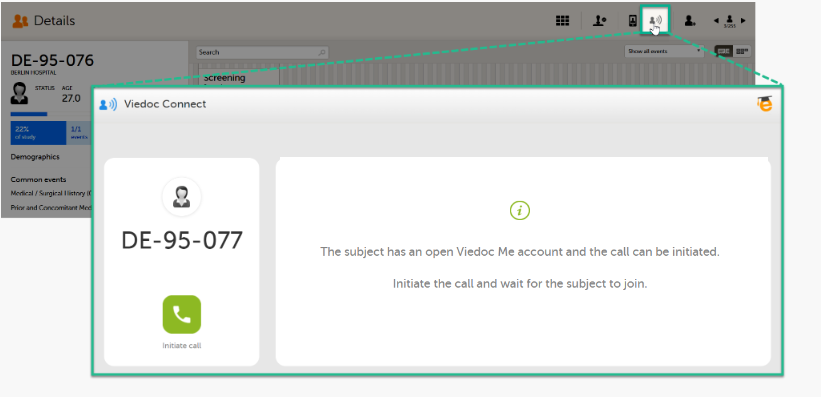
To open Viedoc Connect, select the icon on the Selection page. Viedoc Connect opens in a new tab:
Initating a call
To initiate a call, click the green phone icon.
When the subject joins the call, you will see the following view:

1. To show the screen settings on the site user screen (you), hover over the screen:

- Select Pop out to move the screen of you to the bottom right corner.
- Select Spotlight to put the spotlight on you.
- Select the three dots to show more settings:
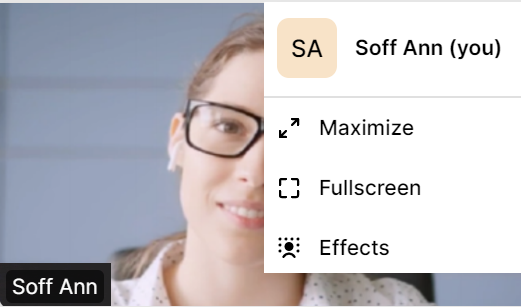
- Select your name to edit it.
- Select Maximize to make both screens larger.
- Select Fullscreen to make your screen cover the whole screen.
- Select Effects to open a menu with more settings.
2. To show the screen settings on the subject's screen, hover over the screen:
- Select Spotlight to put the spotlight on the subject.
- Select the three dots to show more settings:
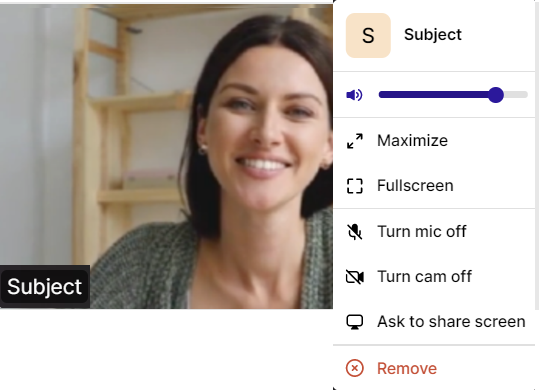
- Pull the bar to increase/decrease their volume.
- Select Maximize to make both screens larger.
- Select Fullscreen to make their screen cover the whole screen.
- Select Turn mic off/Turn cam off to disable their microphone/camera. To enable them, click Ask to turn mic on/Ask to turn cam on. The participant will be notified and needs to enable their mic/cam.
- Select Ask to share screen. The participant will be notified to share their screen.
- Select Remove to end the call with the participant.
3. Camera settings - select to turn off the camera. Hover to see more camera settings.
4. Microphone settings - select to mute. Hover to see more microphone settings.
5. Screen settings - select to share your screen.
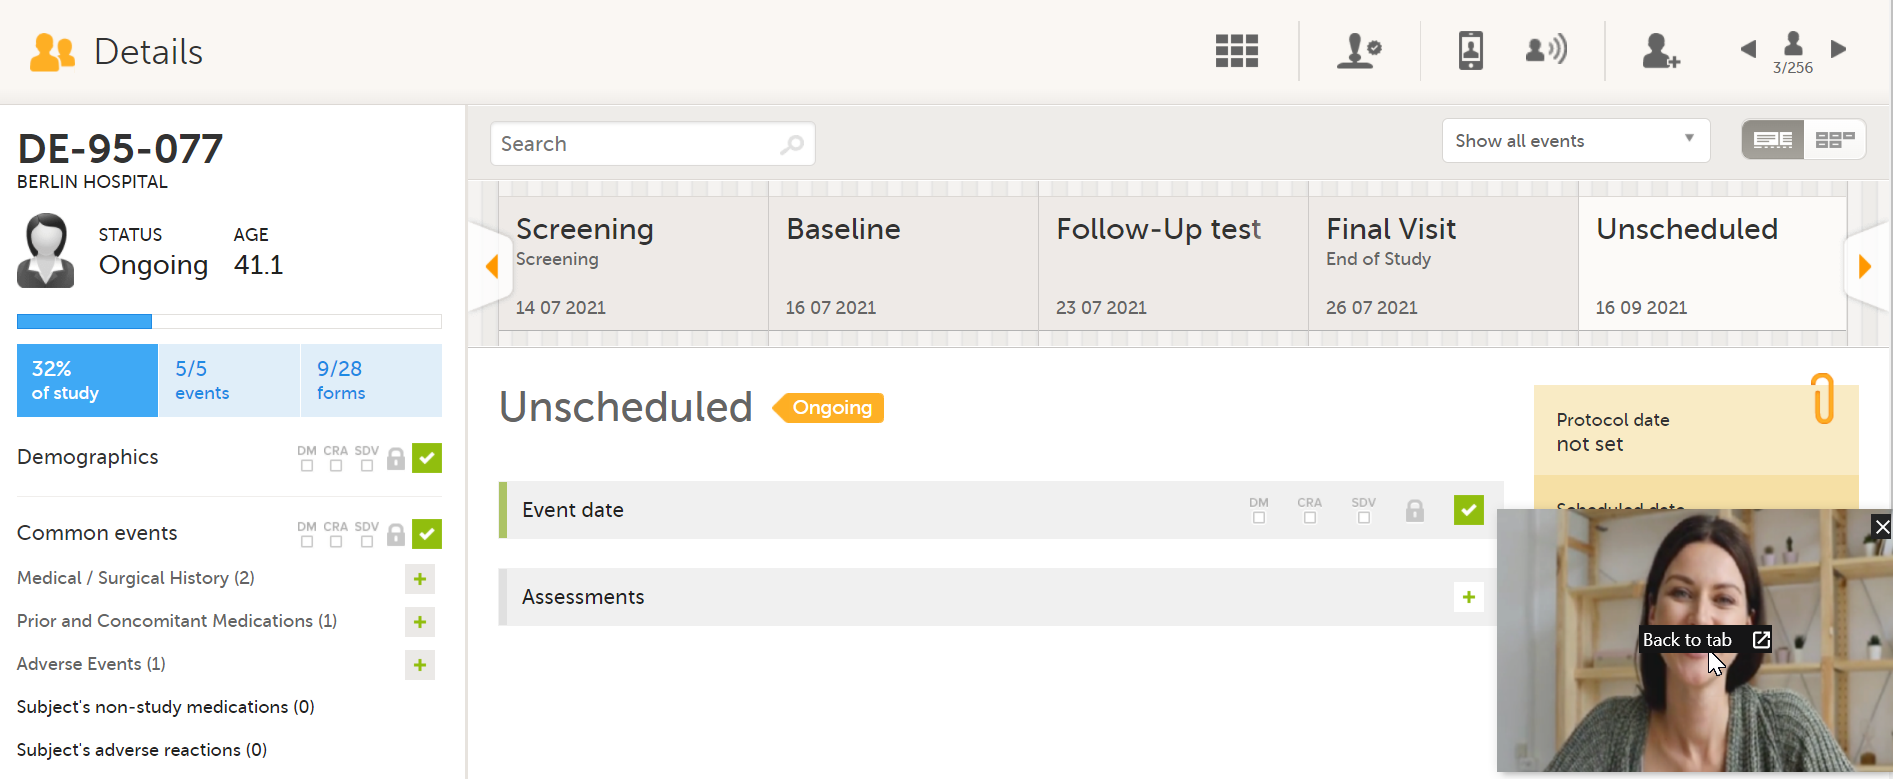
6. Picture-in-picture - select to continue the video call with a remotable screen that will be shown even if you switch tabs. Hover over the mini-screen and select Back to tab to return to the Viedoc Connect main screen.
7. eLearning - select to open this lesson whenever you need help with Viedoc Connect.
8. End call button - select to end the call.
Troubleshooting
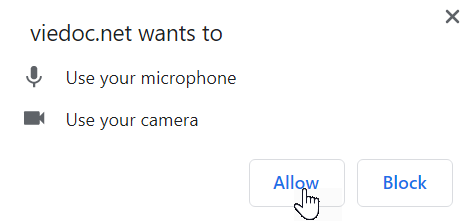
When launching Viedoc Connect, your browser may notify you to enable your microphone and camera.
To enable access to your microphone and camera, select Allow:
If you don't allow access, you will be prompted again:
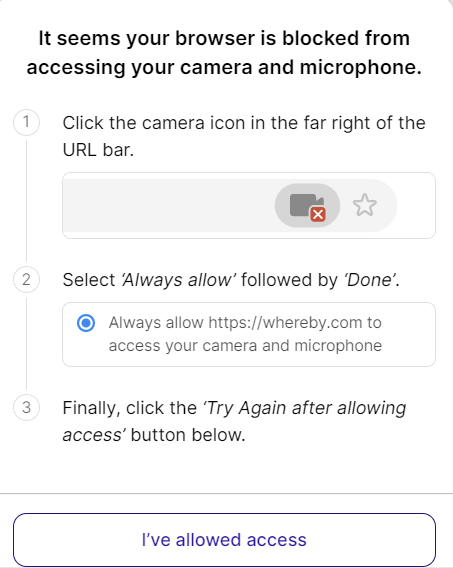
Follow the instructions and select I've alllowed access to enter Viedoc Connect.
