
Managing DICOM de-identification profiles with DICOM Manager
Introduction
This lesson describes the DICOM Manager role, which is responsible for how DICOM de-identification is performed for a study, the DICOM profile builder, and the main tasks that can be performed in it.
In Viedoc, Clinic users can upload Digital Imaging and Communications in Medicine (DICOM) files and Viedoc de-identifies them during upload. Users can upload ZIP archives with DICOM files, and the system automatically de-identifies each file according to the DICOM profile configured for the study. A DICOM Manager sets up this profile in Viedoc Admin before uploads begin, defining how Protected Health Information (PHI), as defined by the DICOM Standards Committee, and the DICOM PS3.15 tags are handled. This includes pixel masking and controlled handling of sensitive fields (for example, birthdate). Clinic users can read and review the planned de-identification profile for each file before upload, but cannot make any changes.
DICOM Manager role and permissions
The DICOM Manager role is a system role in Viedoc Admin. This role is intended for users responsible for managing the complete de-identification profile for a study. The DICOM Manager role is responsible for:
-
Defining DICOM tag handling and metadata actions
-
Setting the requirement for pixel de-identification
-
Editing and updating the profile when any requirements change
-
Configuring the de-identification profile to the relevant study before uploads begin in Viedoc Clinic
All updates are recorded in the admin audit trail.
For more information about assigning users to system roles, see Managing users.
Working with DICOM de-identification
You can only access the DICOM profile settings if you have been assigned the DICOM Manager role in Viedoc Admin.
Starting from a predefined template, the DICOM Manager can configure all of the DICOM de-identification profile requirements according to the needs of the study. This allows clinic users to upload DICOM images without needing detailed knowledge of de-identification standards or configuration settings.
Configuring a DICOM de-identification profile
You can manage your DICOM de-identification profiles from the Study overview page.
To configure a DICOM de-identification profile:
| 1 | Select the toolbox icon on the Study overview page to open the Configure DICOM de-identification dialog: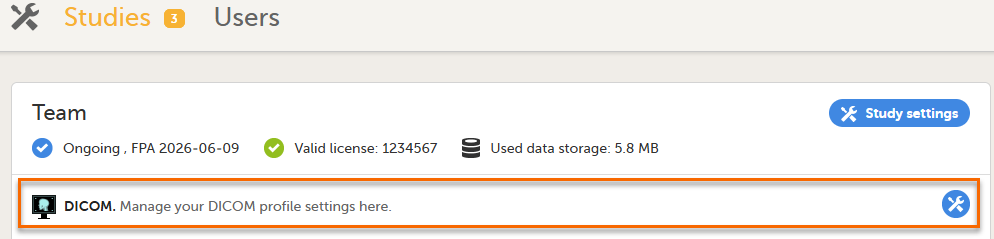 |
| 2 |
The Configure DICOM de-identification dialog opens. Under DICOM Settings, Profile settings is shown, with your Profile name field and the following options: 1. De-identification rule set (PS 3.15 Basic Profile) 2. Profile options 3. Pixel de-identification 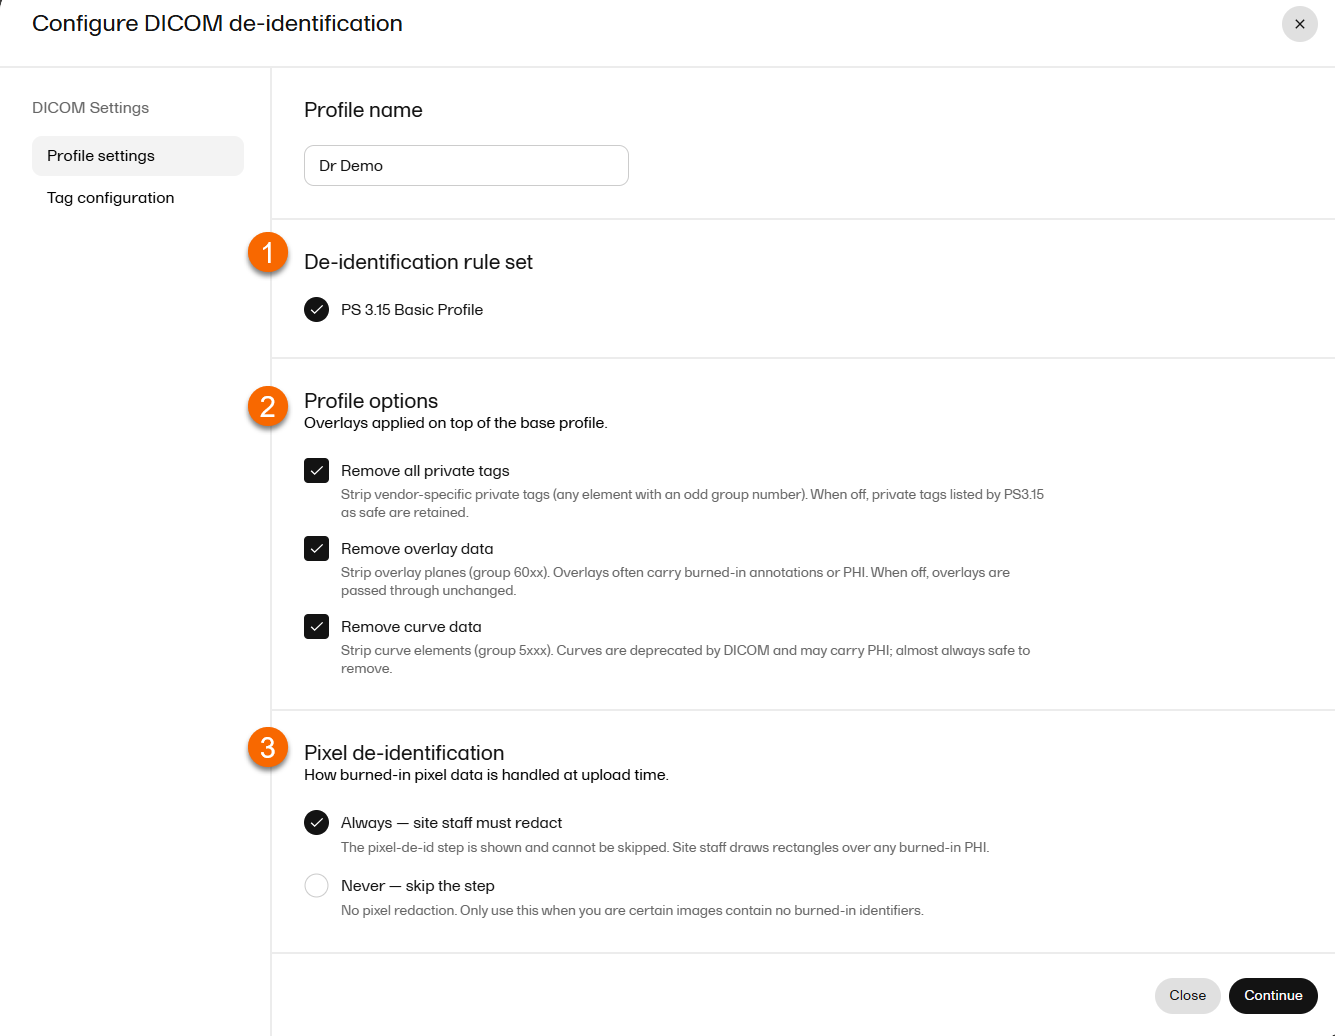
Select:
|
| 3 |
Select Tag configuration to view all of the DICOM tags from the PS 3.15 Basic Profile, in the Tag, Attribute name, VR (Value Representation), Before and After, and the Action columns. In the Tag configuration dialog, for each tag, a planned action is shown: 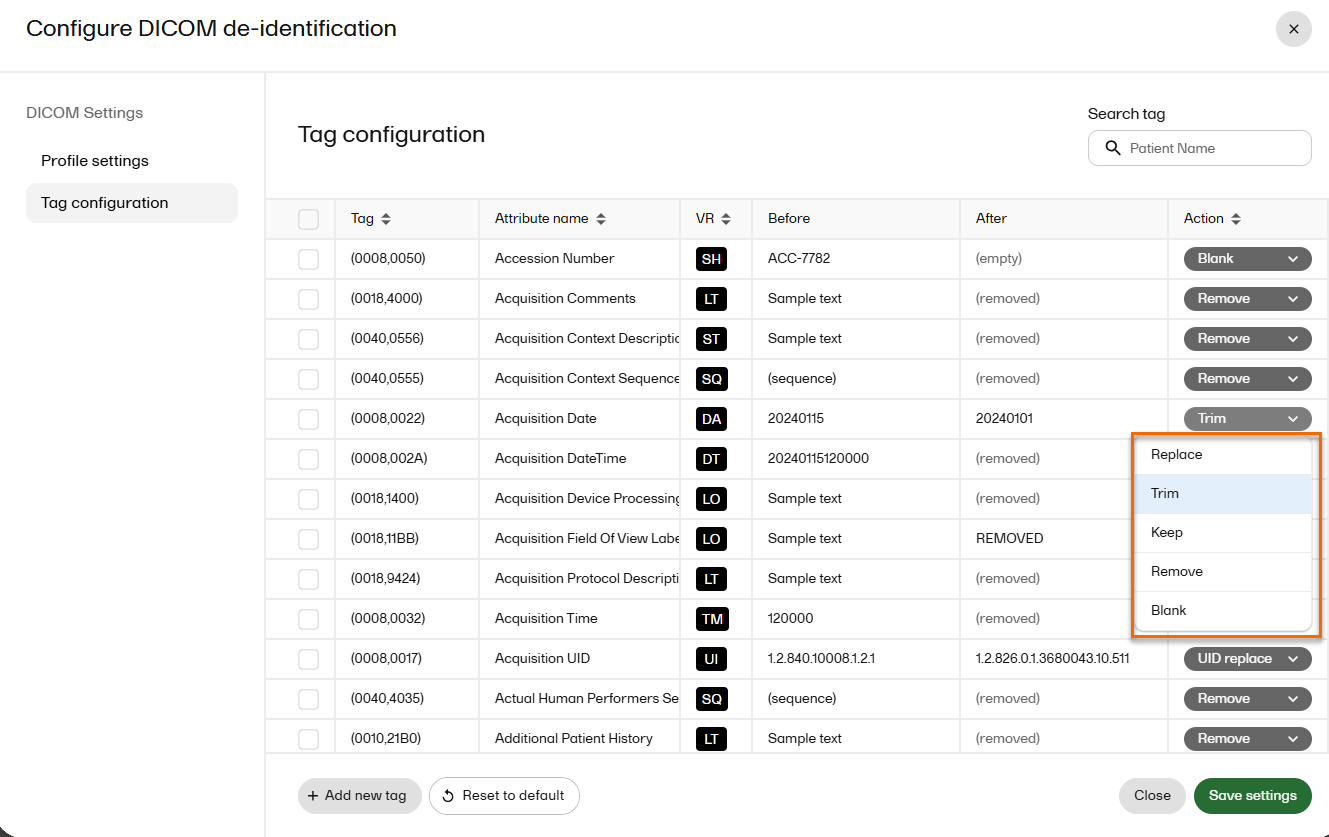
Note!
Select Reset to default to remove the tags that are not part of the PS 3.15 Basic Profile |
| 4 |
You can select Map for tags in the PS3.15 Basic Profile and for tags you add, if the tag has a string VR (LO, LT, PN, SH, ST, UC, or UT). Note! You cannot select Map for the following tags:
To map a tag on the Tag configuration dialog:
The Map value dialog opens: 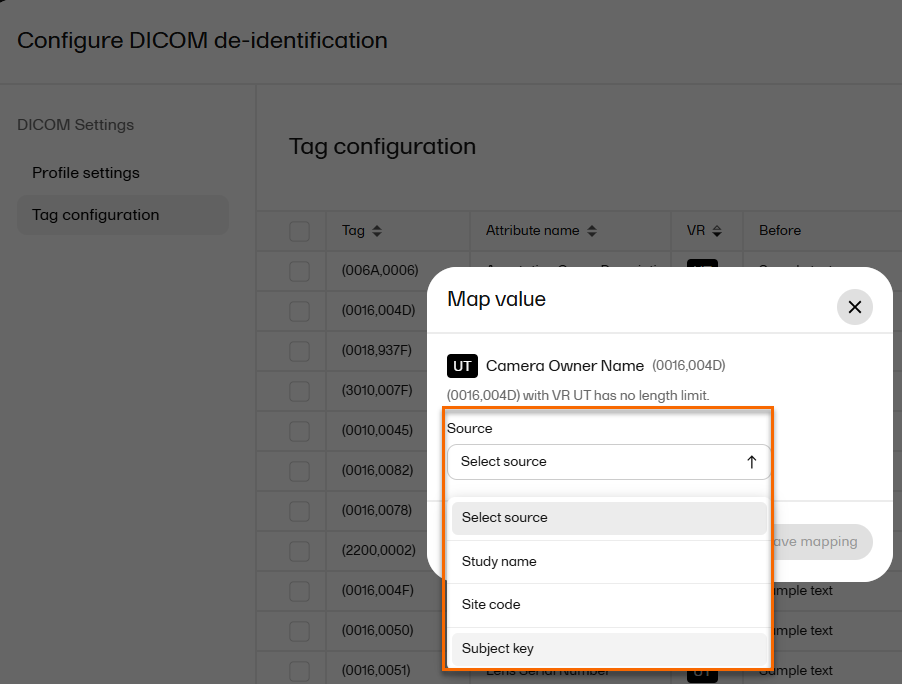
A Source field is shown.
Note! The de-identification audit record includes a Mapped entry for every tag where Map is applied. The audit record does not include the tag's original value. |
| 5 |
To add a new tag on the Tag configuration dialog, select Add new tag. The Add new tag dialog opens. Fill in tag, attribute name and select a VR (Value Representation), then select Add tag. 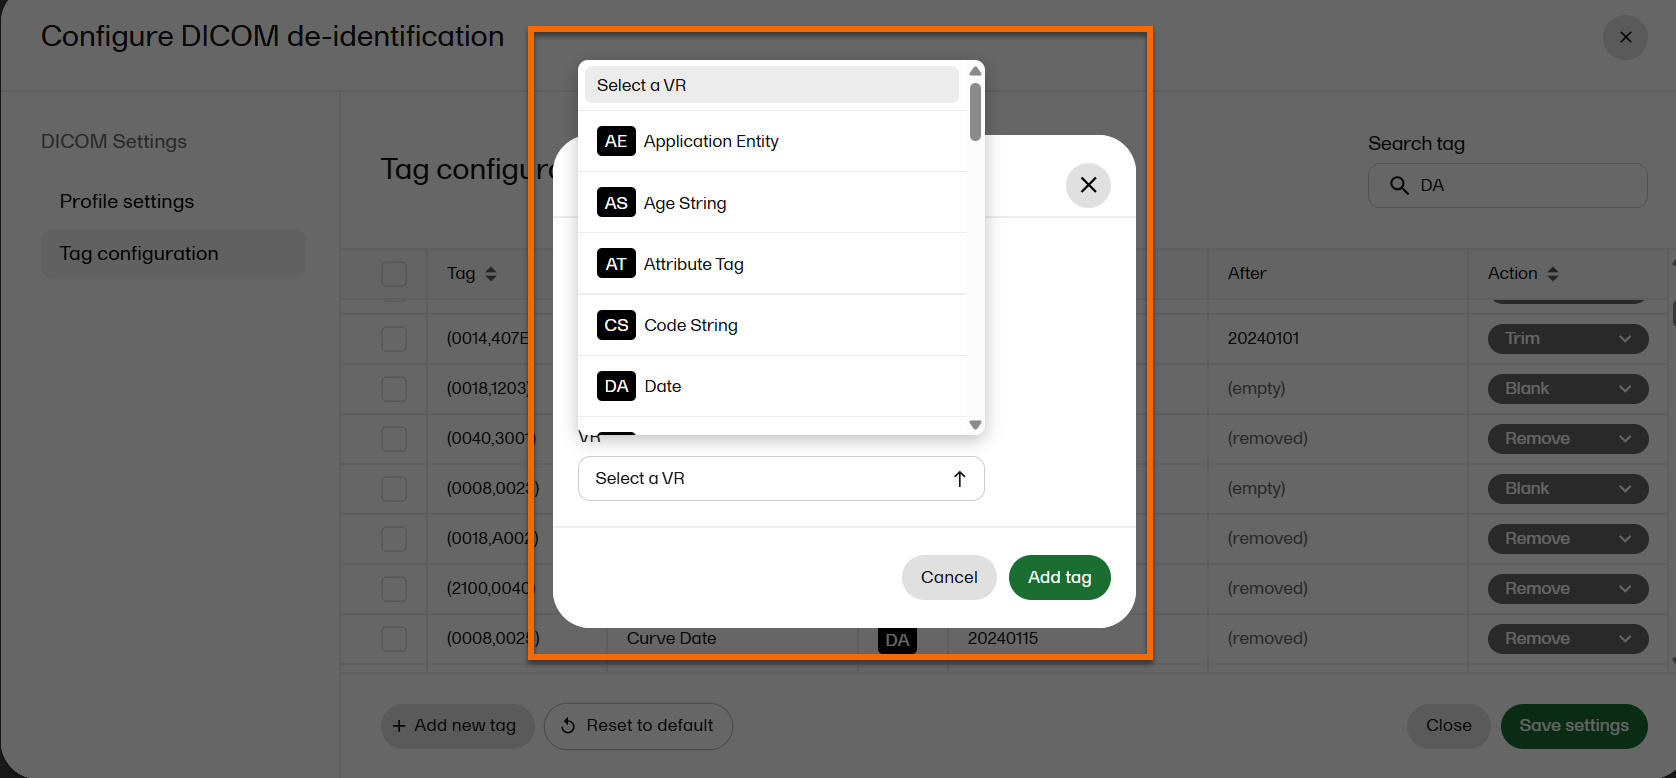
|
| 6 |
Select Save settings. The Study overview page opens and a confirmation message is displayed to inform you that the DICOM settings have been successfully saved. |