SSO Configuration Examples
Introduction
This lesson provides example configurations for setting up single sign-on (SSO) in Viedoc using commonly used Identity Providers (IdPs). These examples show how to configure the IdP side of the integration. For steps performed in Viedoc Admin, refer to the lesson Single sign-on.
Prerequisites
Required roles/permissions:
- You have Organization Administrator access in Viedoc.
- You have administrator access in your Identity Provider (IdP).
Configuration steps:
Before following these examples, complete the following SSO configuration steps in Viedoc Admin, as described in the lesson Single sign-on:
- Add domain
- Verify domain
- Navigate to the Validate setup step
This lesson assumes that you are already on the Validate setup step in Viedoc Admin.
Using Google Workspace as IdP
Pre-requisites
You will need:
-
Access to the Hostmaster email address to the domain name for which you want to configure SSO.
-
Organization Admin access to Viedoc.
-
Administrator access to Google Workspace.
Step-by-step guide
In this example we use a sample domain name and the European Viedoc training instance.
| 1 |
In Viedoc Admin, select Organization Settings, and select the SSO tab. Select the Validate setup step. Copy the Redirect URL and the Entity ID. 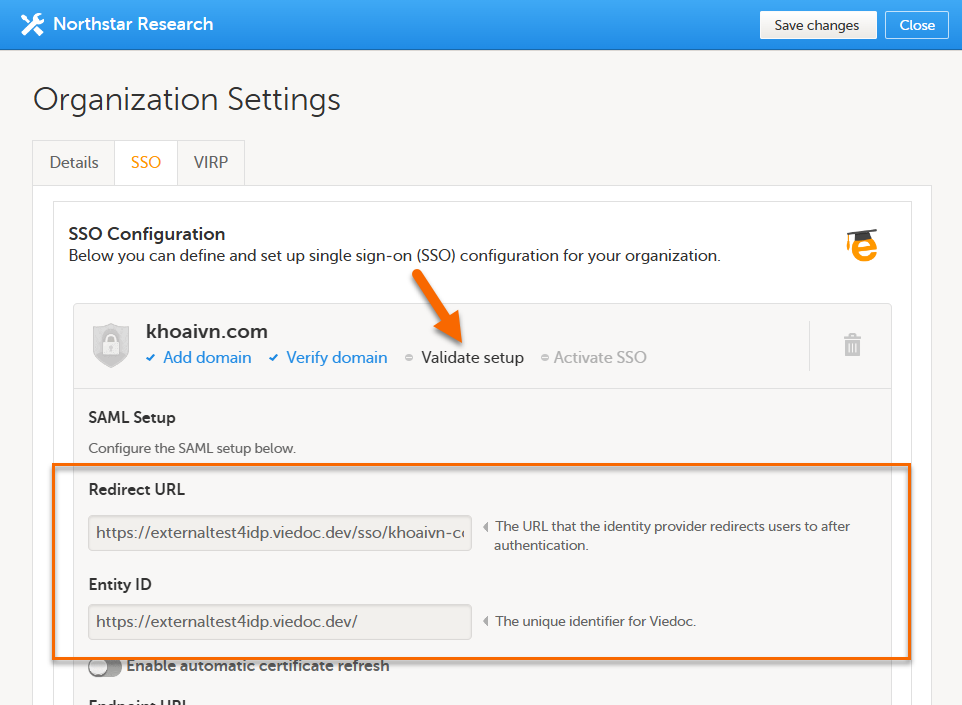
|
| 2 |
In a separate tab, log in to Google Workspace Admin Console, go to Apps > SAML apps. 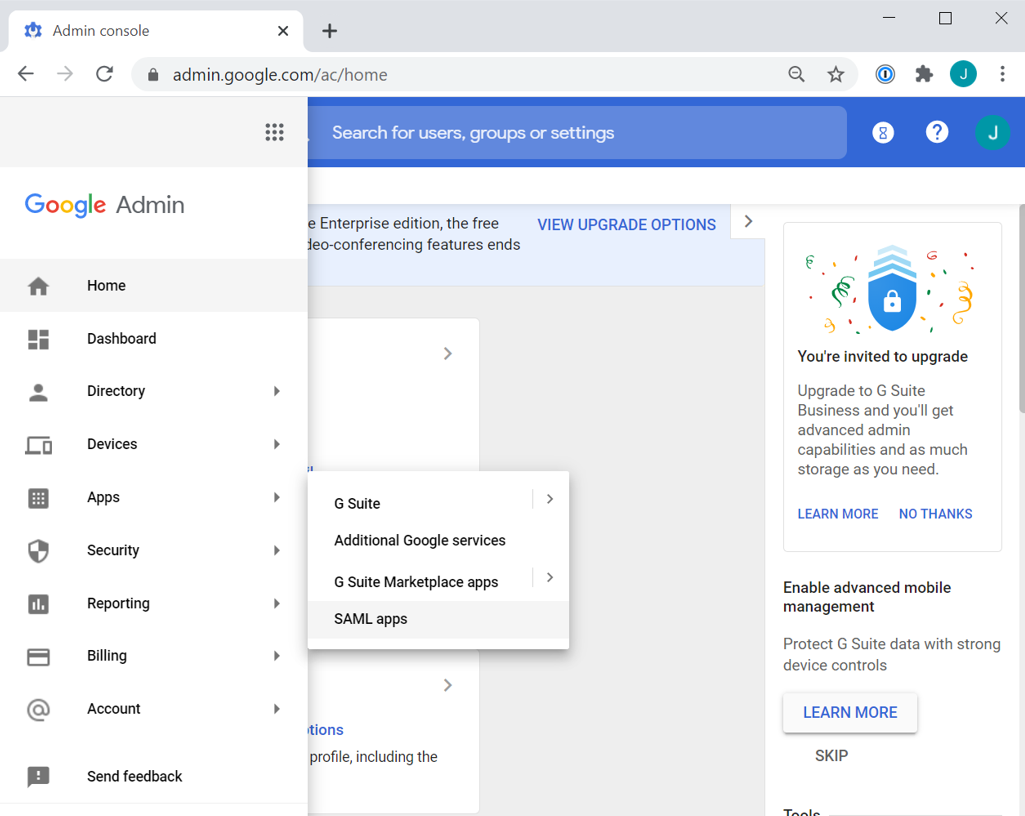
|
| 3 |
Select Add service and SETUP MY OWN CUSTOM APP: 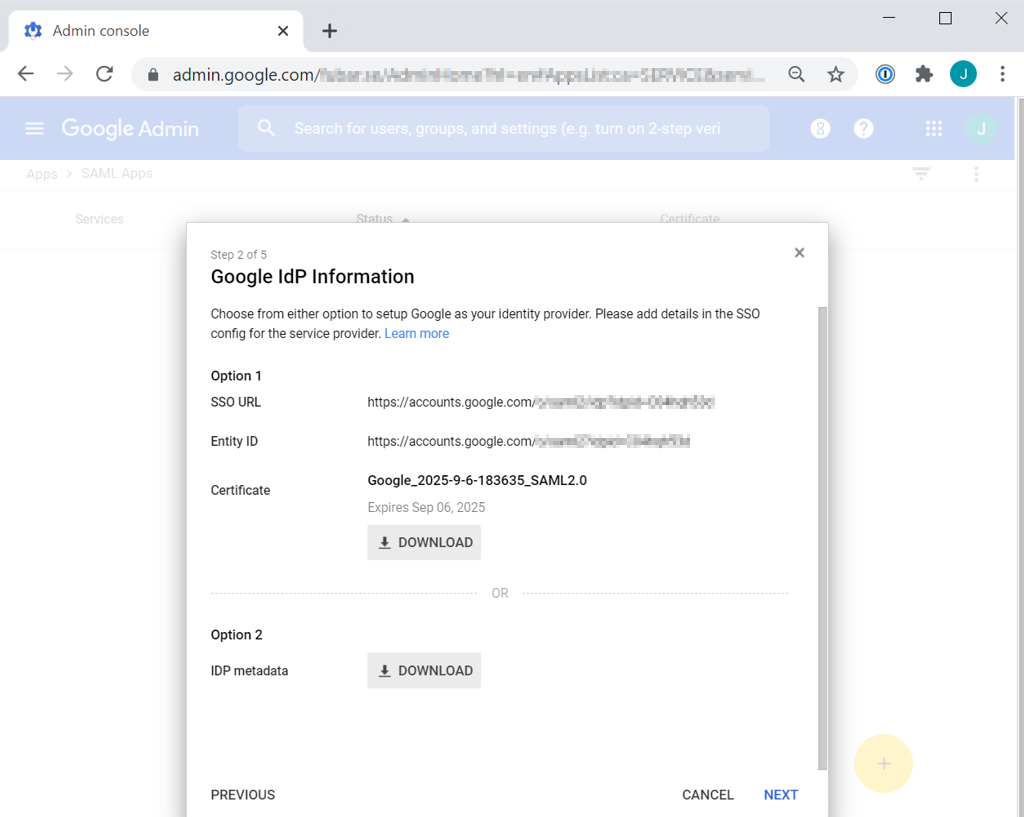
|
| 4 |
Return to the Viedoc Organization settings, SSO in the first tab. From the Google IdP Information window:
Select Save. 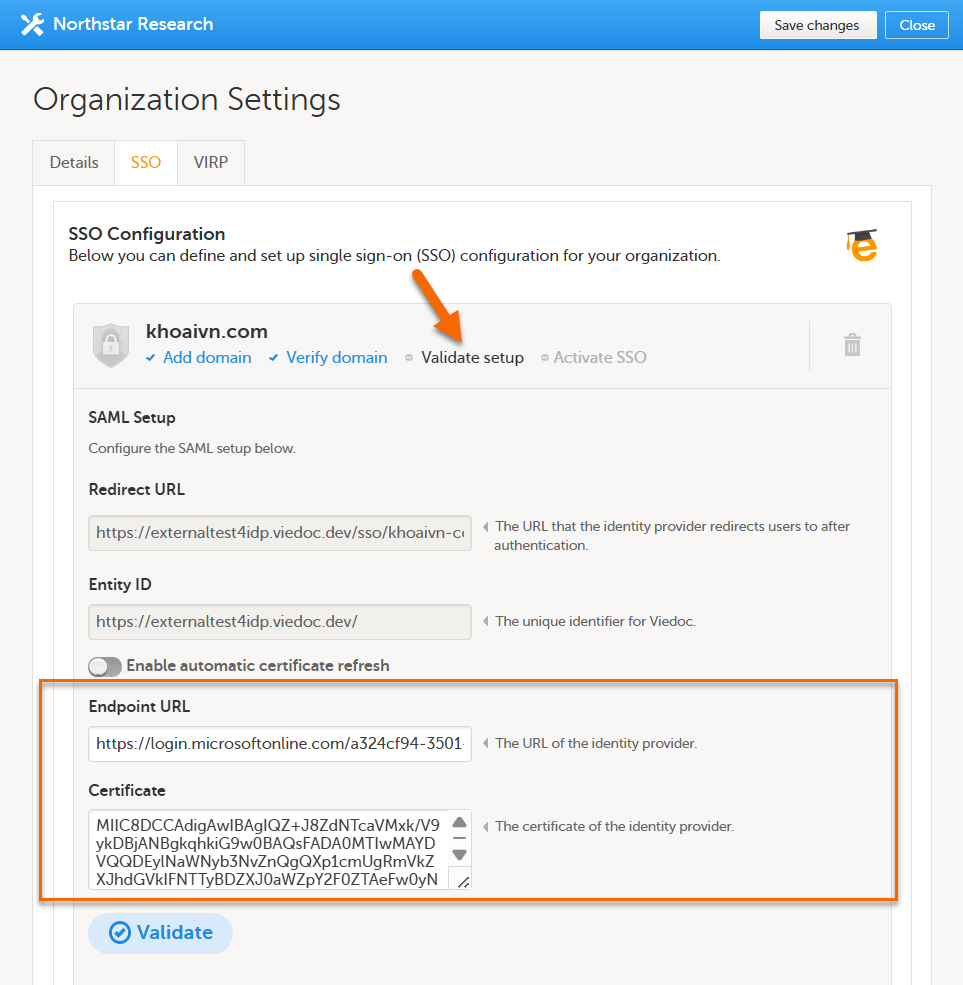
|
| 5 |
Go back to the Google Workspace tab and select Next. |
| 6 |
In the Basic information for your Custom App window:
Select Next. 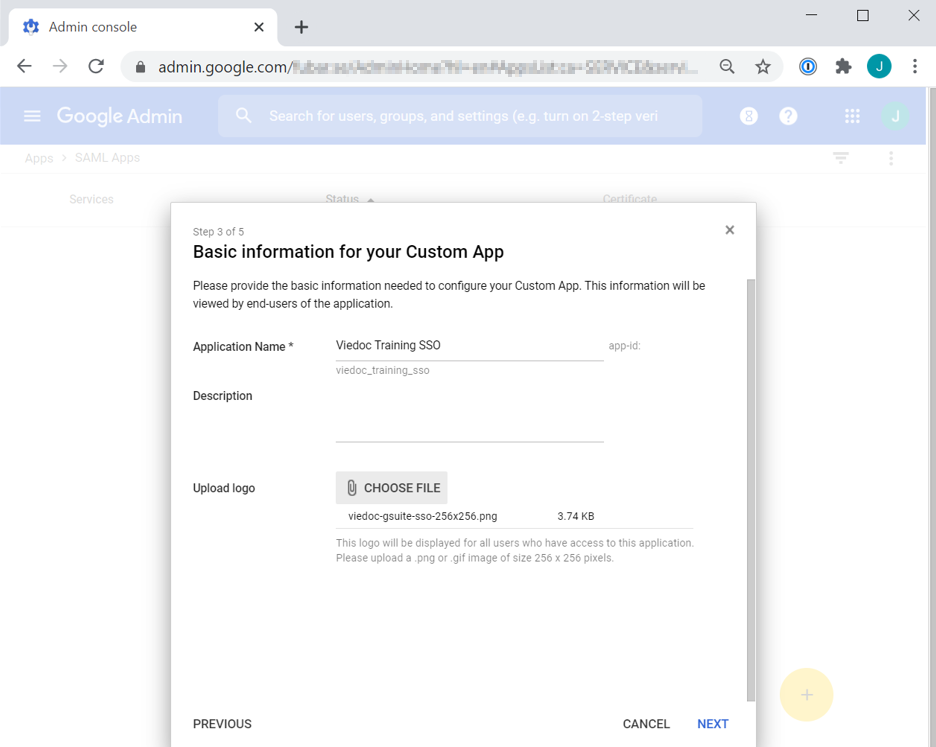 |
| 7 |
In the Service Provider Details window:
Select Next. 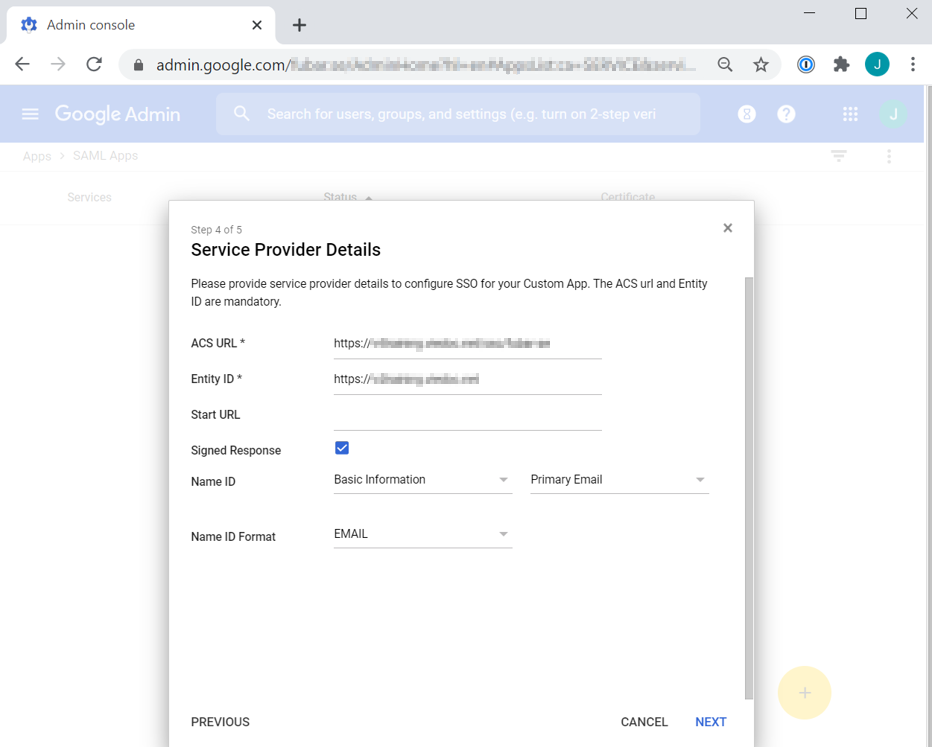
|
| 8 |
In the Attribute Mapping window, select Finish. 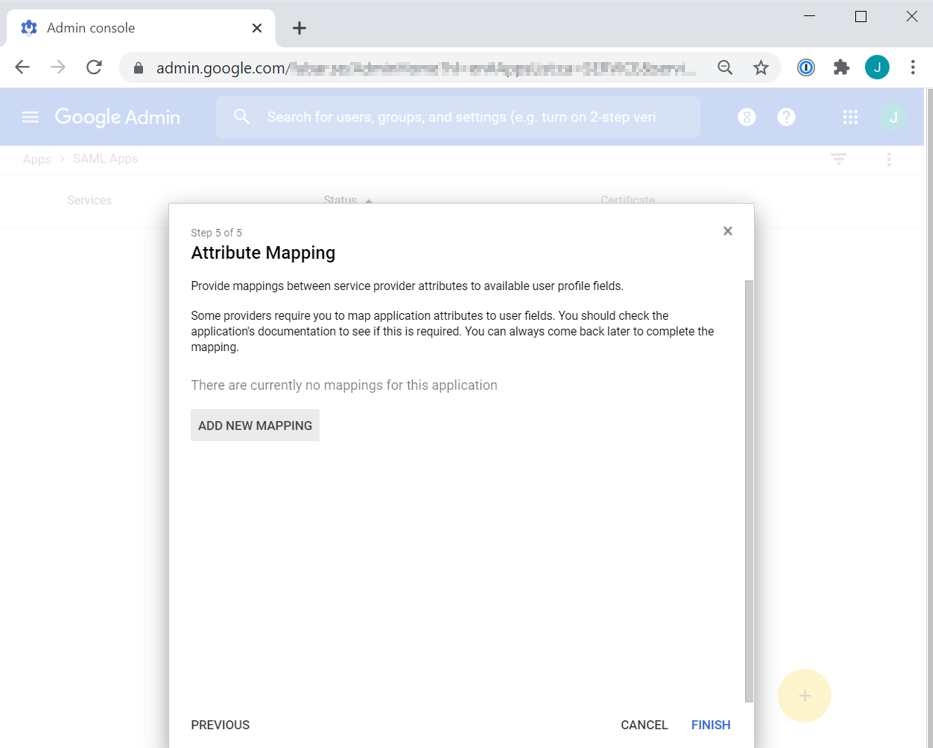
|
| 9 |
Select OK. 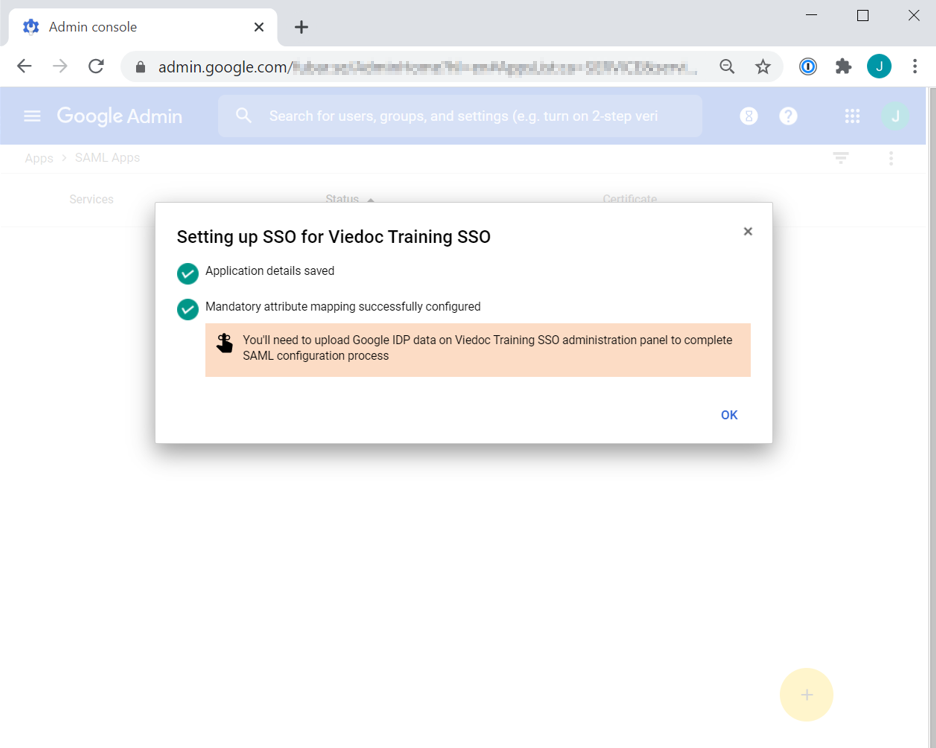
|
| 10 |
Select the down arrow of the User access section of the newly configured SAML App. Select ON for everyone and Save. 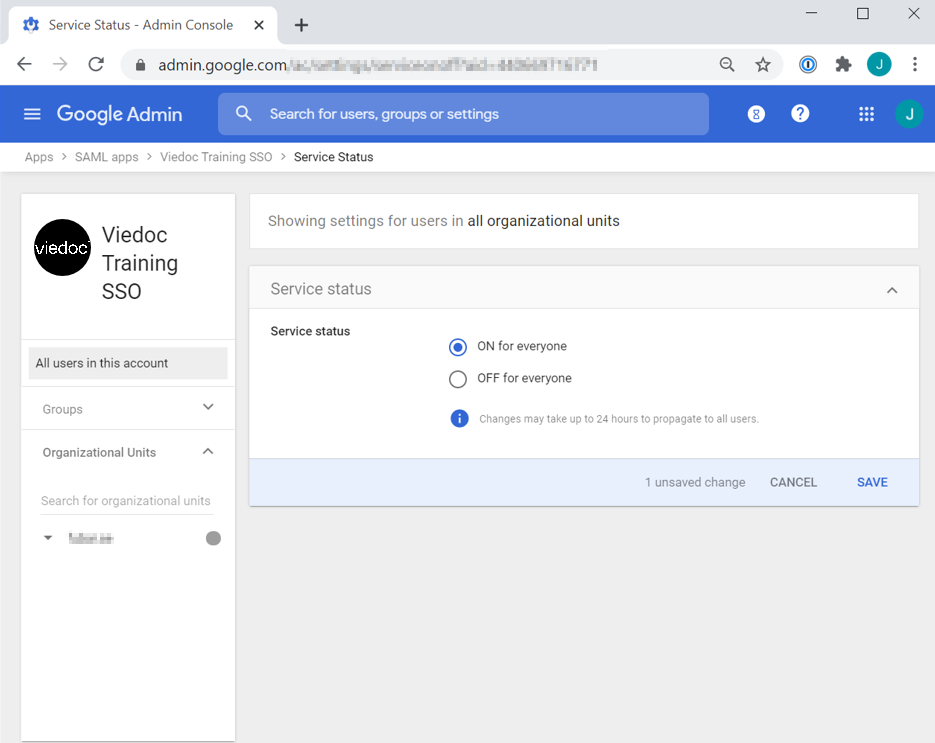
|
| 11 |
Go back to the Viedoc tab and select Validate to complete the validation step. Note! You might be prompted to enter your email address and password in order to authenticate with your IdP if not already logged in. Upon successful authentication you will automatically be redirected to the domain verification page. For steps performed in Viedoc Admin, refer to the lesson Single sign-on. |
Using Microsoft Azure AD as IdP
Pre-requisites:
You will need:
-
Access to the Hostmaster email address to the domain name for which you want to configure SSO.
-
Organization Admin access to Viedoc.
-
Administrator access to Microsoft Azure Active Directory (AD).
Step-by-step guide
In this example we use a sample domain name and the European Viedoc training instance.
| 1 |
In Viedoc Admin, select Organization Settings, and select the SSO tab. Select the Validate setup step. Copy the Redirect URL and the Entity ID.
|
| 2 |
In a separate tab, log in to the Microsoft Azure portal and go to Azure Active Directory. Select Enterprise Applications > New application and Non-gallery application. 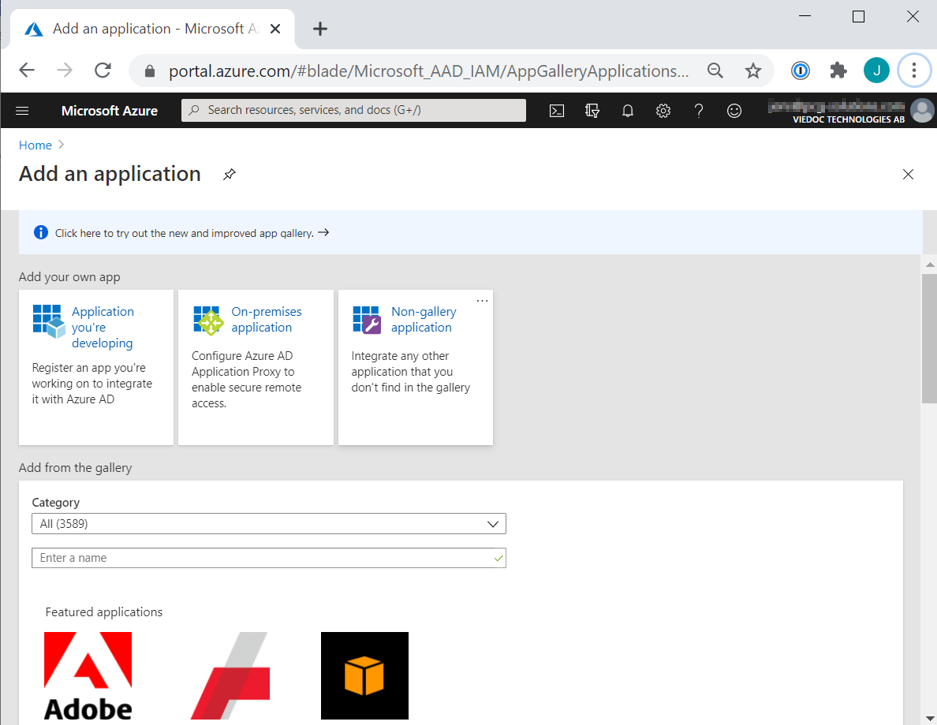
|
| 3 |
Enter an appropriate Name describing the Viedoc instance, for example “Viedoc Training SSO”. Select Add. 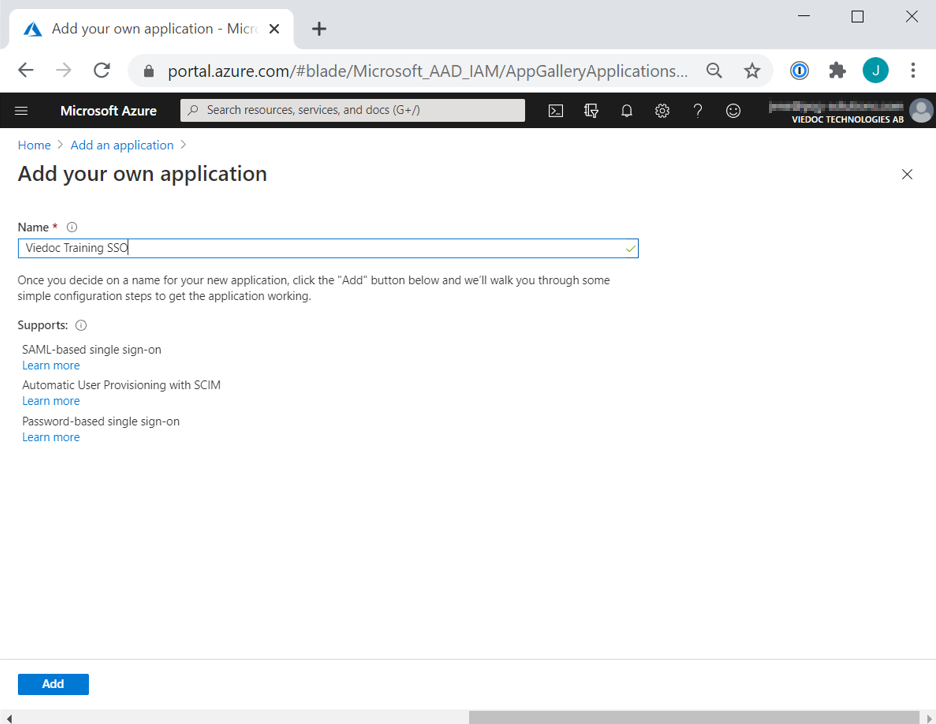
|
| 4 |
Select Single Sign-On > SAML. 
|
| 5 |
Select Edit the Basic SAML Configuration. From the Viedoc tab, copy and paste:
select Save and close the pop-up. 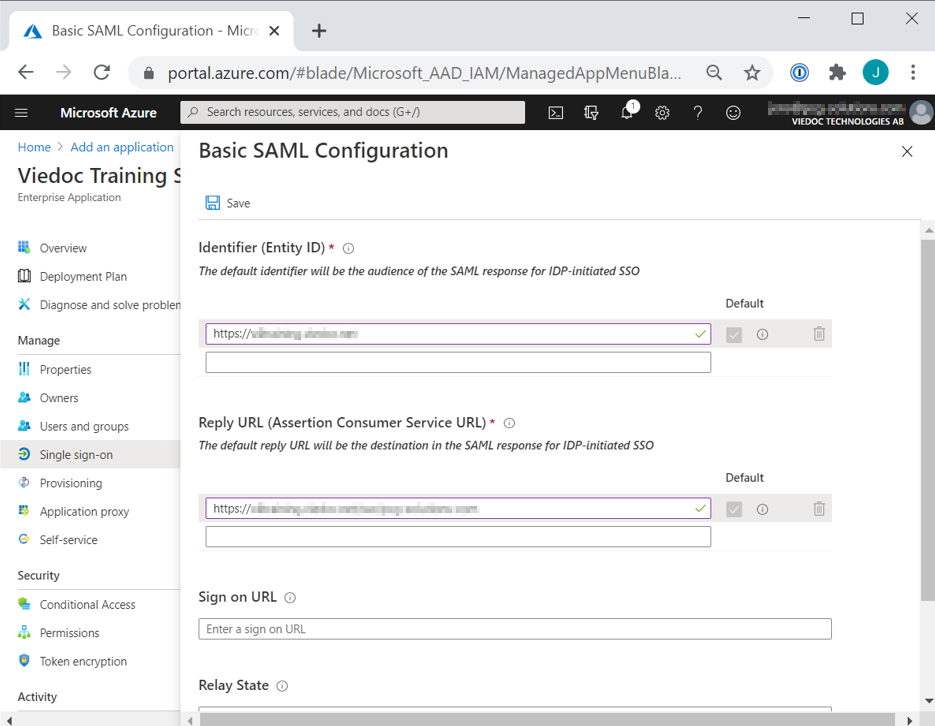
|
| 6 |
Select to Edit the User Attributes & Claims. 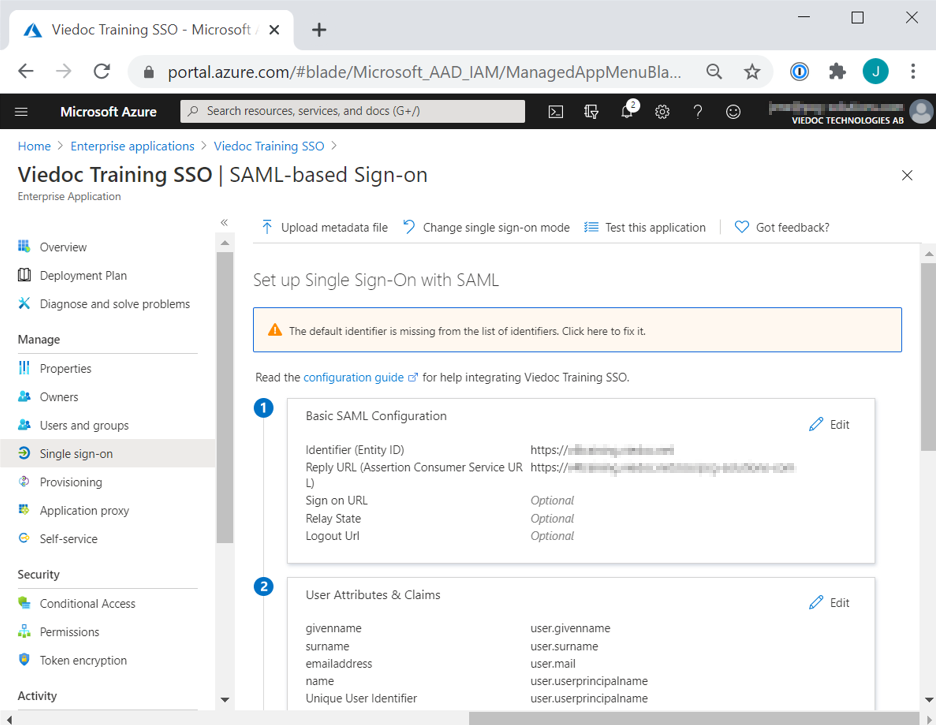
|
| 7 |
Map the Unique User Identifier (Name ID) to the attribute that best matches the email address that users authenticate with in Viedoc, typically [user.userprincipalname] or [user.mail]. 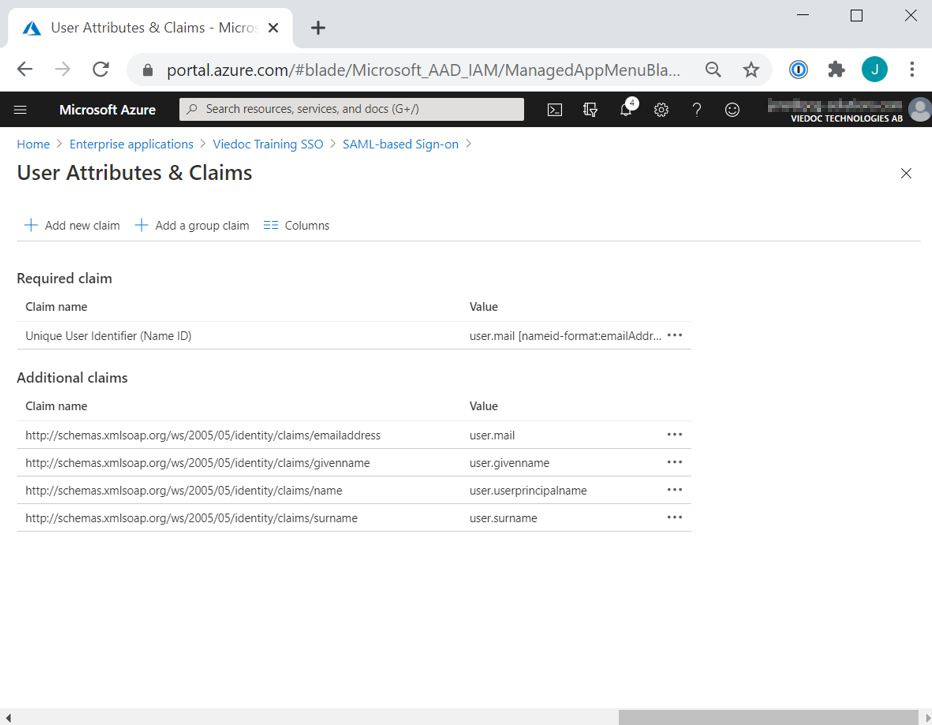
|
| 8 |
From the Azure AD window:
Select Save.
|
| 9 |
Download the Viedoc logo from https://www.viedoc.com/brand-resources#logos and upload it to the Properties section in the Azure AD tab. 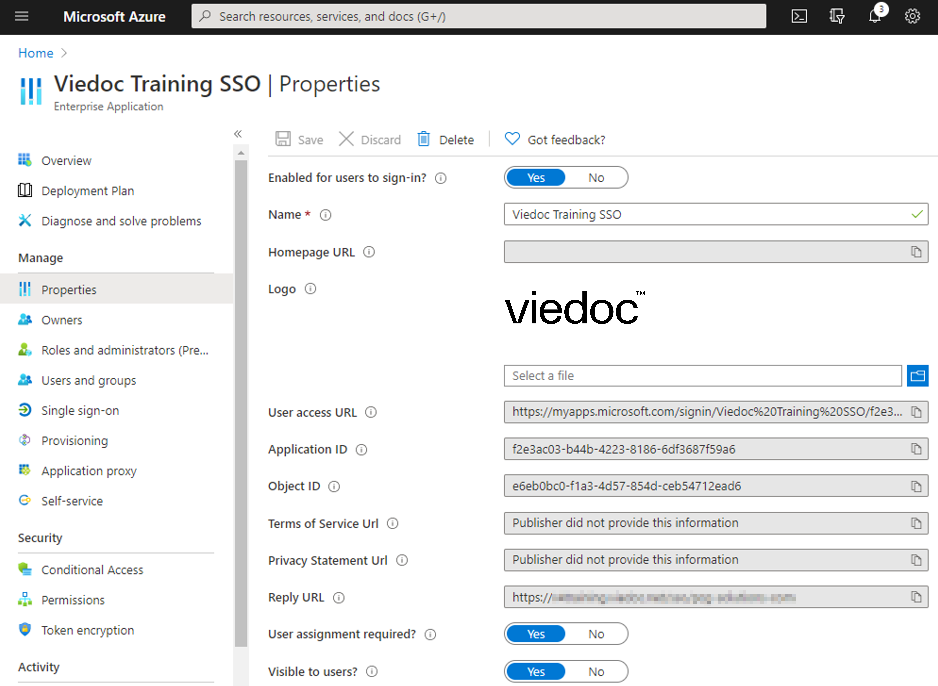
|
| 10 |
Under Users and groups, add all users or security groups that shall be able to log in to Viedoc using SSO. 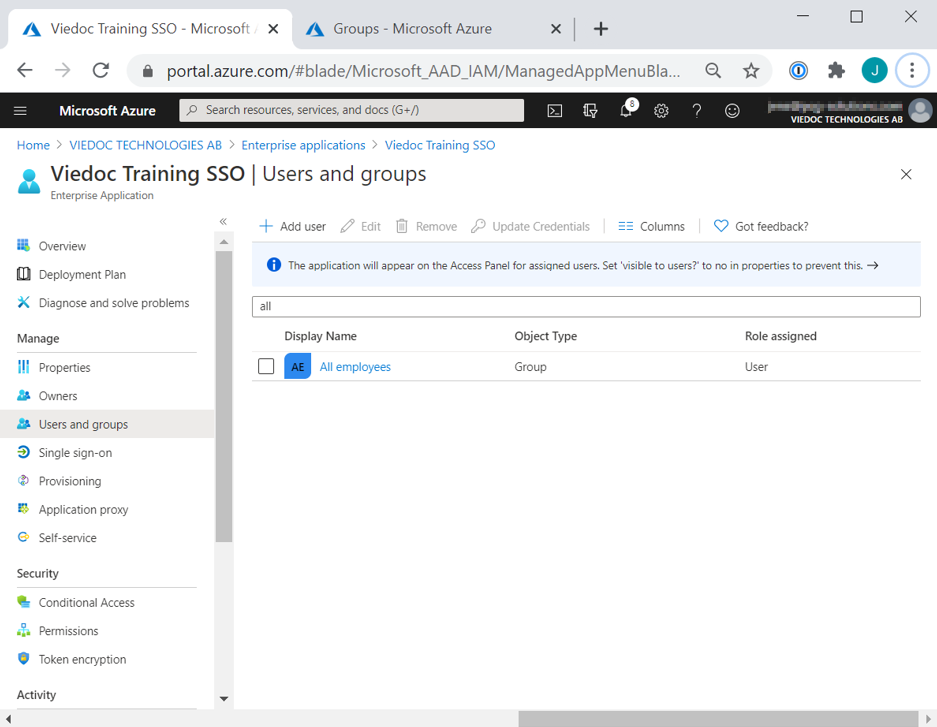
|
| 11 |
Go back to the Viedoc tab and select Validate. Note! You might be prompted to enter your email address and password in order to authenticate with your IdP if not already logged in. Upon successful authentication you will automatically be redirected to the domain verification page. 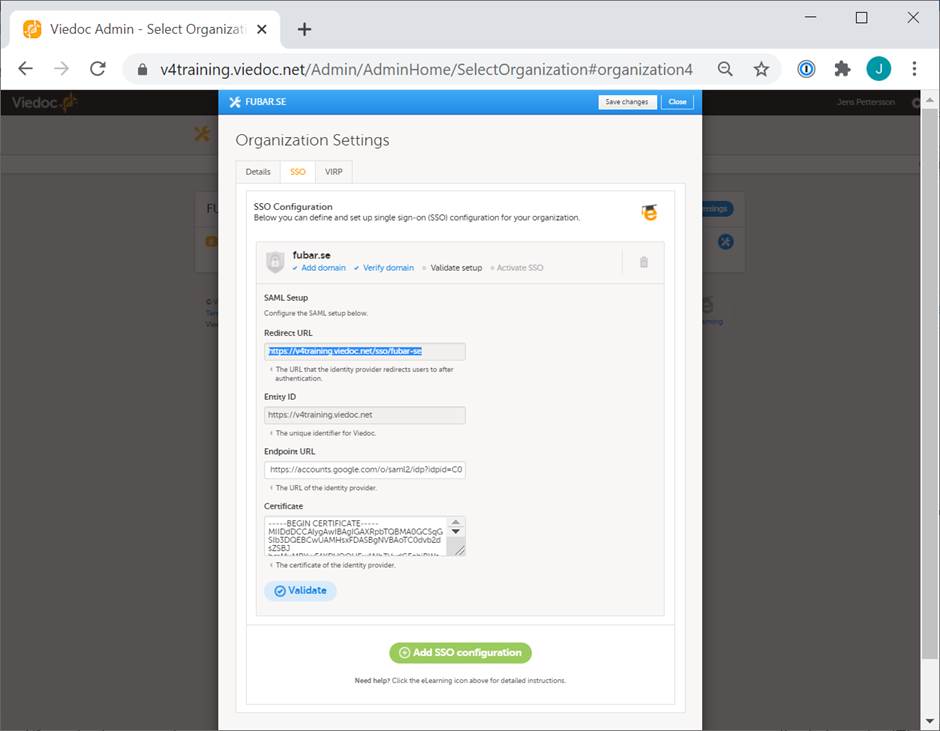
|
| 12 |
Go back to the Viedoc tab and select Validate to complete the validation step. Note! You might be prompted to enter your email address and password in order to authenticate with your IdP if not already logged in. Upon successful authentication you will automatically be redirected to the domain verification page. For steps performed in Viedoc Admin, refer to the lesson Single sign-on. |
After completing the IdP configuration and validating the setup in Viedoc, follow the activation steps described in the lesson Single sign-on.